On September 13, 2013 my family was invited to test Walt Disney World’s magical tool called MyMagic+.
Before I start my review, I want you to remind you that I am in no way affiliated with The Walt Disney Company and all opinions in this post are just that, my opinions. In this review I will tell you about my family’s experience being part of Disney’s “test”. Now on with the review!
We received our first invitation to test MyMagic+ in an email and then another email. Soon to follow was an overnighted invitation by way of FedEx and then another overnighted invitation. Needless to say, we were invited. Talk about feeling needed! Why, you might ask, did we receive so many invites? The answer is my family vacations at Walt Disney World by using our Disney Vacation Club membership. I don’t want to dive deep into a review of Disney Vacation Club, but I do want you to know that while using my membership I had four different reservations during our one week vacation. Three of the reservations were for the same resort, same room and for consecutive days. The reason that I received two different emails and two different letters (each with different codes) was because we were invited to test MyMagic+ for two out of four of our reservations. We curiously accepted our two invitations.
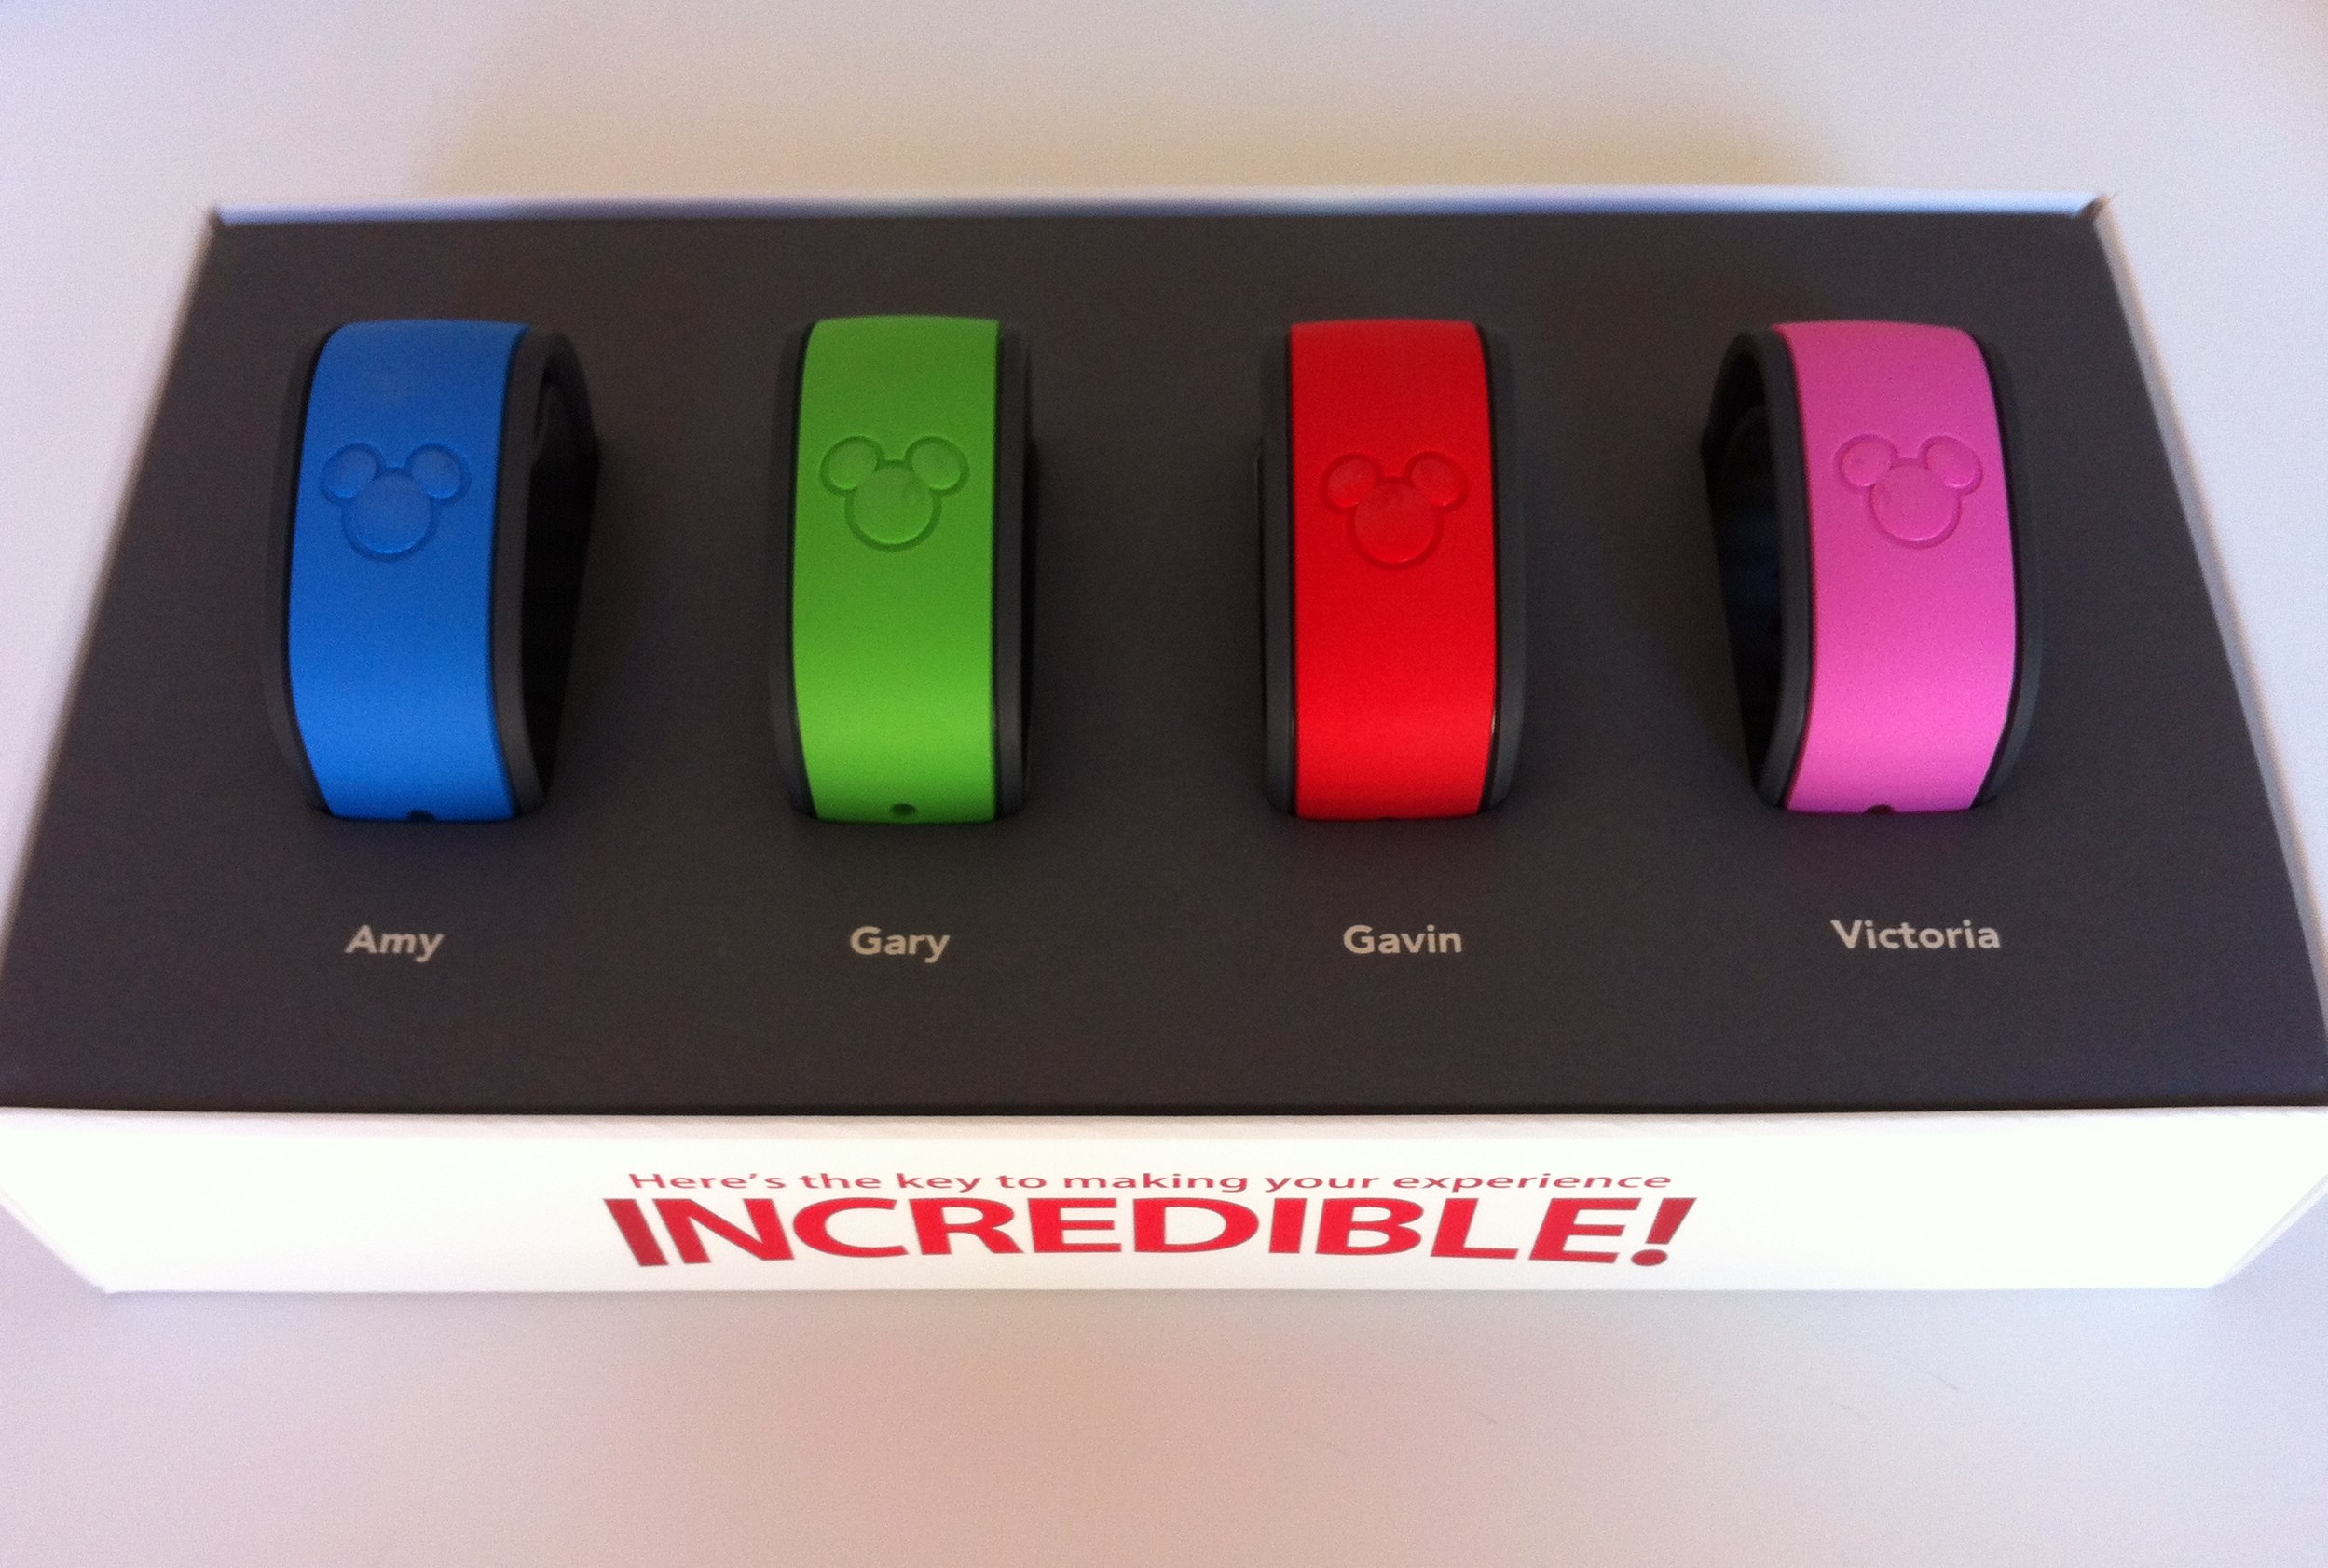
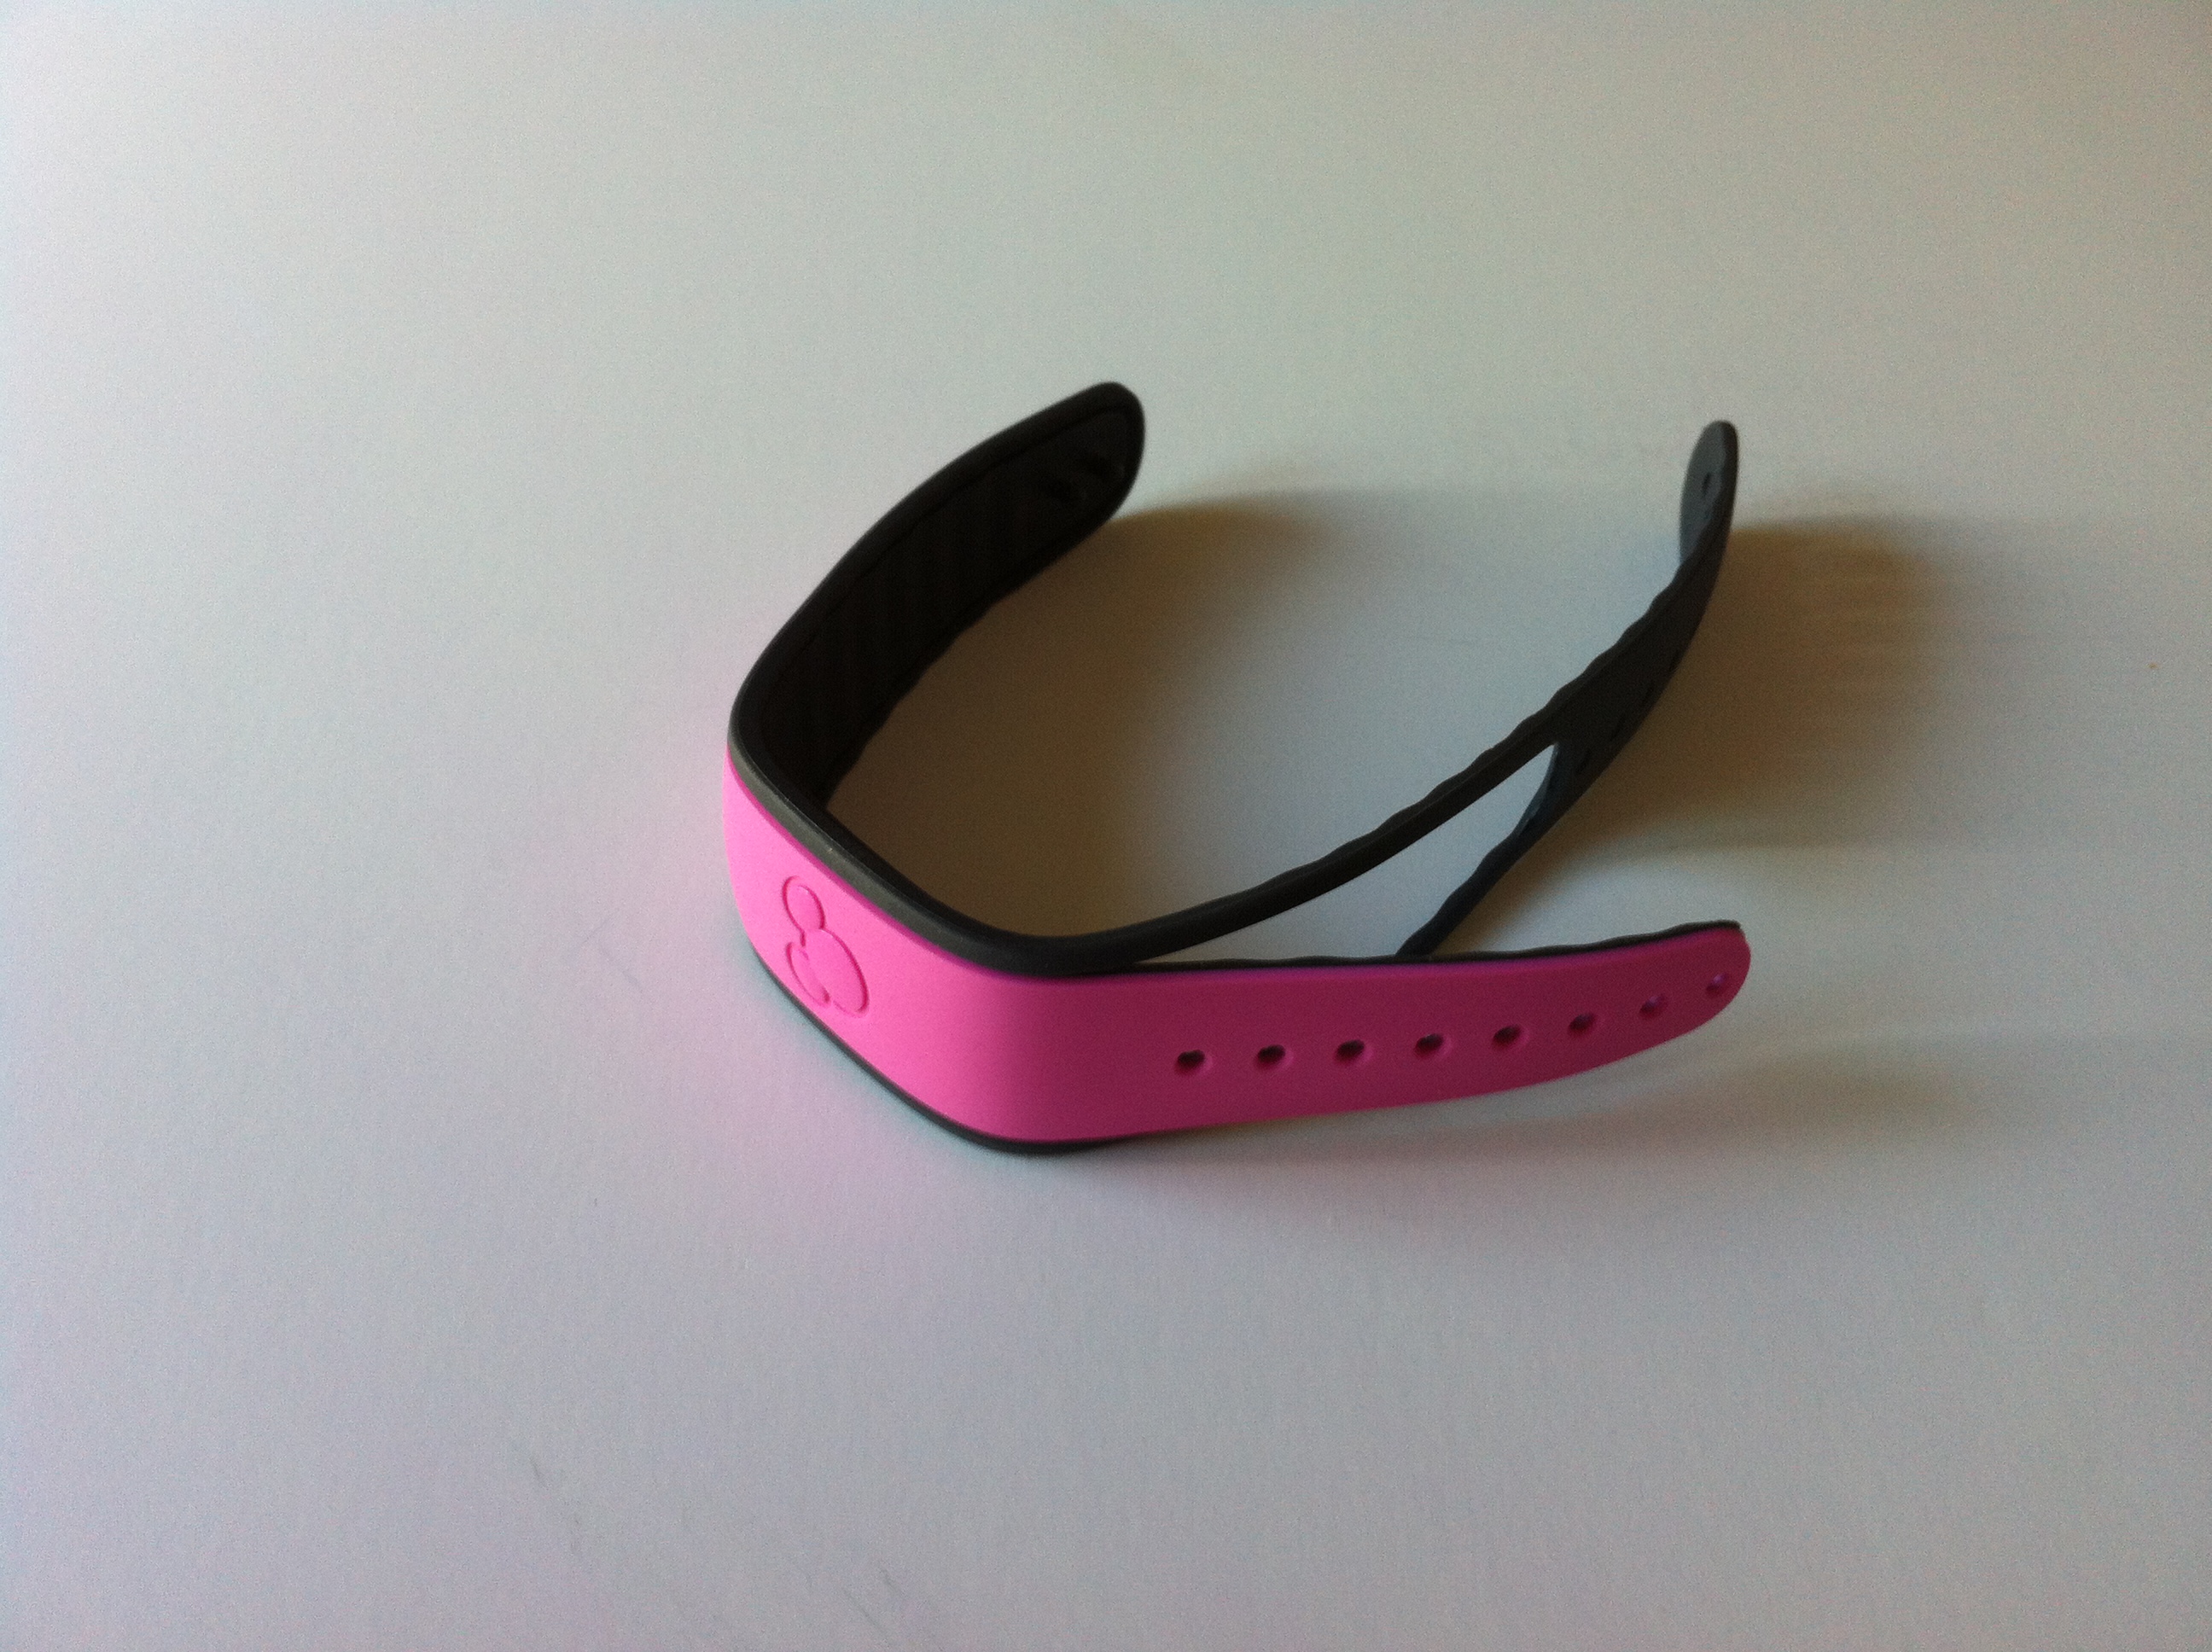
As instructed, I began our experience by going on-line to mydisneyexperience.com and attempted to complete the steps on the email I received. The first step was to sign on or register on mydisneyexperience.com. From there I was told I could request Magic Bands and select FastPass+ times. For each reservation I had no problem requesting and personalizing the bands. Since we had two different invites, I accepted both and ordered two sets of MagicBands. Having the two different sets, I was concerned that we would confuse the bands, so I chose different colors for each reservation. I later found out after receiving them that we only needed one band per person and it would work for all linked reservations.
Selecting FastPass+ times was a little more complicated. I learned from this experience and I’ll pass the knowledge I gained on to you! First, you must have tickets linked to your reservations. We have annual passes, so we had to link the passes to our reservations before we were allowed to select our FastPass+ times. Second, you are only allowed to select FastPass+ times for those members in your resort reservation party. At this time (September 28th through October 5th) not all resorts were participating in this test. Since I had already registered my family on mydisneyexperience.com before the test invitation, I had included all 13 people in my family, including family staying at a different resort. For this test, I could only select FastPass+ times for our family of four. I’ll elaborate more on our FastPass+ experience later in this post.
After completing the steps on my invitations my family received two special packages!
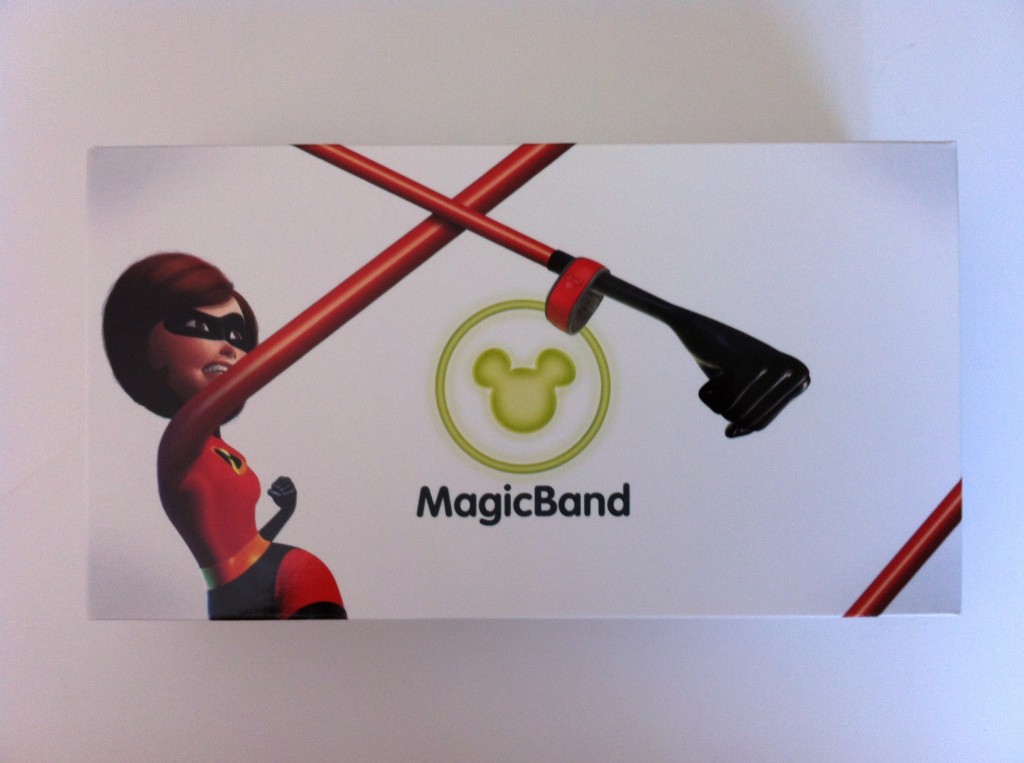
I can not express in words how excited my children were upon opening these boxes. Victoria, our two-year old wanted to wear her band instantly. All of the MagicBands in the box are the same size. To reduce the size of the band to fit a toddler or small child, you peel the outside grey lining off of the solid color band.
 Once the grey part of the band was removed, the MagicBand fit our toddler perfectly.
Now that we had our MagicBands we were ready to go! or at least pack to go to Disney. Here’s some additional information that I learned through this process that I’d like to pass along with you. Yes, the initial thought that ran through my mind upon getting this shiny Incredible box was “Wow, this is cool.” However, taking that box on vacation with you takes up precious packing space. You don’t have to take the box with you. I packed them in a quartz size Ziploc bag and put them in my purse. When we arrived in the airport, we put them on. Do not pack them in your check in bag. You’ll need them for your Magical Express Bus ride to your resort.
Magical Express was our first experience in how COOL MagicBands really are. As I mentioned earlier, our “test” was only for 2 out of 4 reservations. I did not expect our bands to work until our “test” reservation dates, which were in the middle of our seven-day trip, not the first day, but we tried them anyways. To my surprise, we approached our first MagicBand Mickey spot and lined up our band’s Mickey icon to the icon at the Magical Express location and my family was greeted and told where to wait for our bus.
After checking into the resort, the kids and my husband headed over to the Magic Kingdom Park. Since we had linked our annual passes to the bands, they were allowed access into the park without any problems. Since our “test” had not started yet, so their paper passes were still needed at the FastPass distribution areas.
A few days into our vacation our participation in Disney’s test began. In the lobby, I checked back in and this time they linked my credit card with the band and I was told to enter a pin into their system. We were then allowed to use the band for purchases, FastPass+ times and could also gain access into our room without using our plastic room keys. Our keyless entry did not work, but I never made Disney aware of this issue. The kids liked playing with the cards to get into the room anyways. I used the Disney Visa Reward points for most of our purchases during the test time period, so we didn’t use the band for purchases either. We did use the FastPass+ feature.
FastPass+ is great for those families that are very good at keeping a schedule. We struggled a tiny bit with using FastPass+. However, when it’s fully operational to all Disney resort guests, we will most likely love it. Here’s why I feel this way. In regards to keeping a schedule: if you’re a parent you already know this, it’s not easy to keep a schedule with young children at Disney. Between potty breaks, diaper changes, feeding times, and nap times sometimes making it to a dining reservation on time is hard. When I selected my FastPass+ times on-line before arriving at Walt Disney World, I was offered three different time frames to schedule each park’s three FastPass+ experiences. The times were lumped together. For example, the first FastPass would begin at 9:30 and the third would be done by 1pm. The second and third options would usually be lumped together in the afternoon or evening time frames. Often only the morning times would work for us, due to what we thought would be our daughter’s nap schedule. Once we were on vacation, the My Disney Experience App was wonderful in helping us with FastPass+. I would recommend using it if you can find the time to adjust your plans while your taking care of the kids. I found out quickly while on vacation that if you’re not going to make your time frame you can go into the My Disney Experience App on your Iphone and change those times. For example we got out of Chef Mickey’s late the day we had scheduled to be at Epcot. We would have missed our Soarin’ Over California ride time if I kept our original time. I was able to reschedule just this FastPass+ experience time easily using the App. As long as your phone is working well, it’s great! There was one time when I couldn’t get the App to load my dining reservation times and I began to panic. Make sure you have a hard copy of your reservation number with you. I also recommend asking the front desk for a print out of your FastPass+ times, just in case there is a problem with your phone. I used my copy a bunch of times. There’s already enough potential for stress on vacation. This is one that you can avoid by having a hard copy with you. Also, as I mentioned earlier, we vacationed with a total of 13 family members. This is common with our family. We do our best on vacation to spend as much time as possible with all 13 people, especially when it comes to riding our favorite rides. My son announced that his favorite part about this years vacation was “spending time with Billy”, his cousin. During the days that we chose to participate in the test Billy and Gavin were unable to ride their favorite rides together, because our FastPass times did not match. Gavin was using his band and Billy did not have a band because he stayed in a different Disney Resort. Now, I’m not complaining. It was AWESOME to have a reservation time in the morning for us to bypass the standby line and walk on Toy Story Mania in Disney’s Hollywood Studios.
In addition, MagicBands can be used to collect all of your PhotoPass photos too. It’s really nice to watch your little pirate get his picture taken with Jake and not have to find your plastic PhotoPass card. We took advantage of this and it was a nice bonus to having the bands.
You might be wondering about the physical aspects of the MagicBands. They were very comfortable, regardless of the 90+ degree weather. Not one of us complained at any time that they were bothering us. They’re waterproof, so no need to worry about the kids getting them wet in Dumbo’s Splash “N” Soak area or in the pools. And if you have little Mousketeers that want to have the same band color, no problem. The back side of the band has the owner’s first name on it. My family loved the bands. Our six-year old suited up each morning as if it was part of a Super Hero costume. Victoria, our toddler, always made sure everyone had them on before we left the resort each morning. The only negative side about wearing the bands was that any toddler like mine, can take the band off with ease. Usually within the first half of our day my husband or I would take the band away from her because she was playing with it and we didn’t want her to lose it. She didn’t really need one anyways, so this didn’t cause any issues.
When we returned home at the end of our week, Gavin’s MagicBands were tucked away in his pirate treasure box. Along with those shiny white boxes, I have my husband and my MagicBands packed away for safe keeping. But Victoria, she saw the photos in this post, yelled “Disney” and wants to wear her MagicBand again!
Are you planning a trip to The Walt Disney World Resort soon? Do you plan on using Disney’s MagicBands? I hope my review has helped answer some of your questions. Feel free to ask me any other questions you may have. I’ll do my best to answer your questions or if I don’t know the answer, I’ll point you in the correct direction to receive your answer.
 Can we agree that Disney’s Villains have a sense of style and beauty?
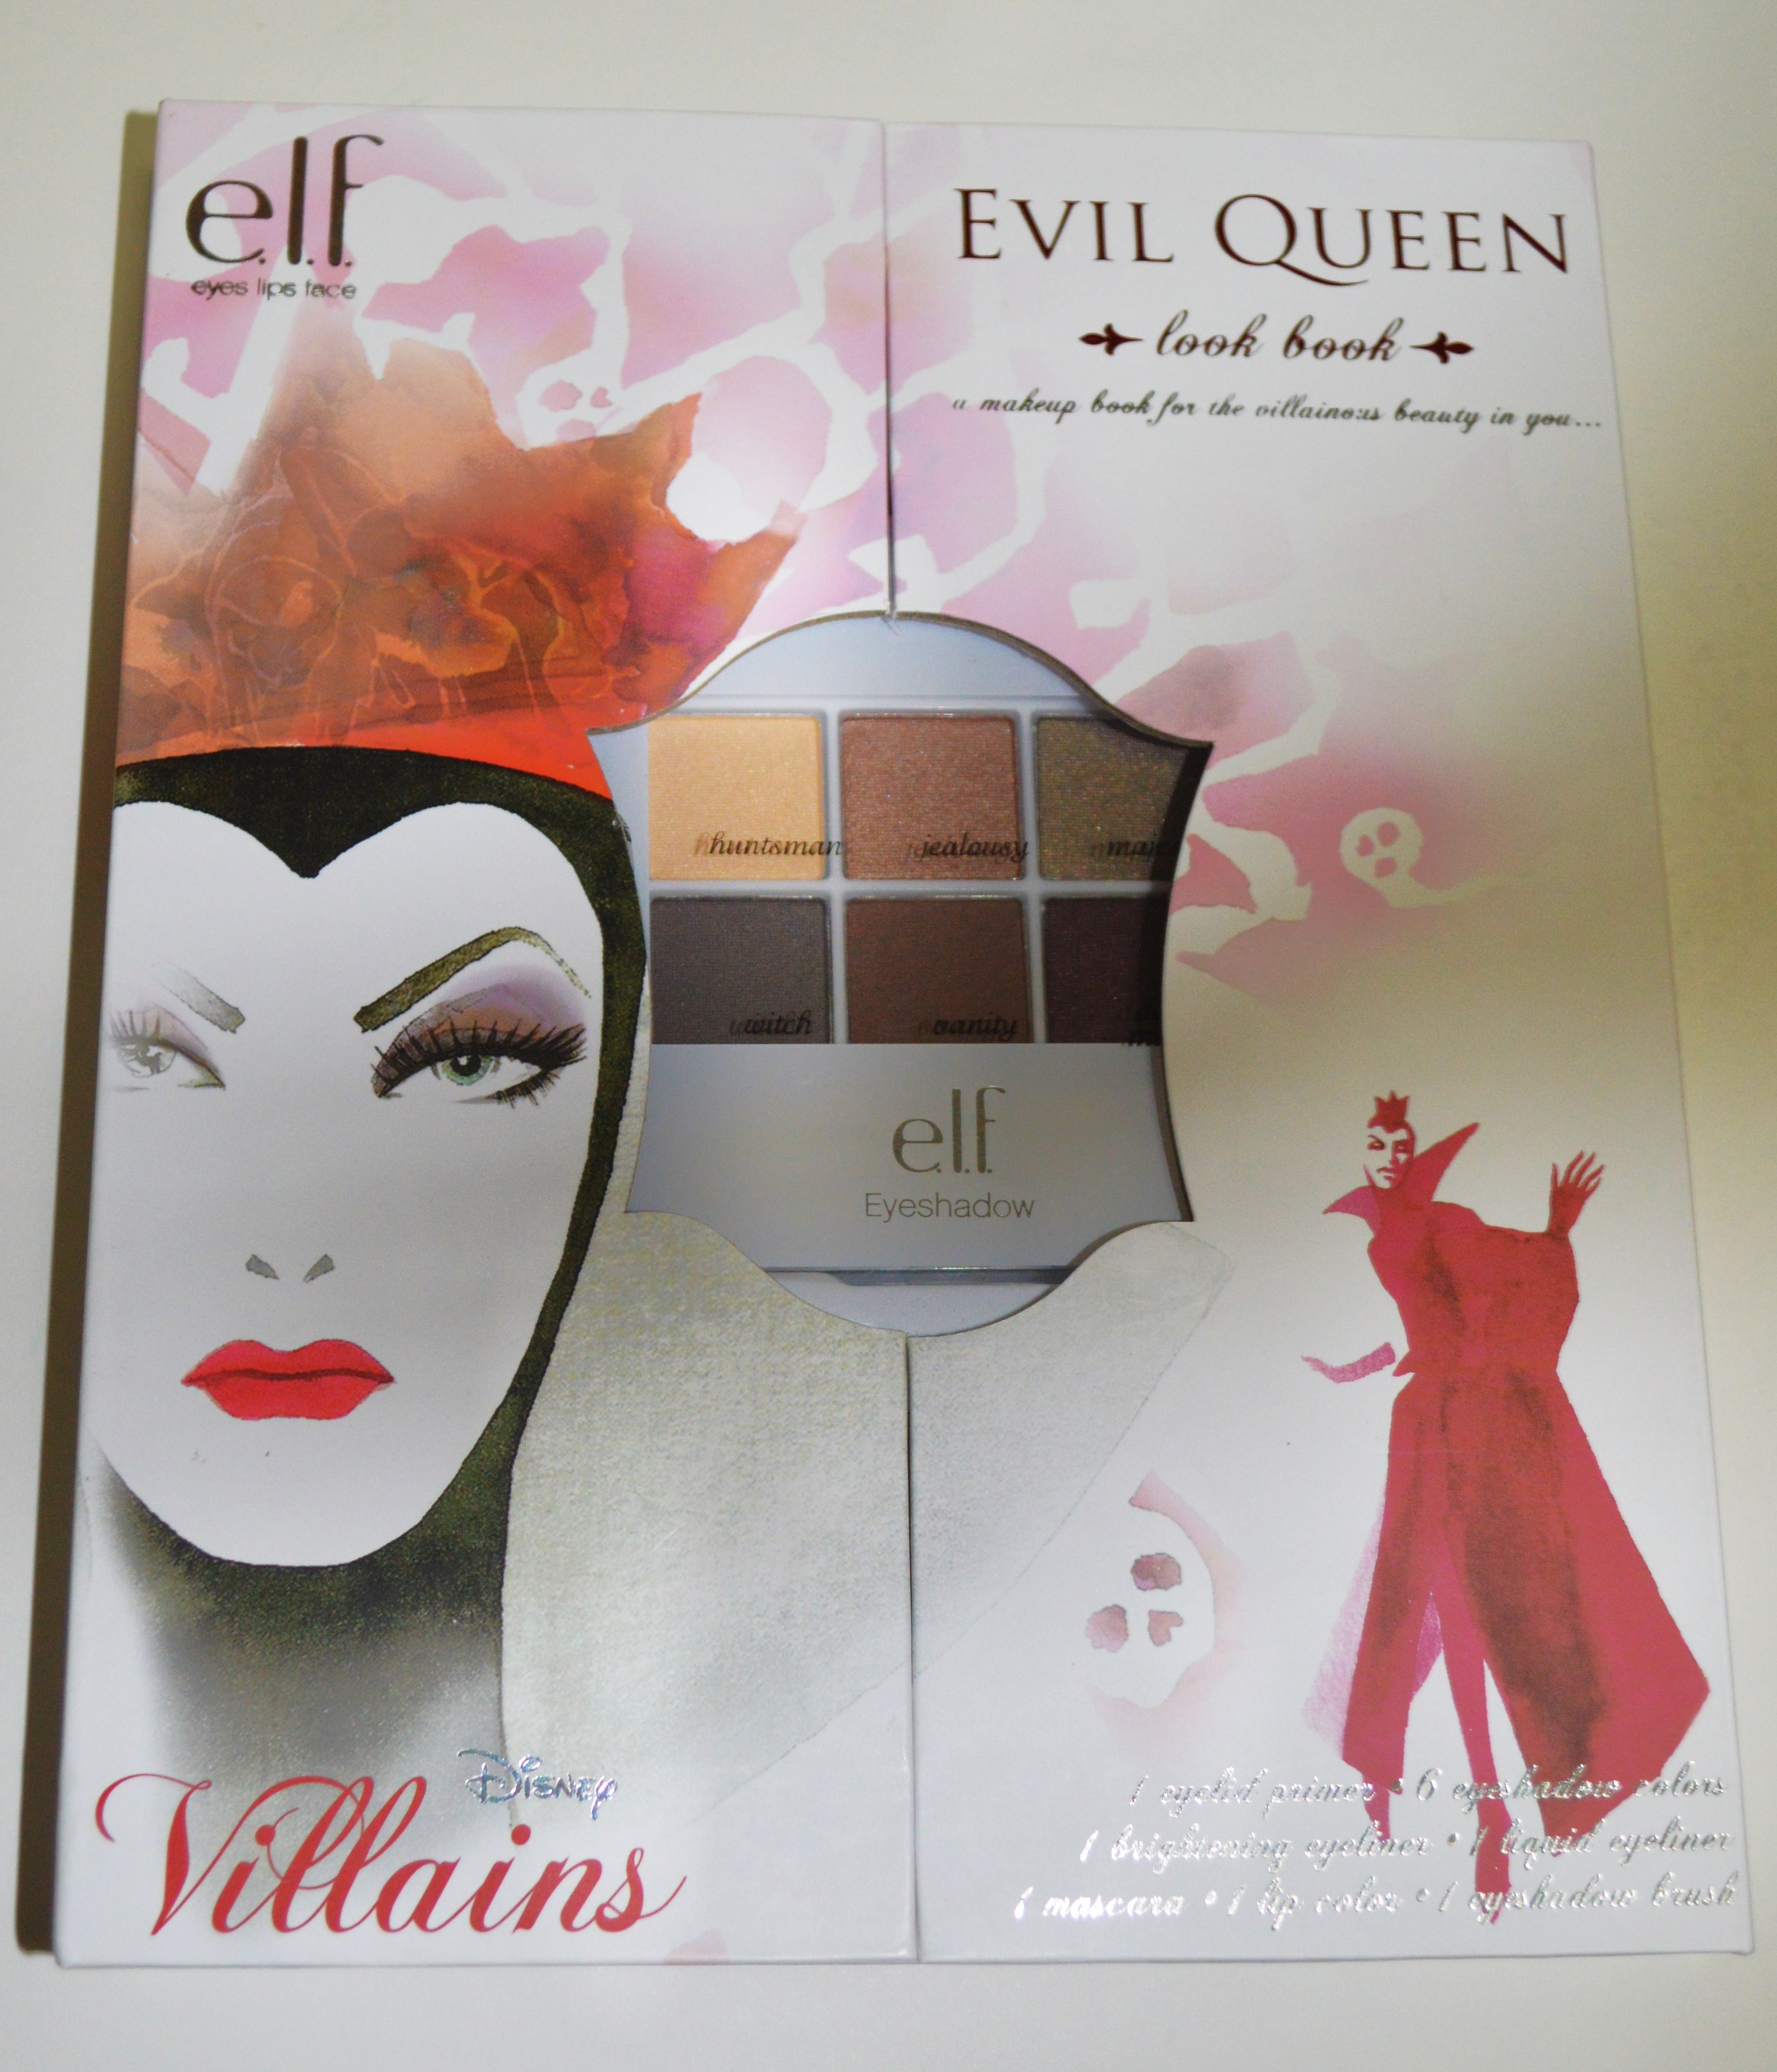
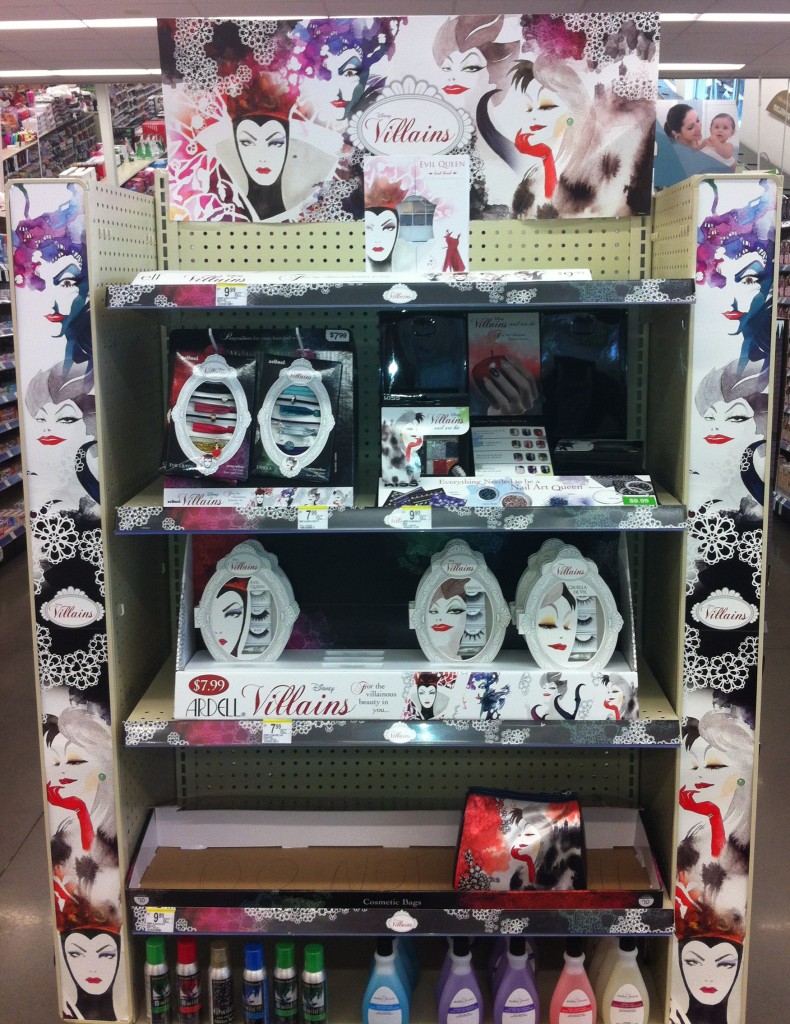 From Eyelashes to Fingernails, the Villains are ready to bring out the villainous side of you!
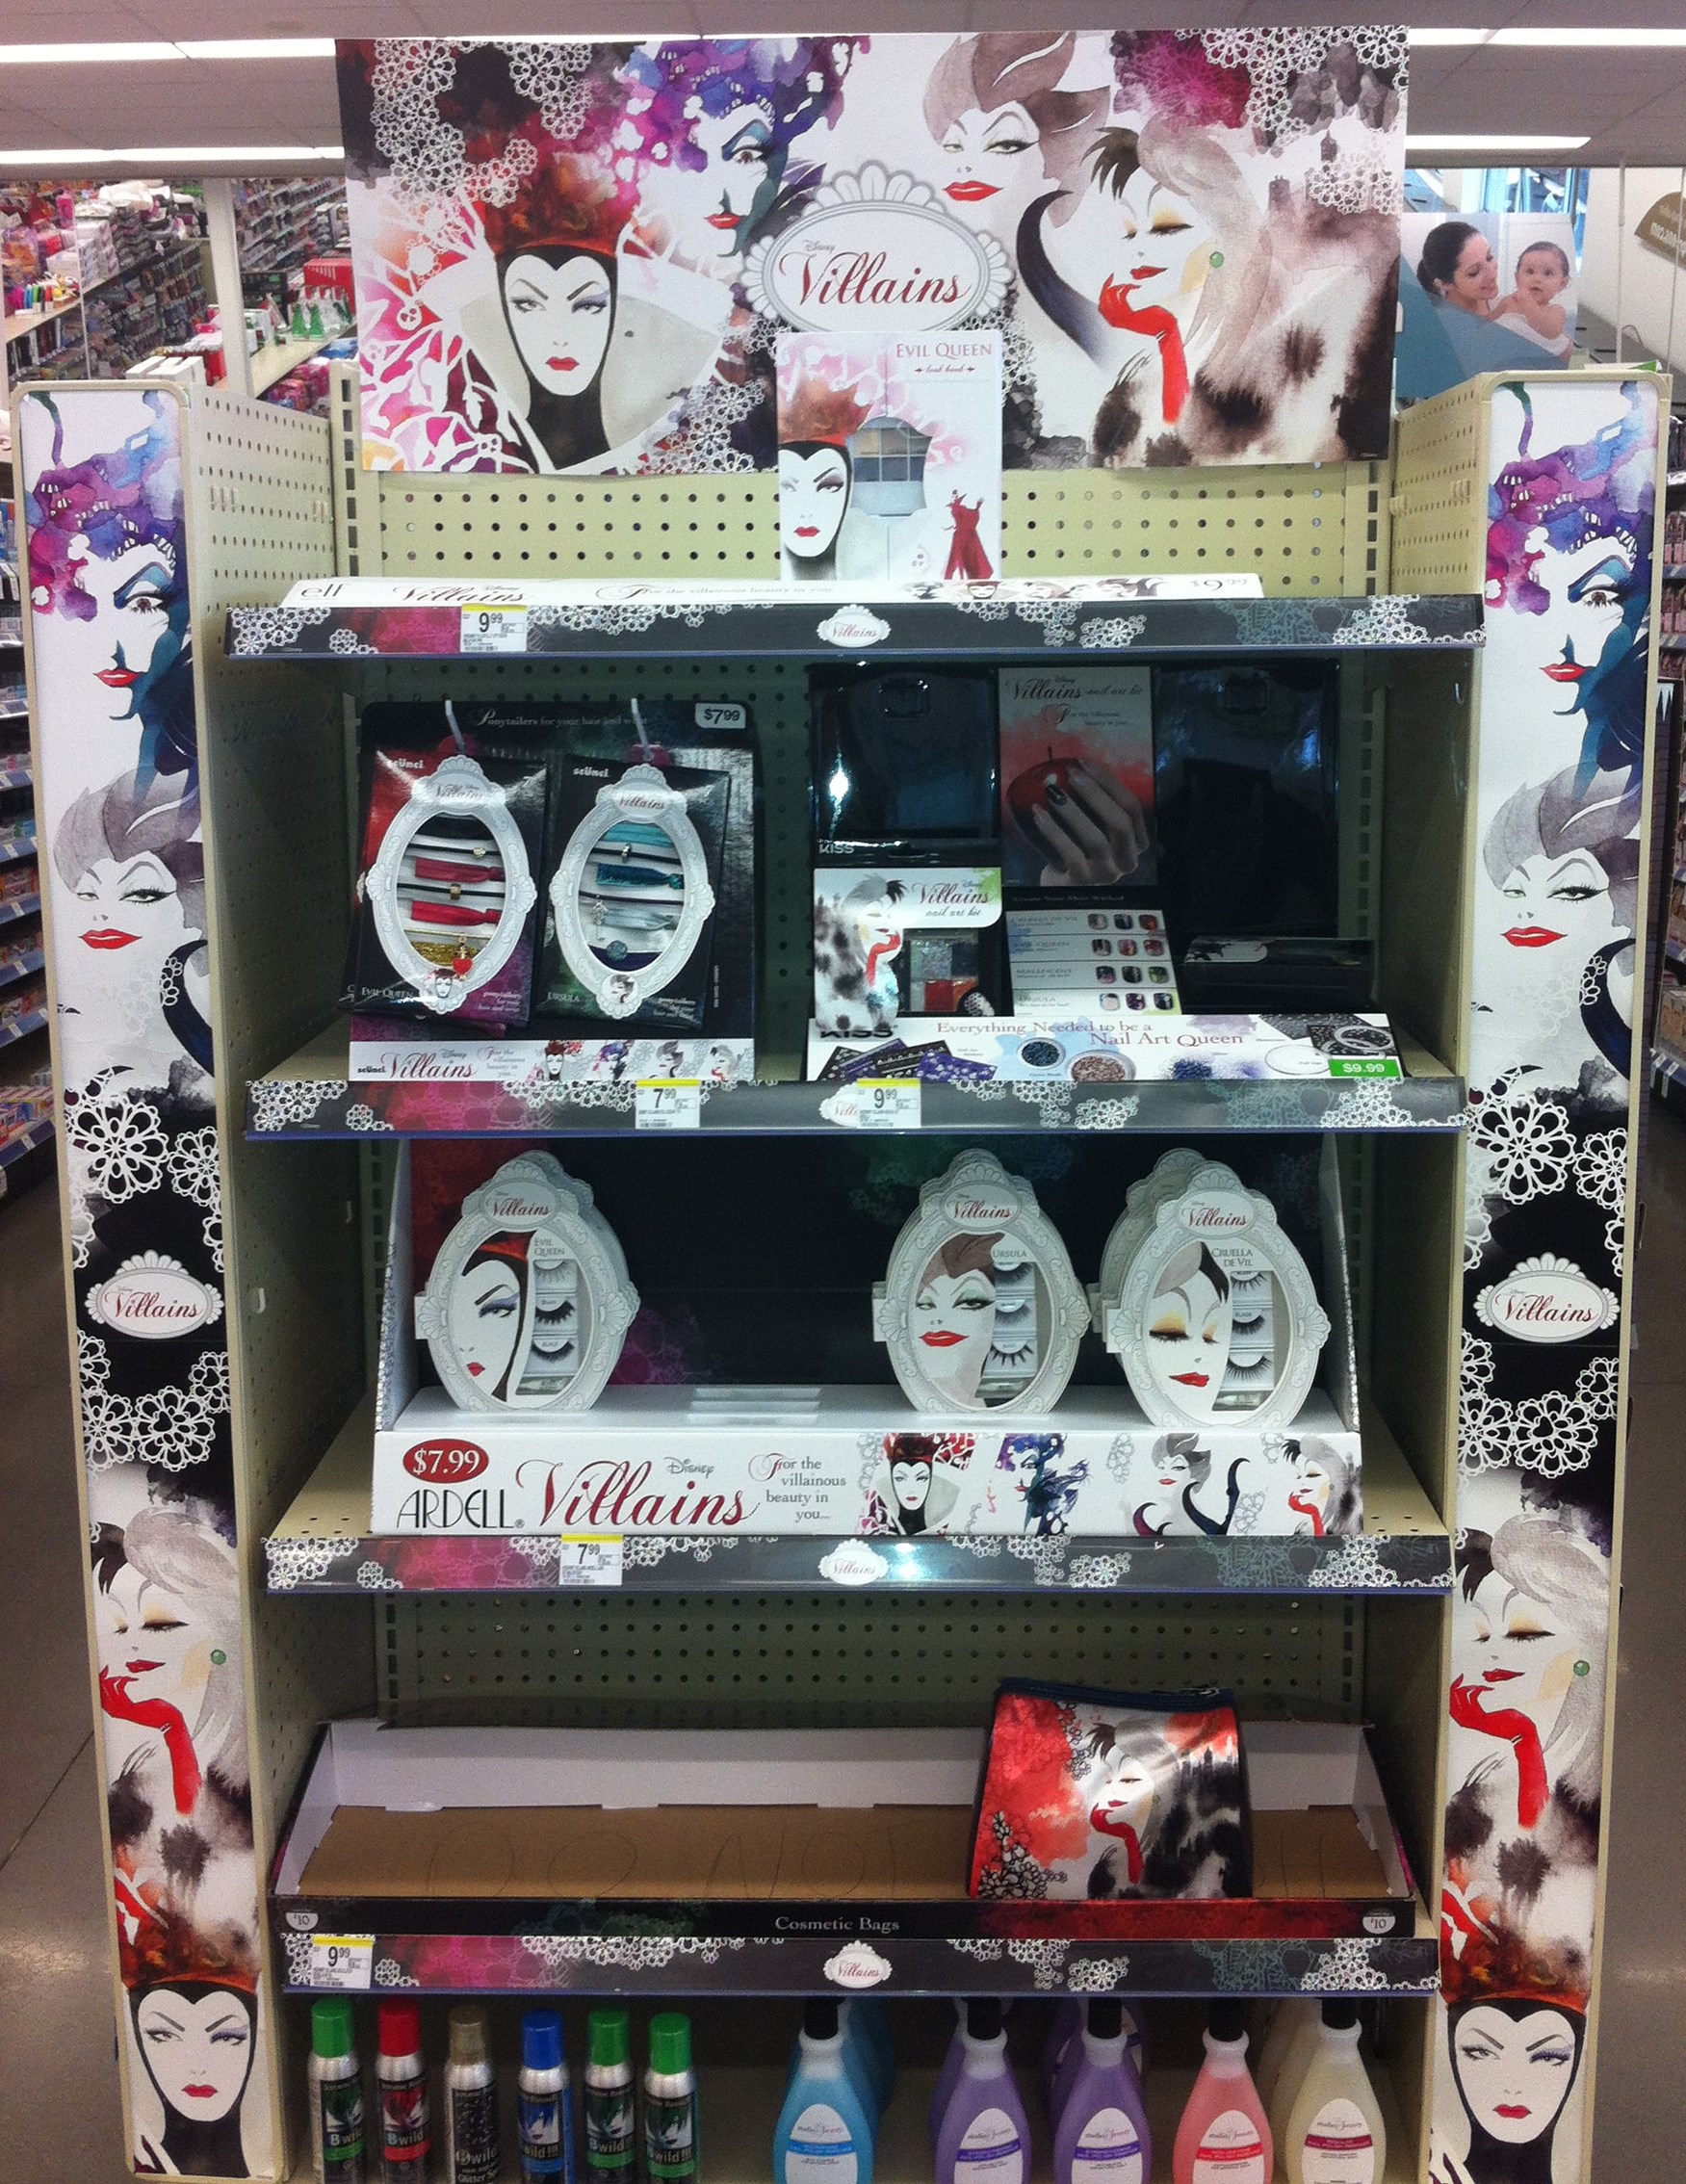
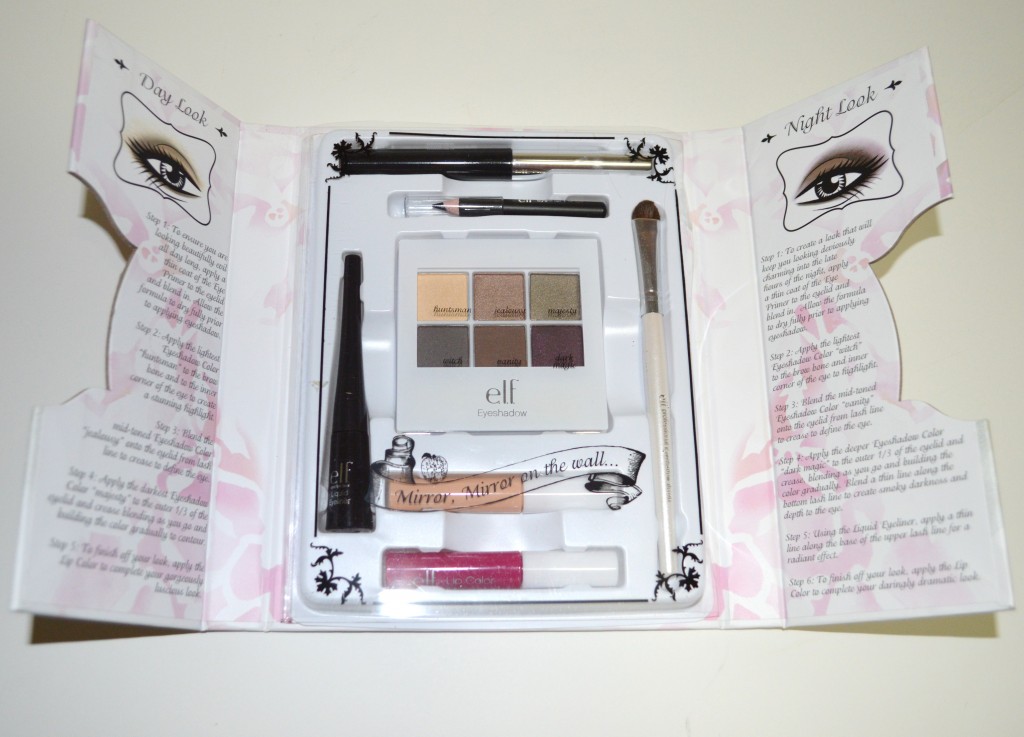 This is a photo of the Evil Queen Look Book.
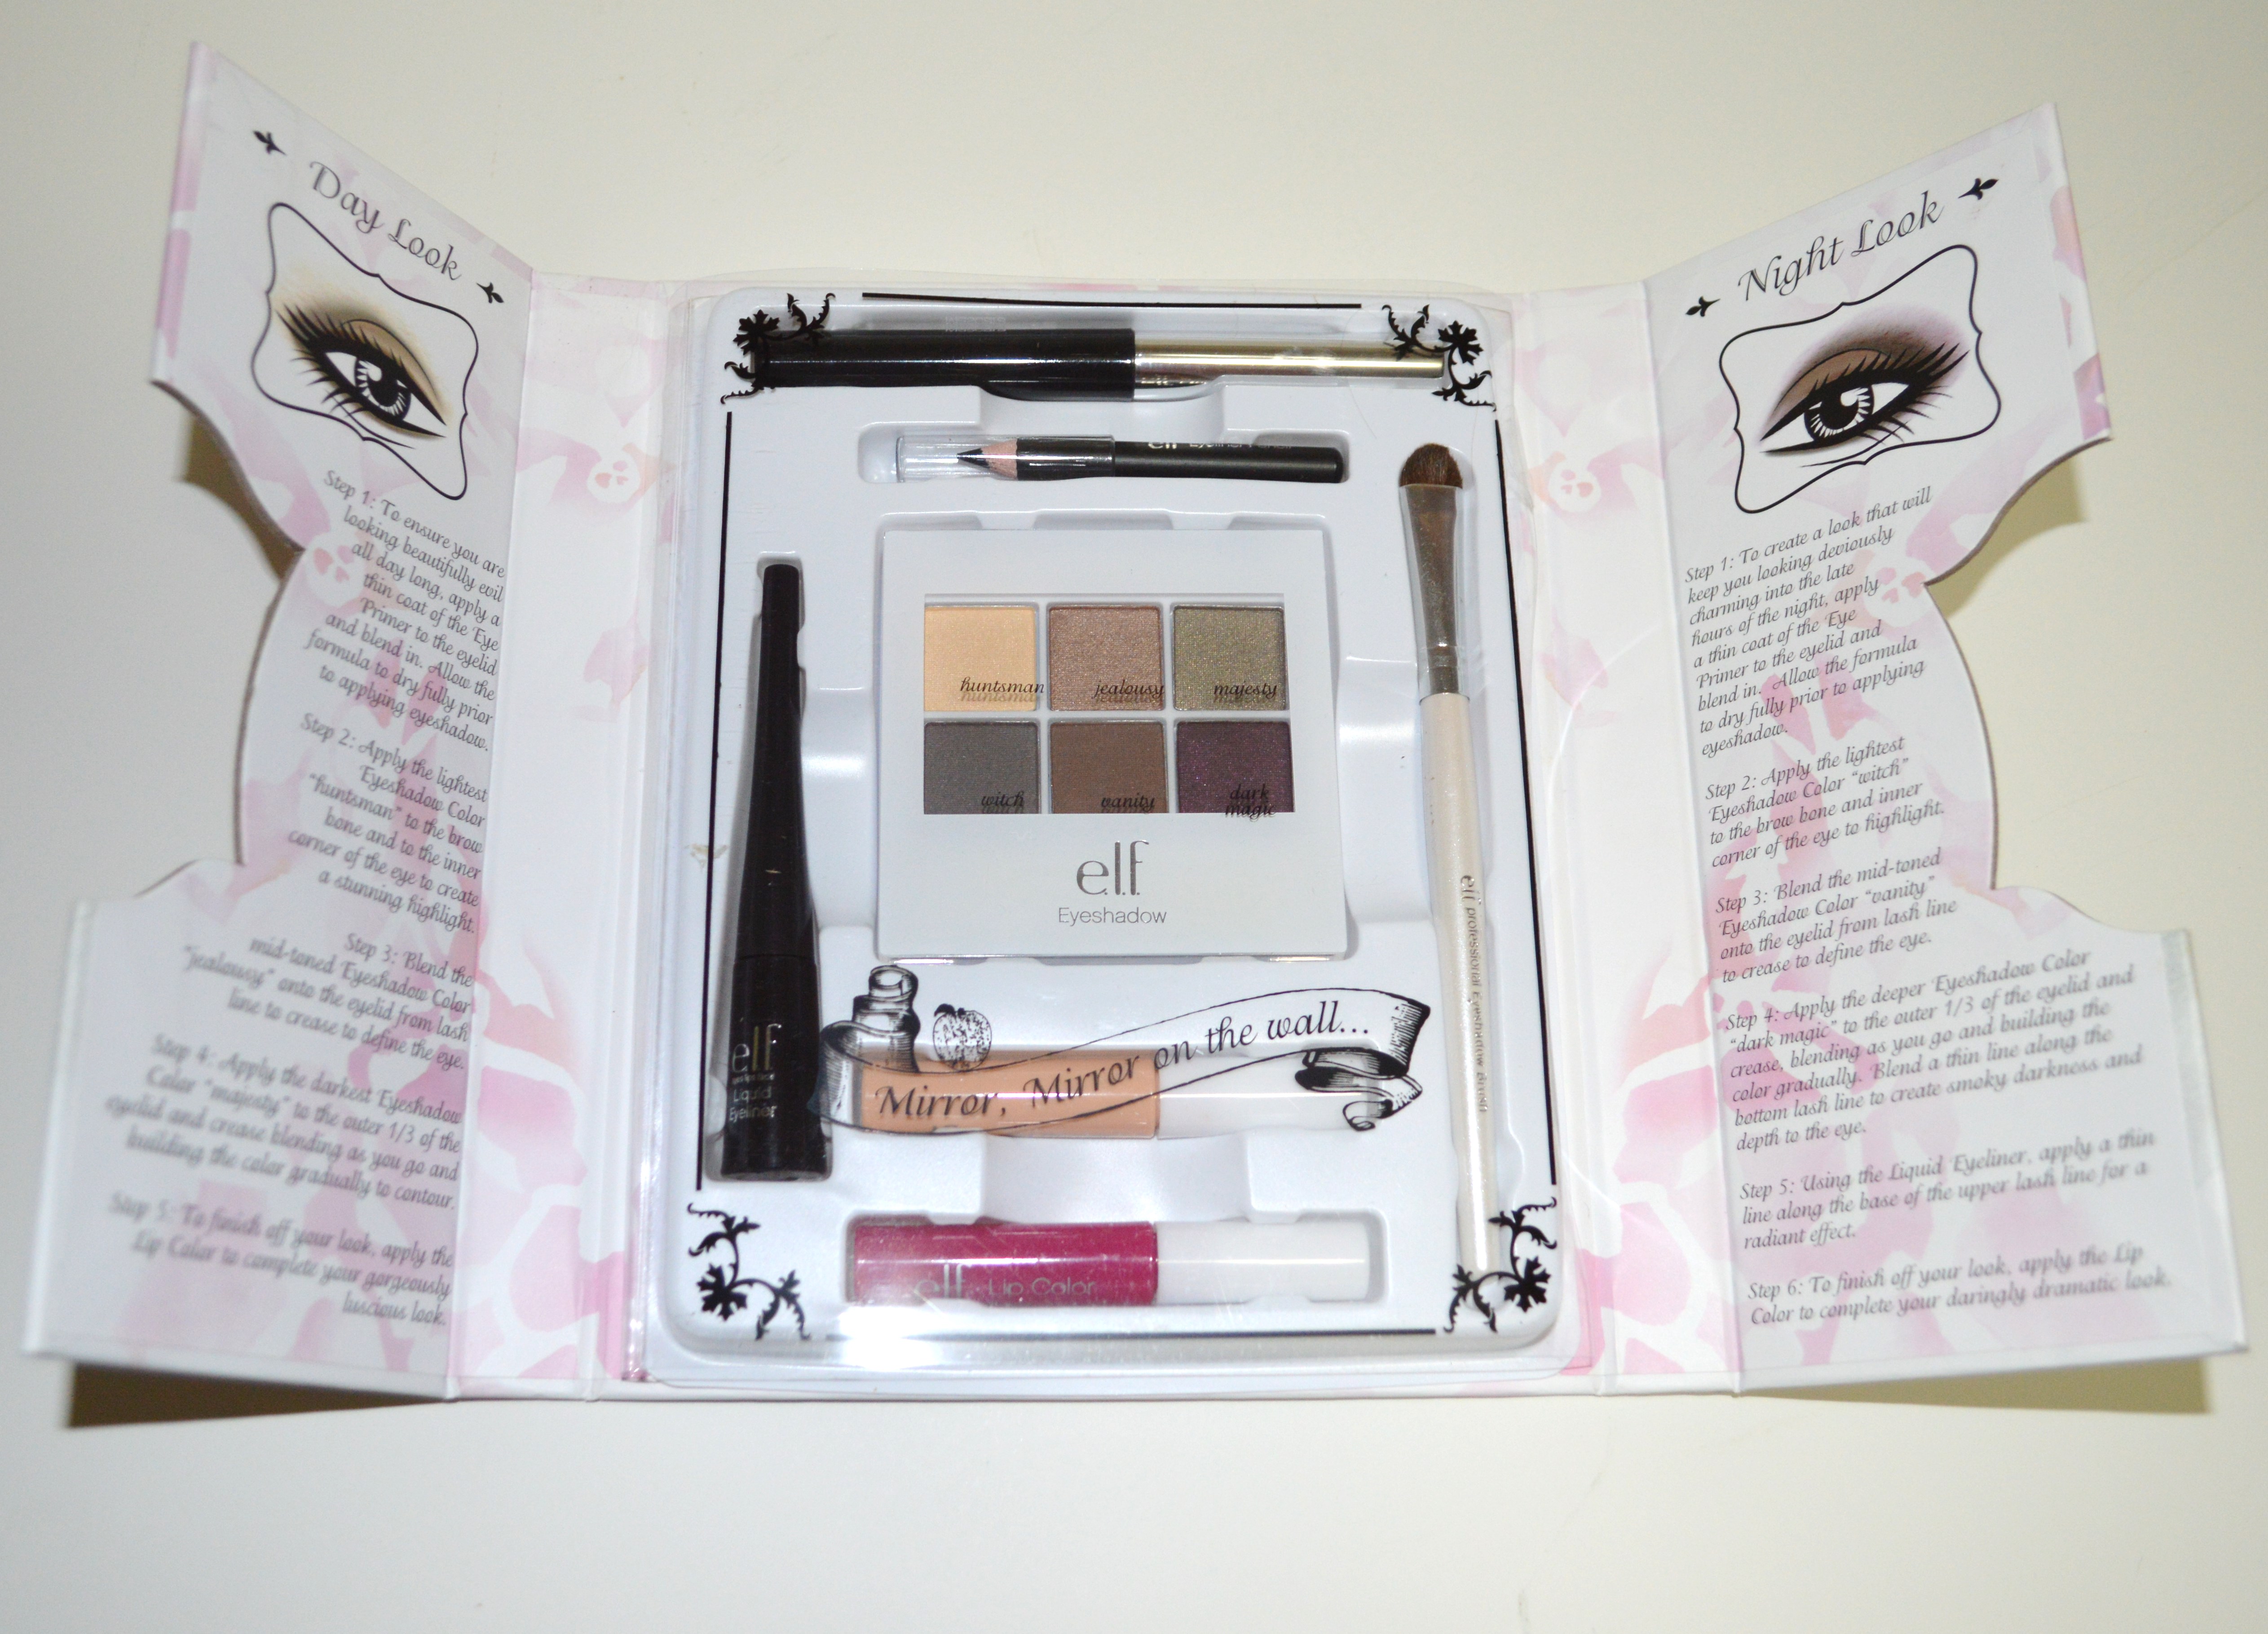
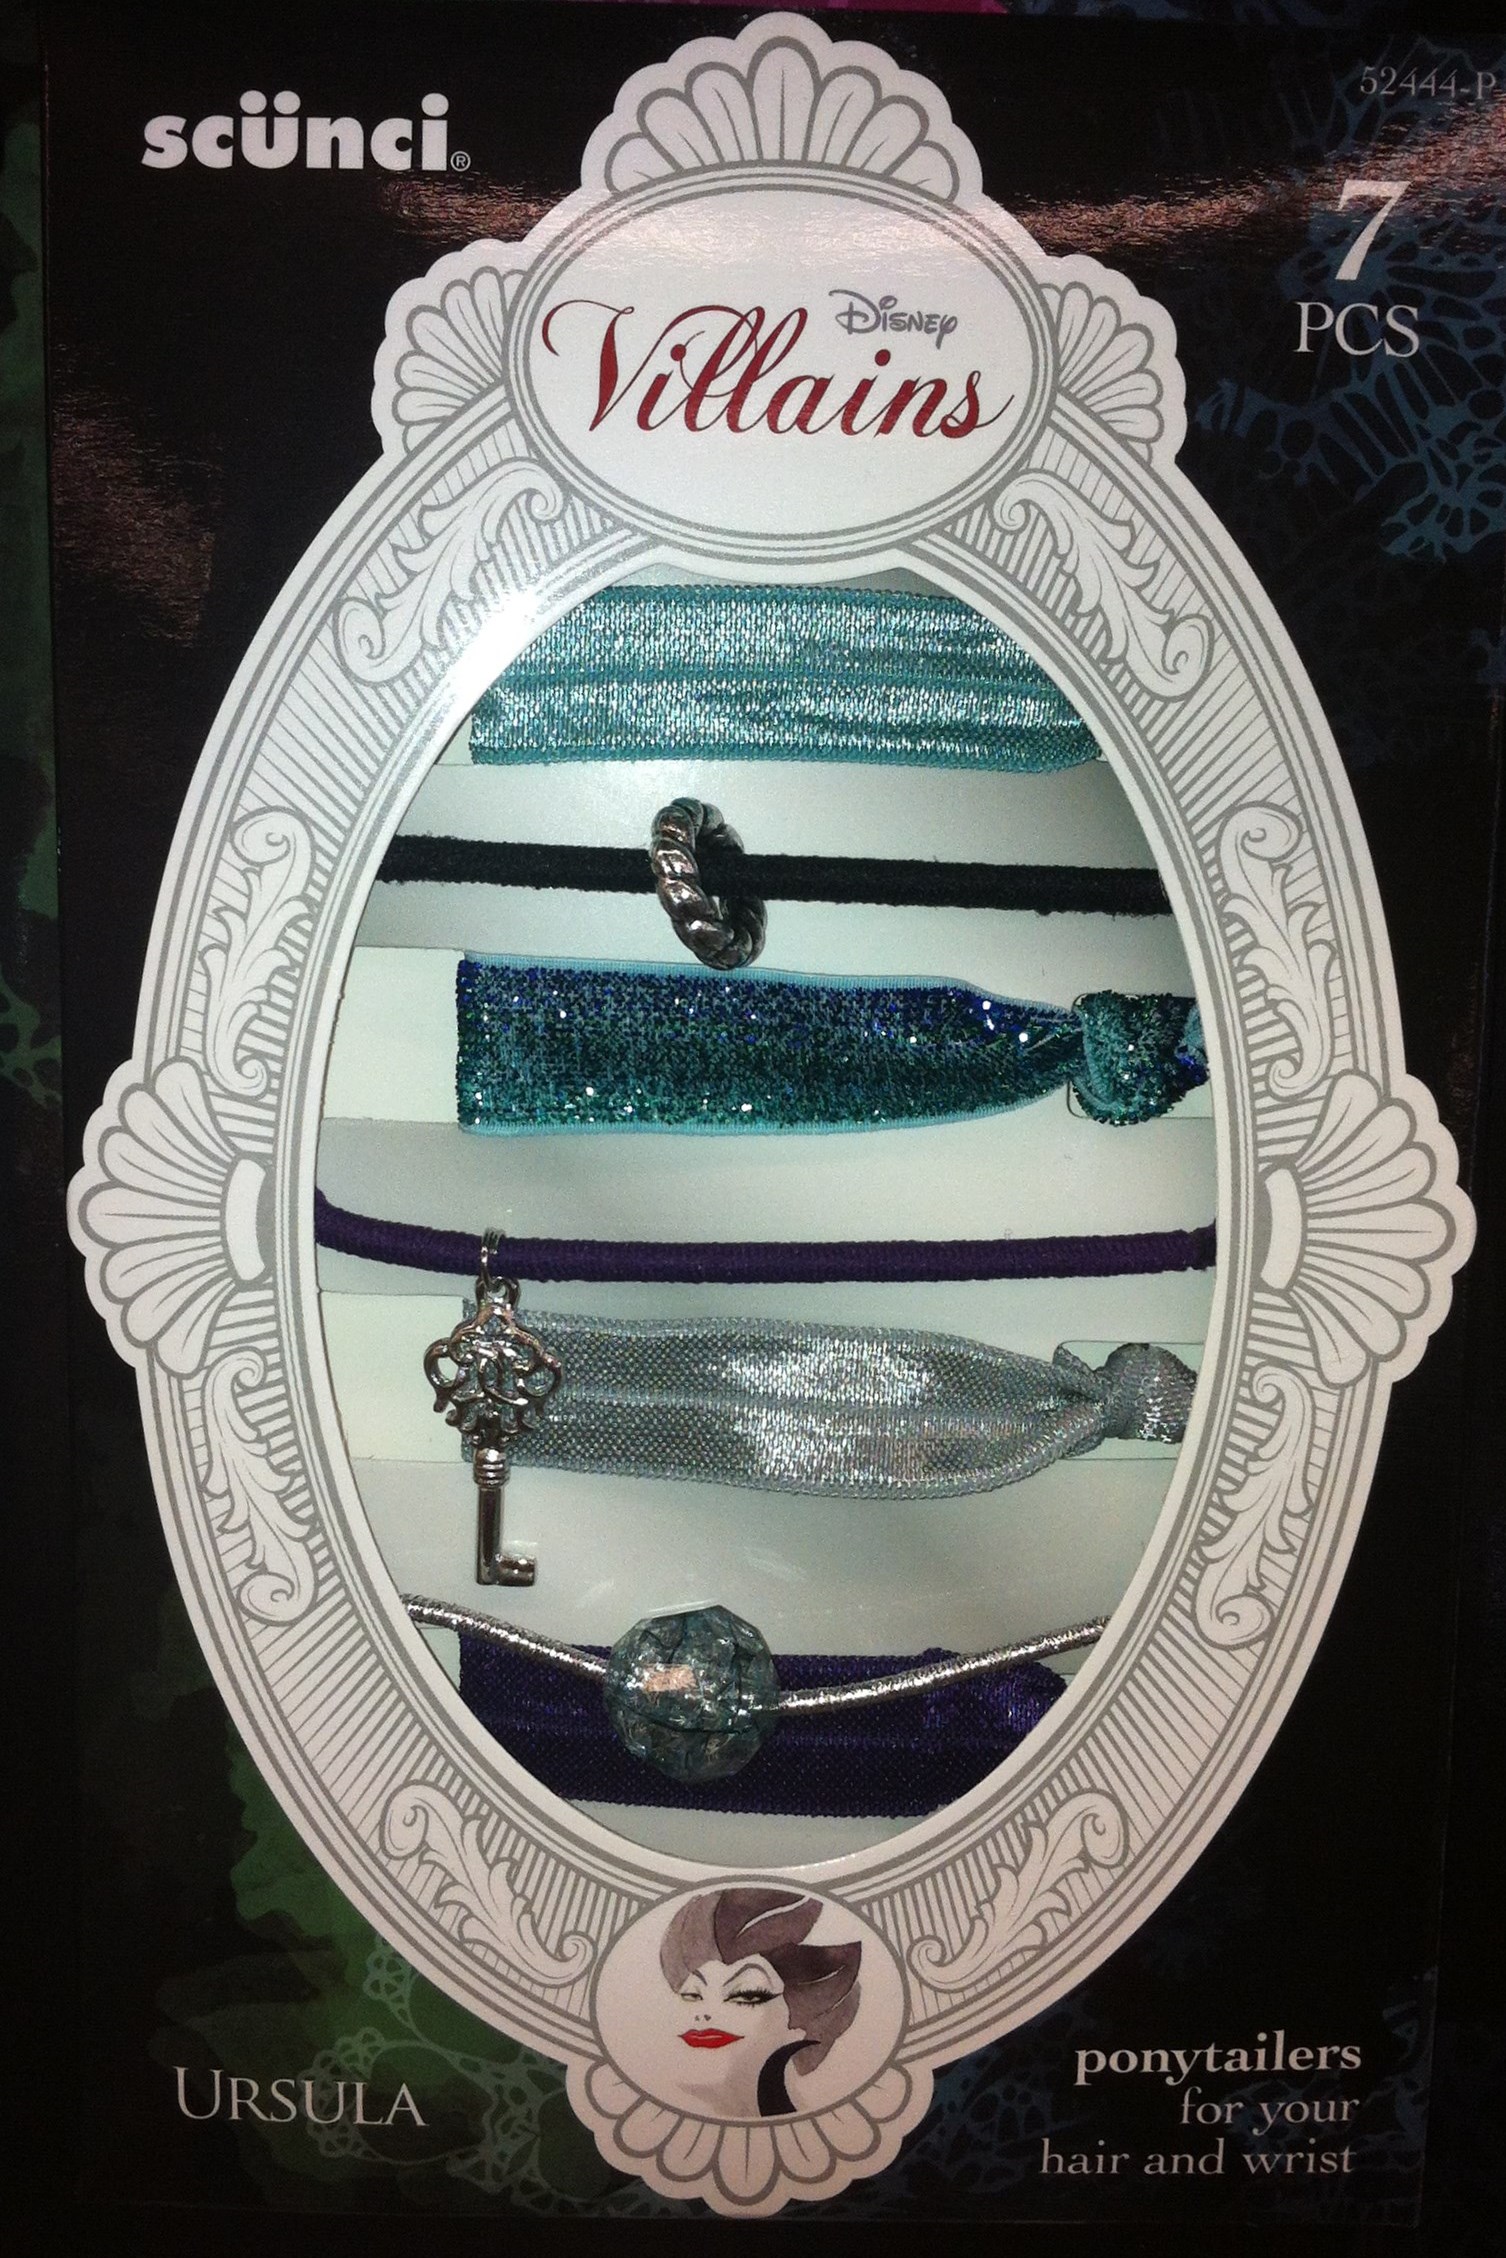
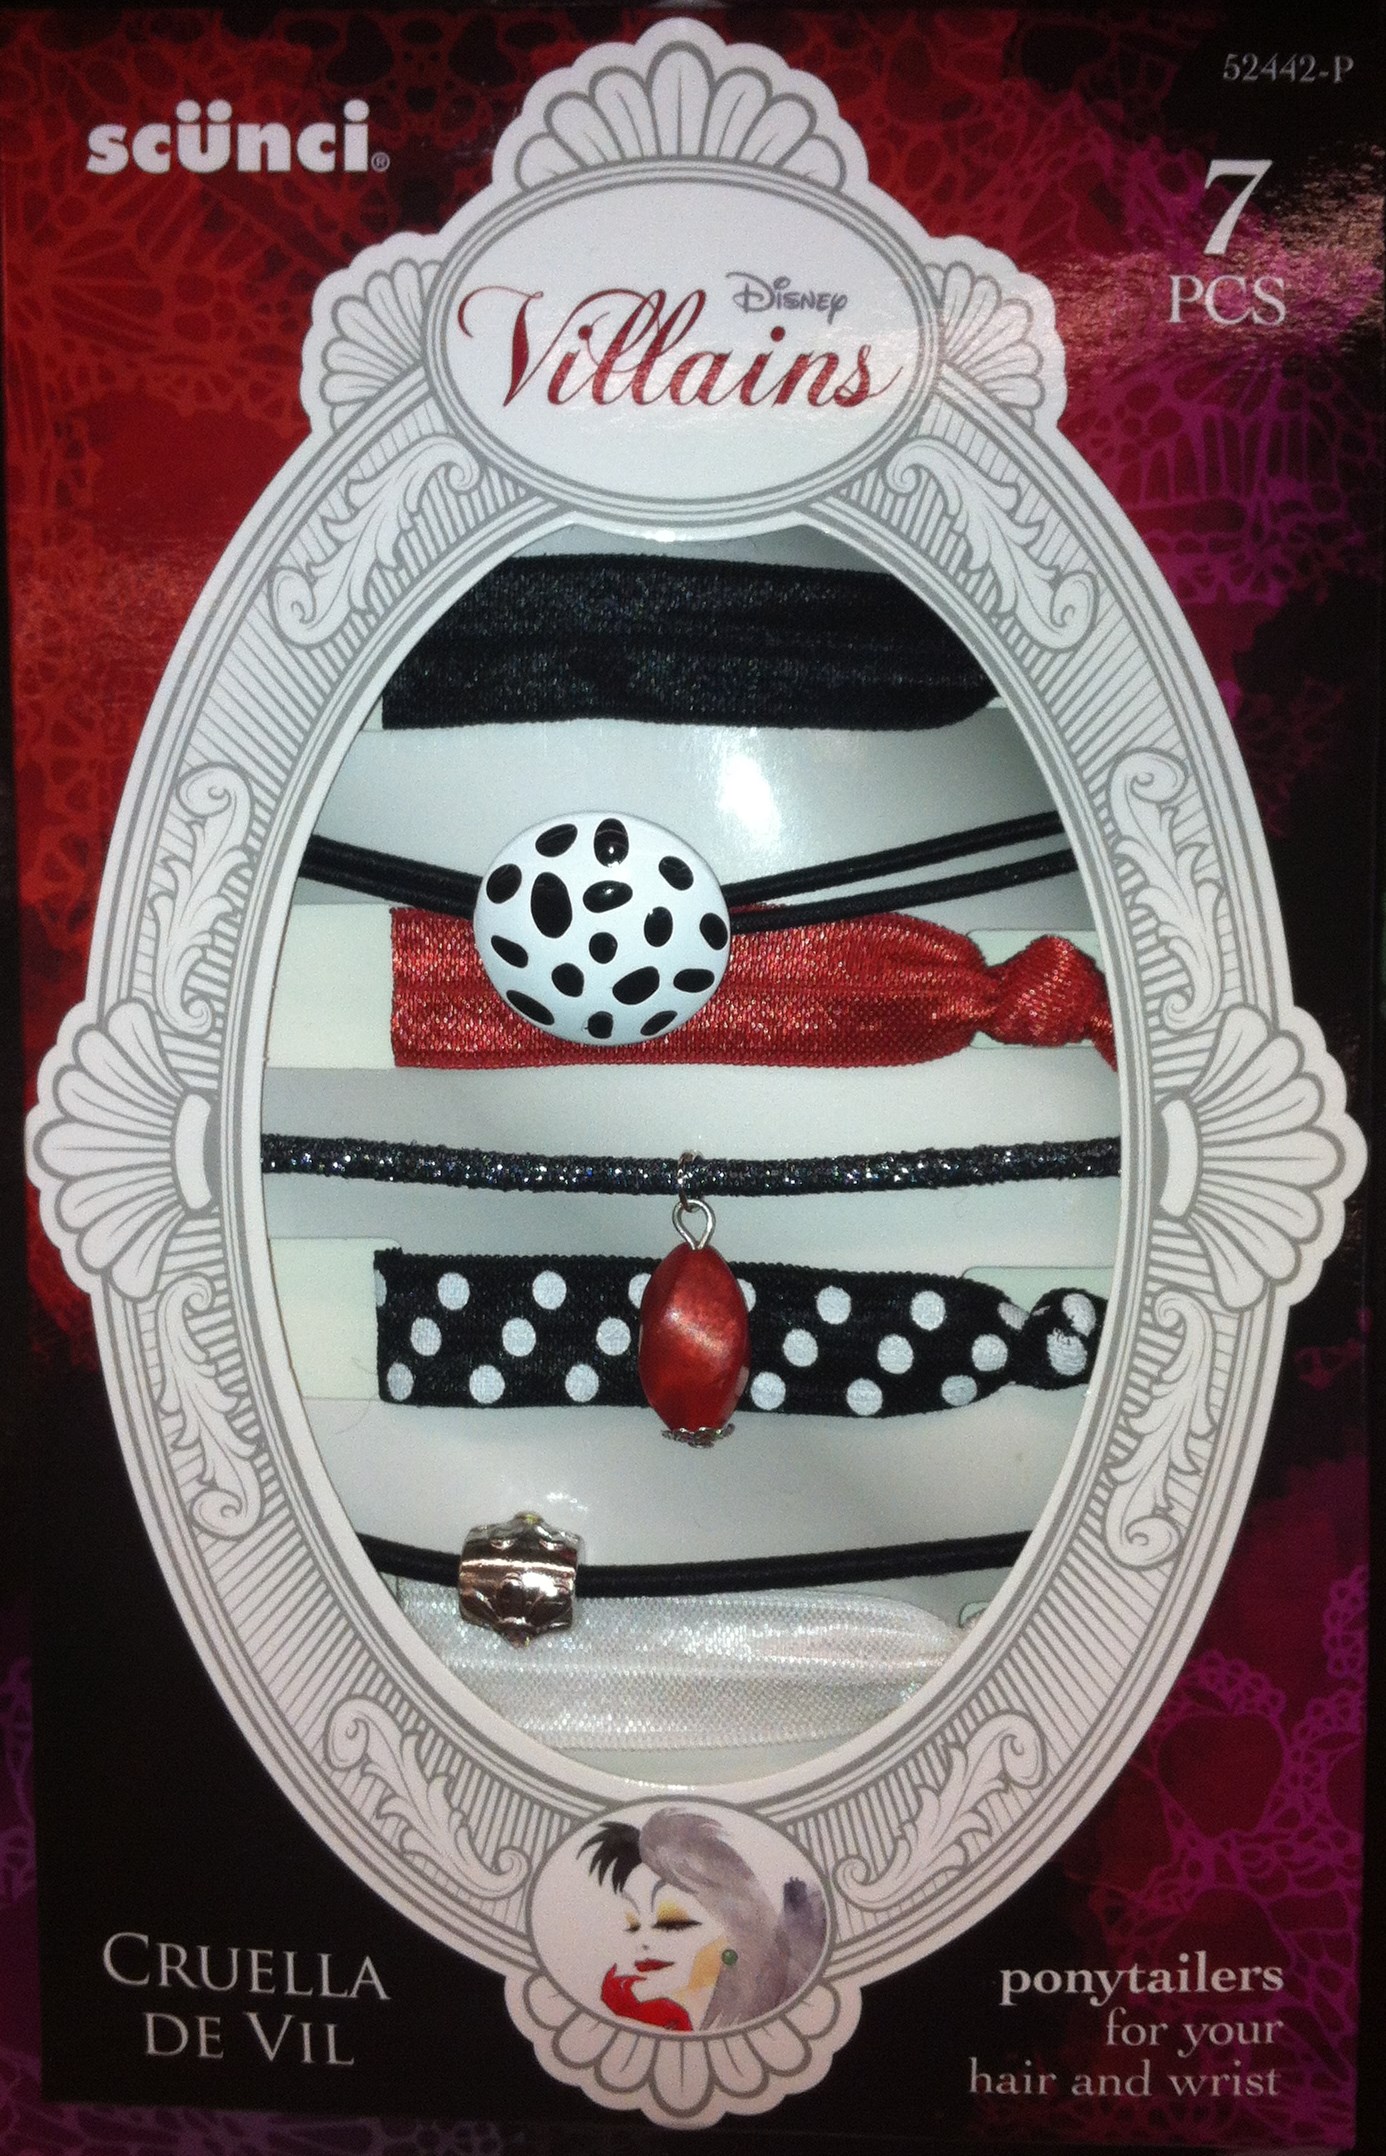 The Ponytailers, advertised as “for your hair and wrists” are priced at $7.99 and come as a 7 piece set.
 Villain false eyelashes are sold for $7.99 per each wicked set.
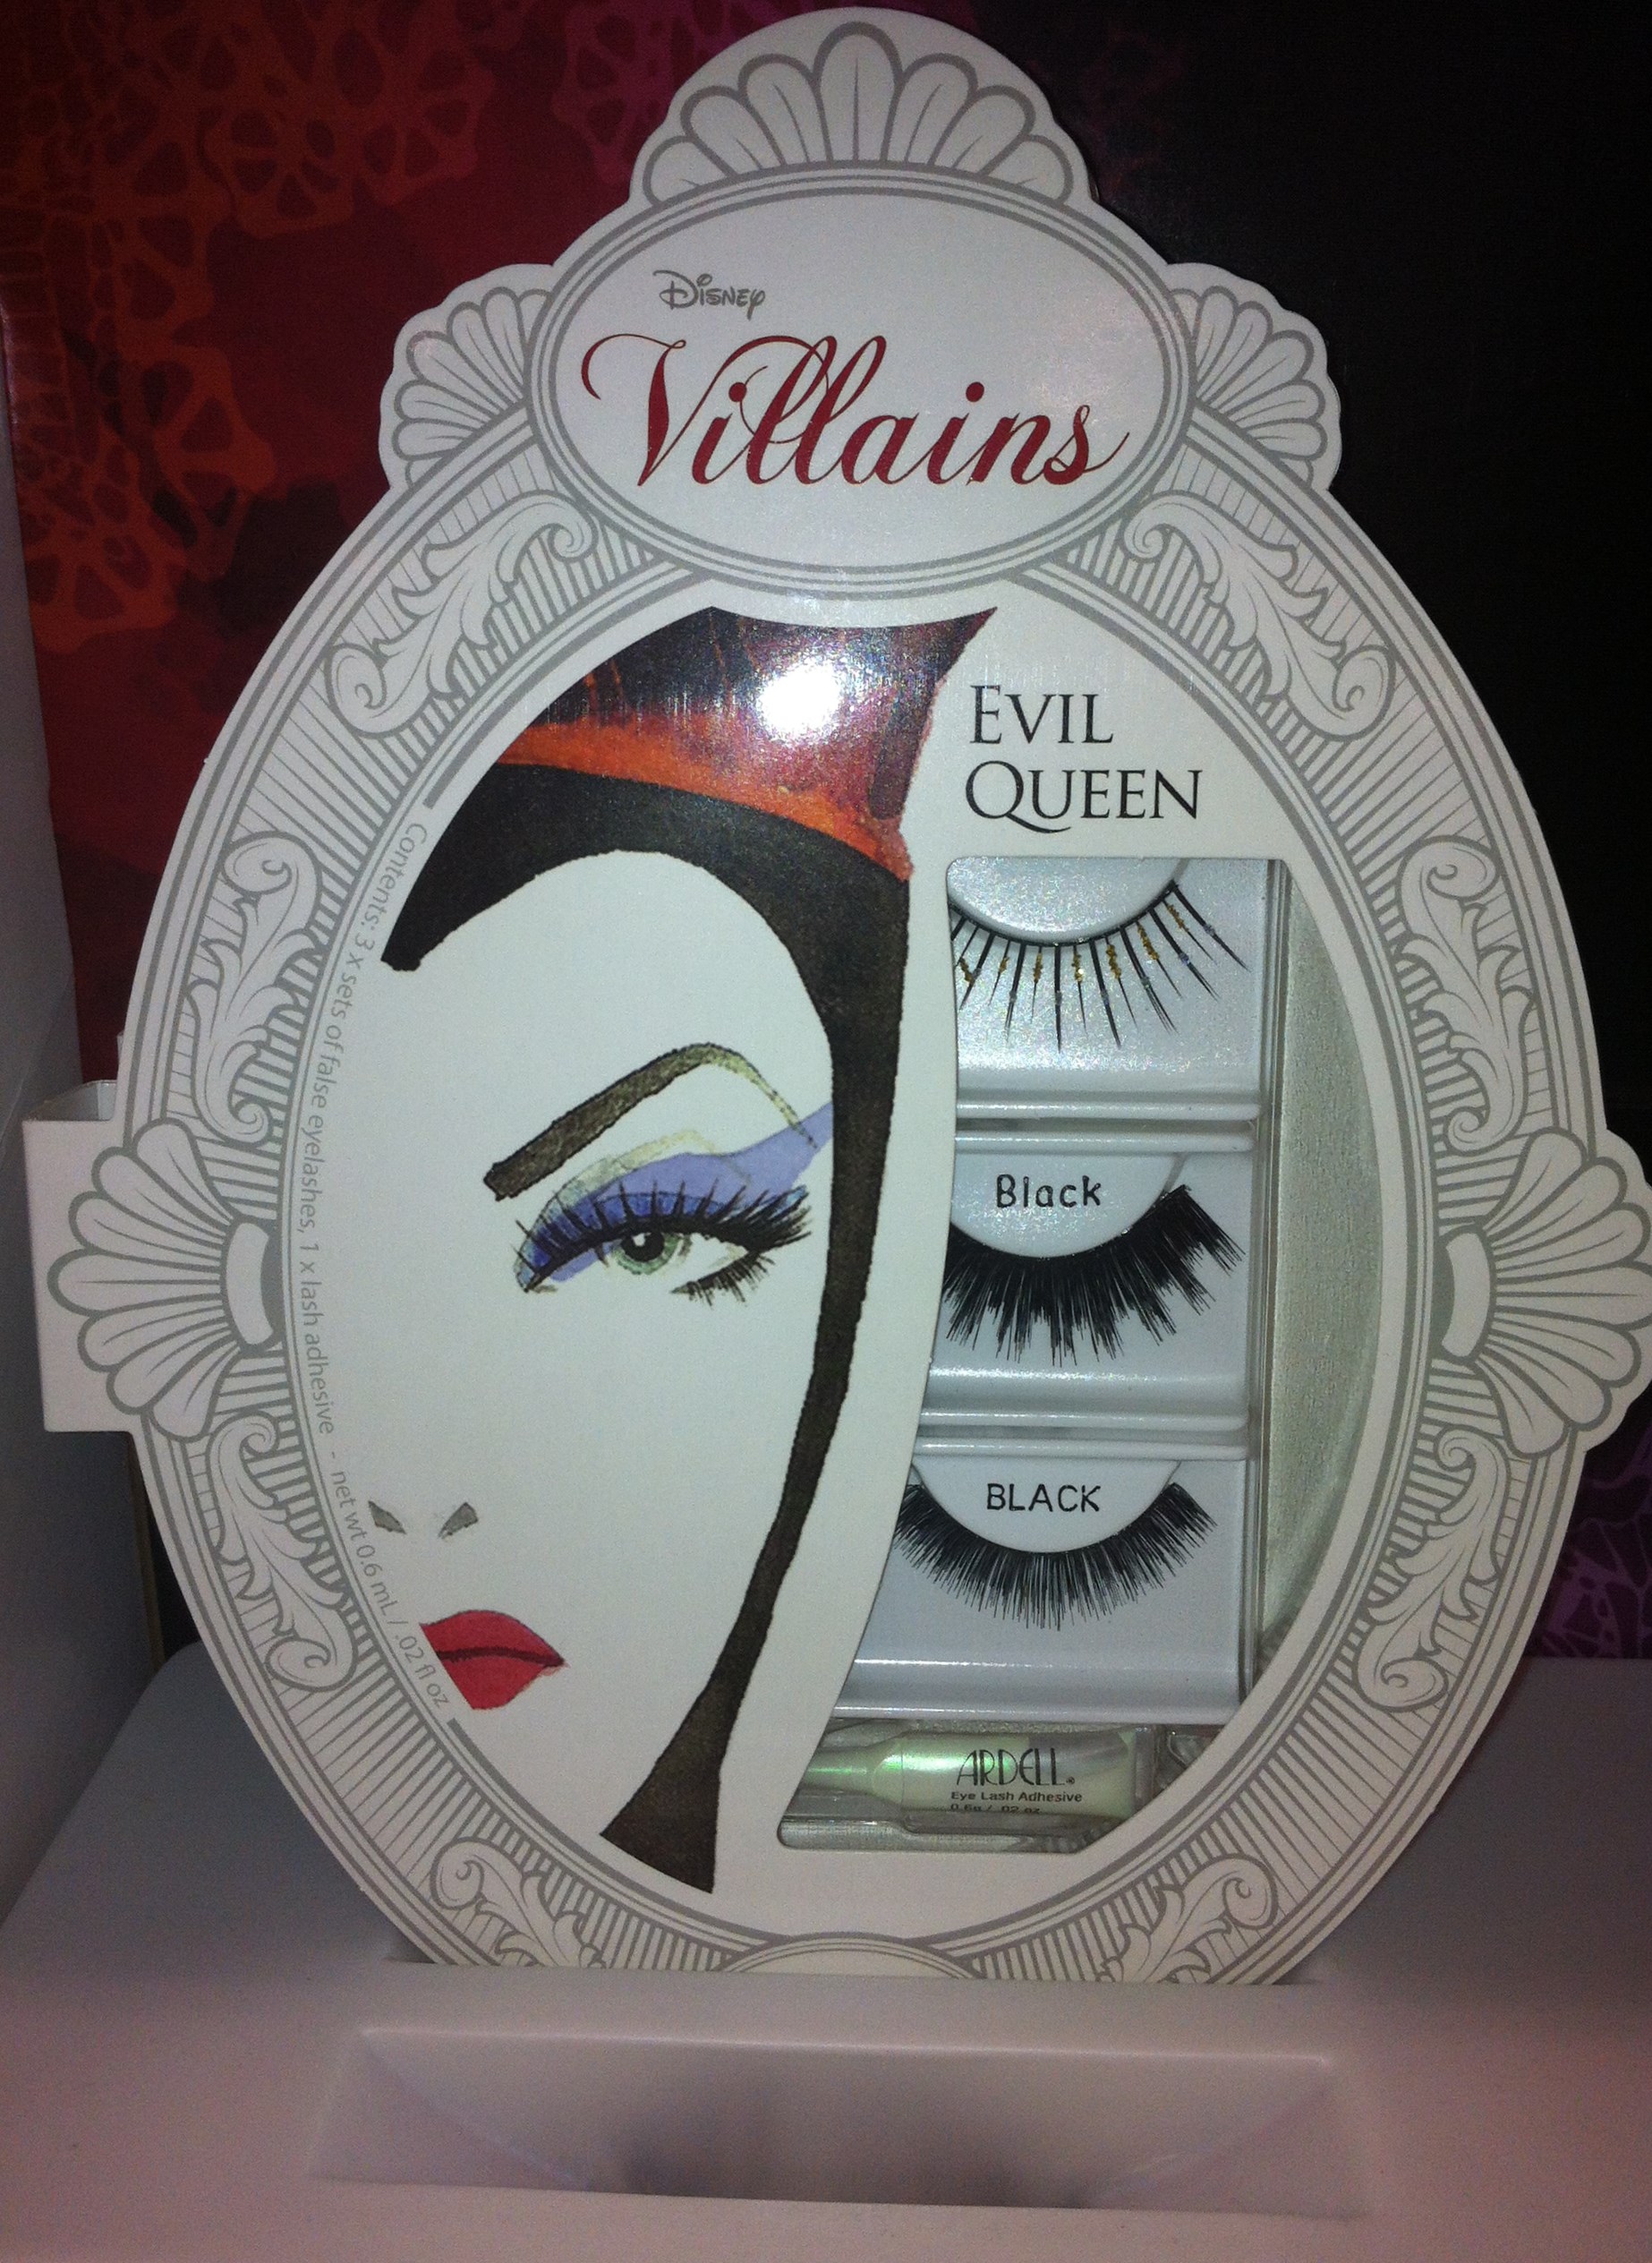
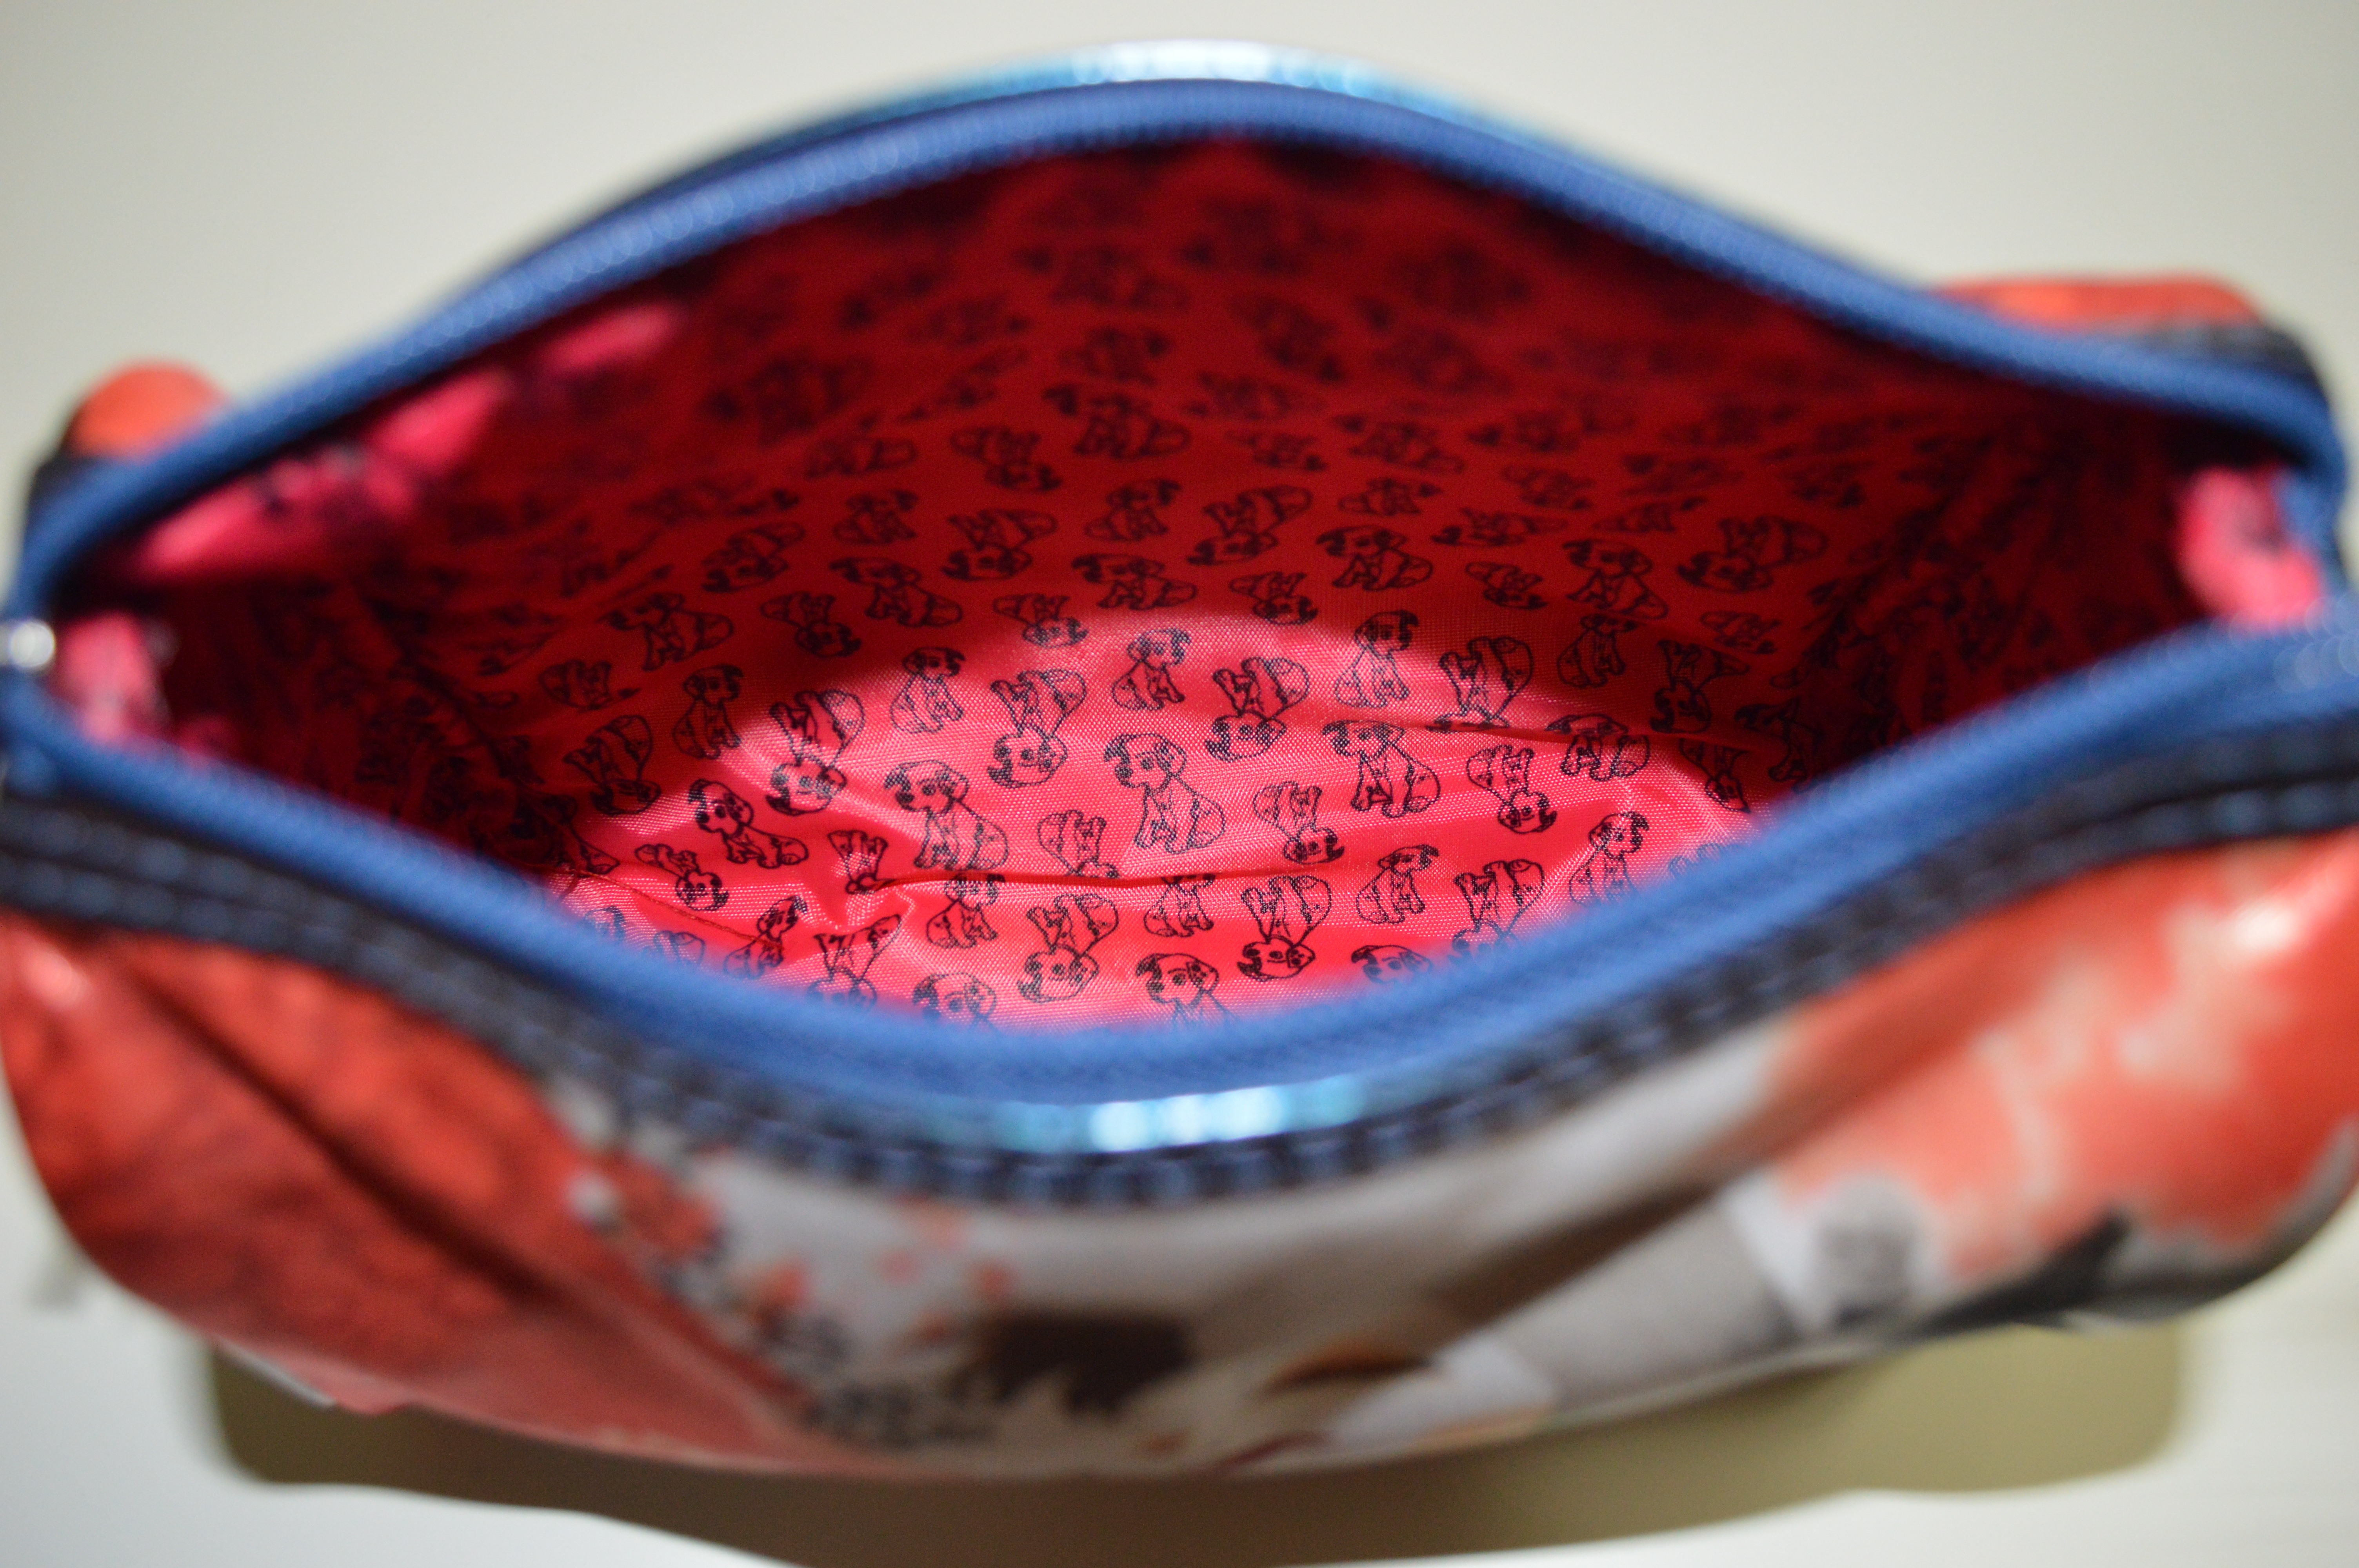
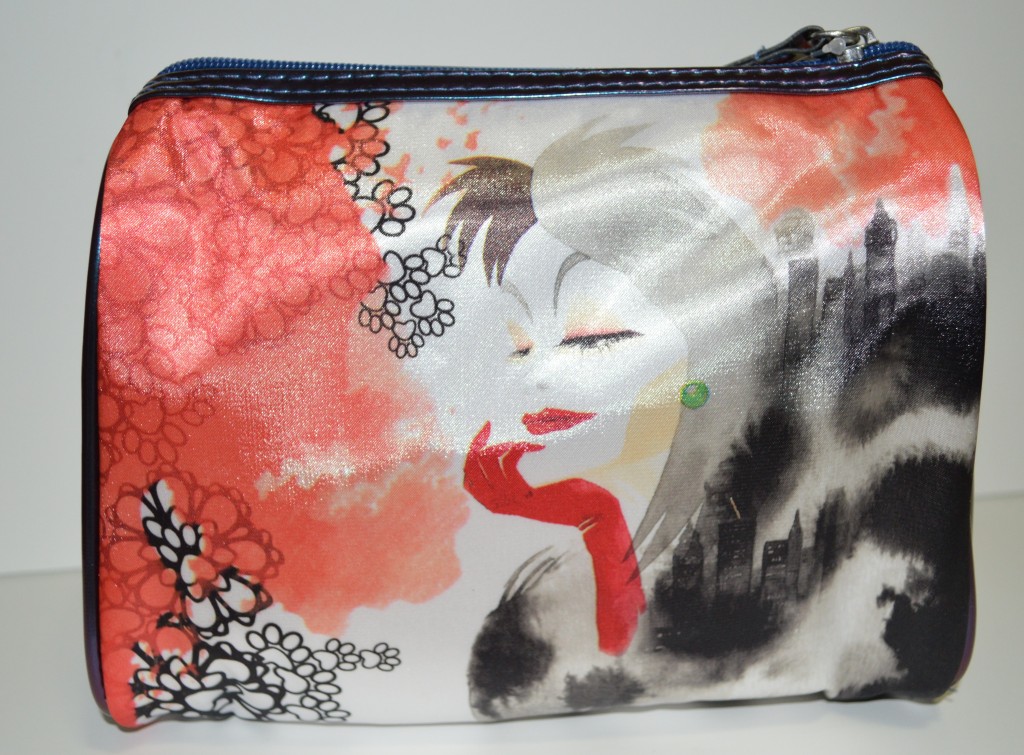 I fell in love the artwork on the cosmetic cases. Notice on this Cruella de Vil inspired bag the London landscape camouflaged on the right side of the bag and the puppy paw prints on the left side that morph into flowers.
 Check out the inside lining of the bag- Puppies! The costs of the bags are $9.99. I think anyone traveling to a Disney vacation NEEDS one of these bags. Don’t you think?