Tag: Americana

Picnicking With Mickey Cupcakes

Picnic mickey

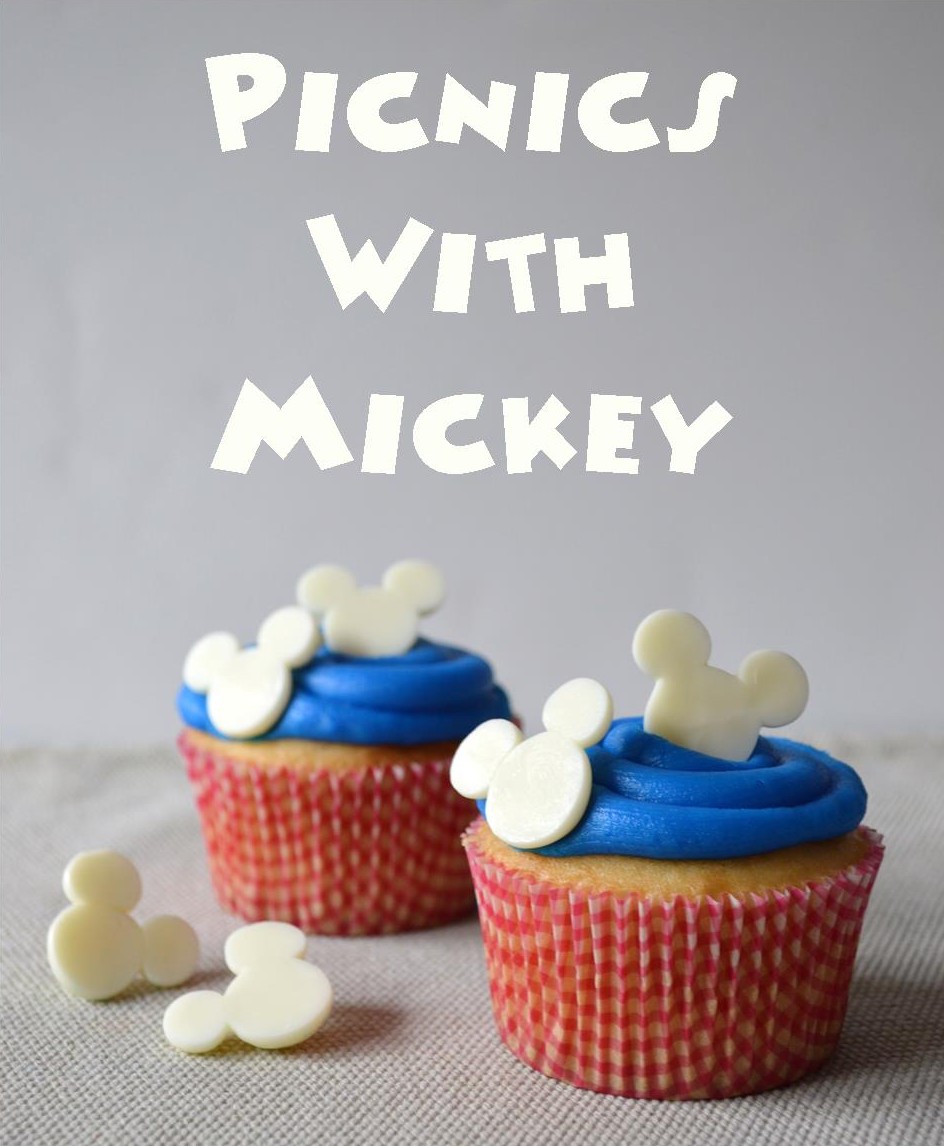
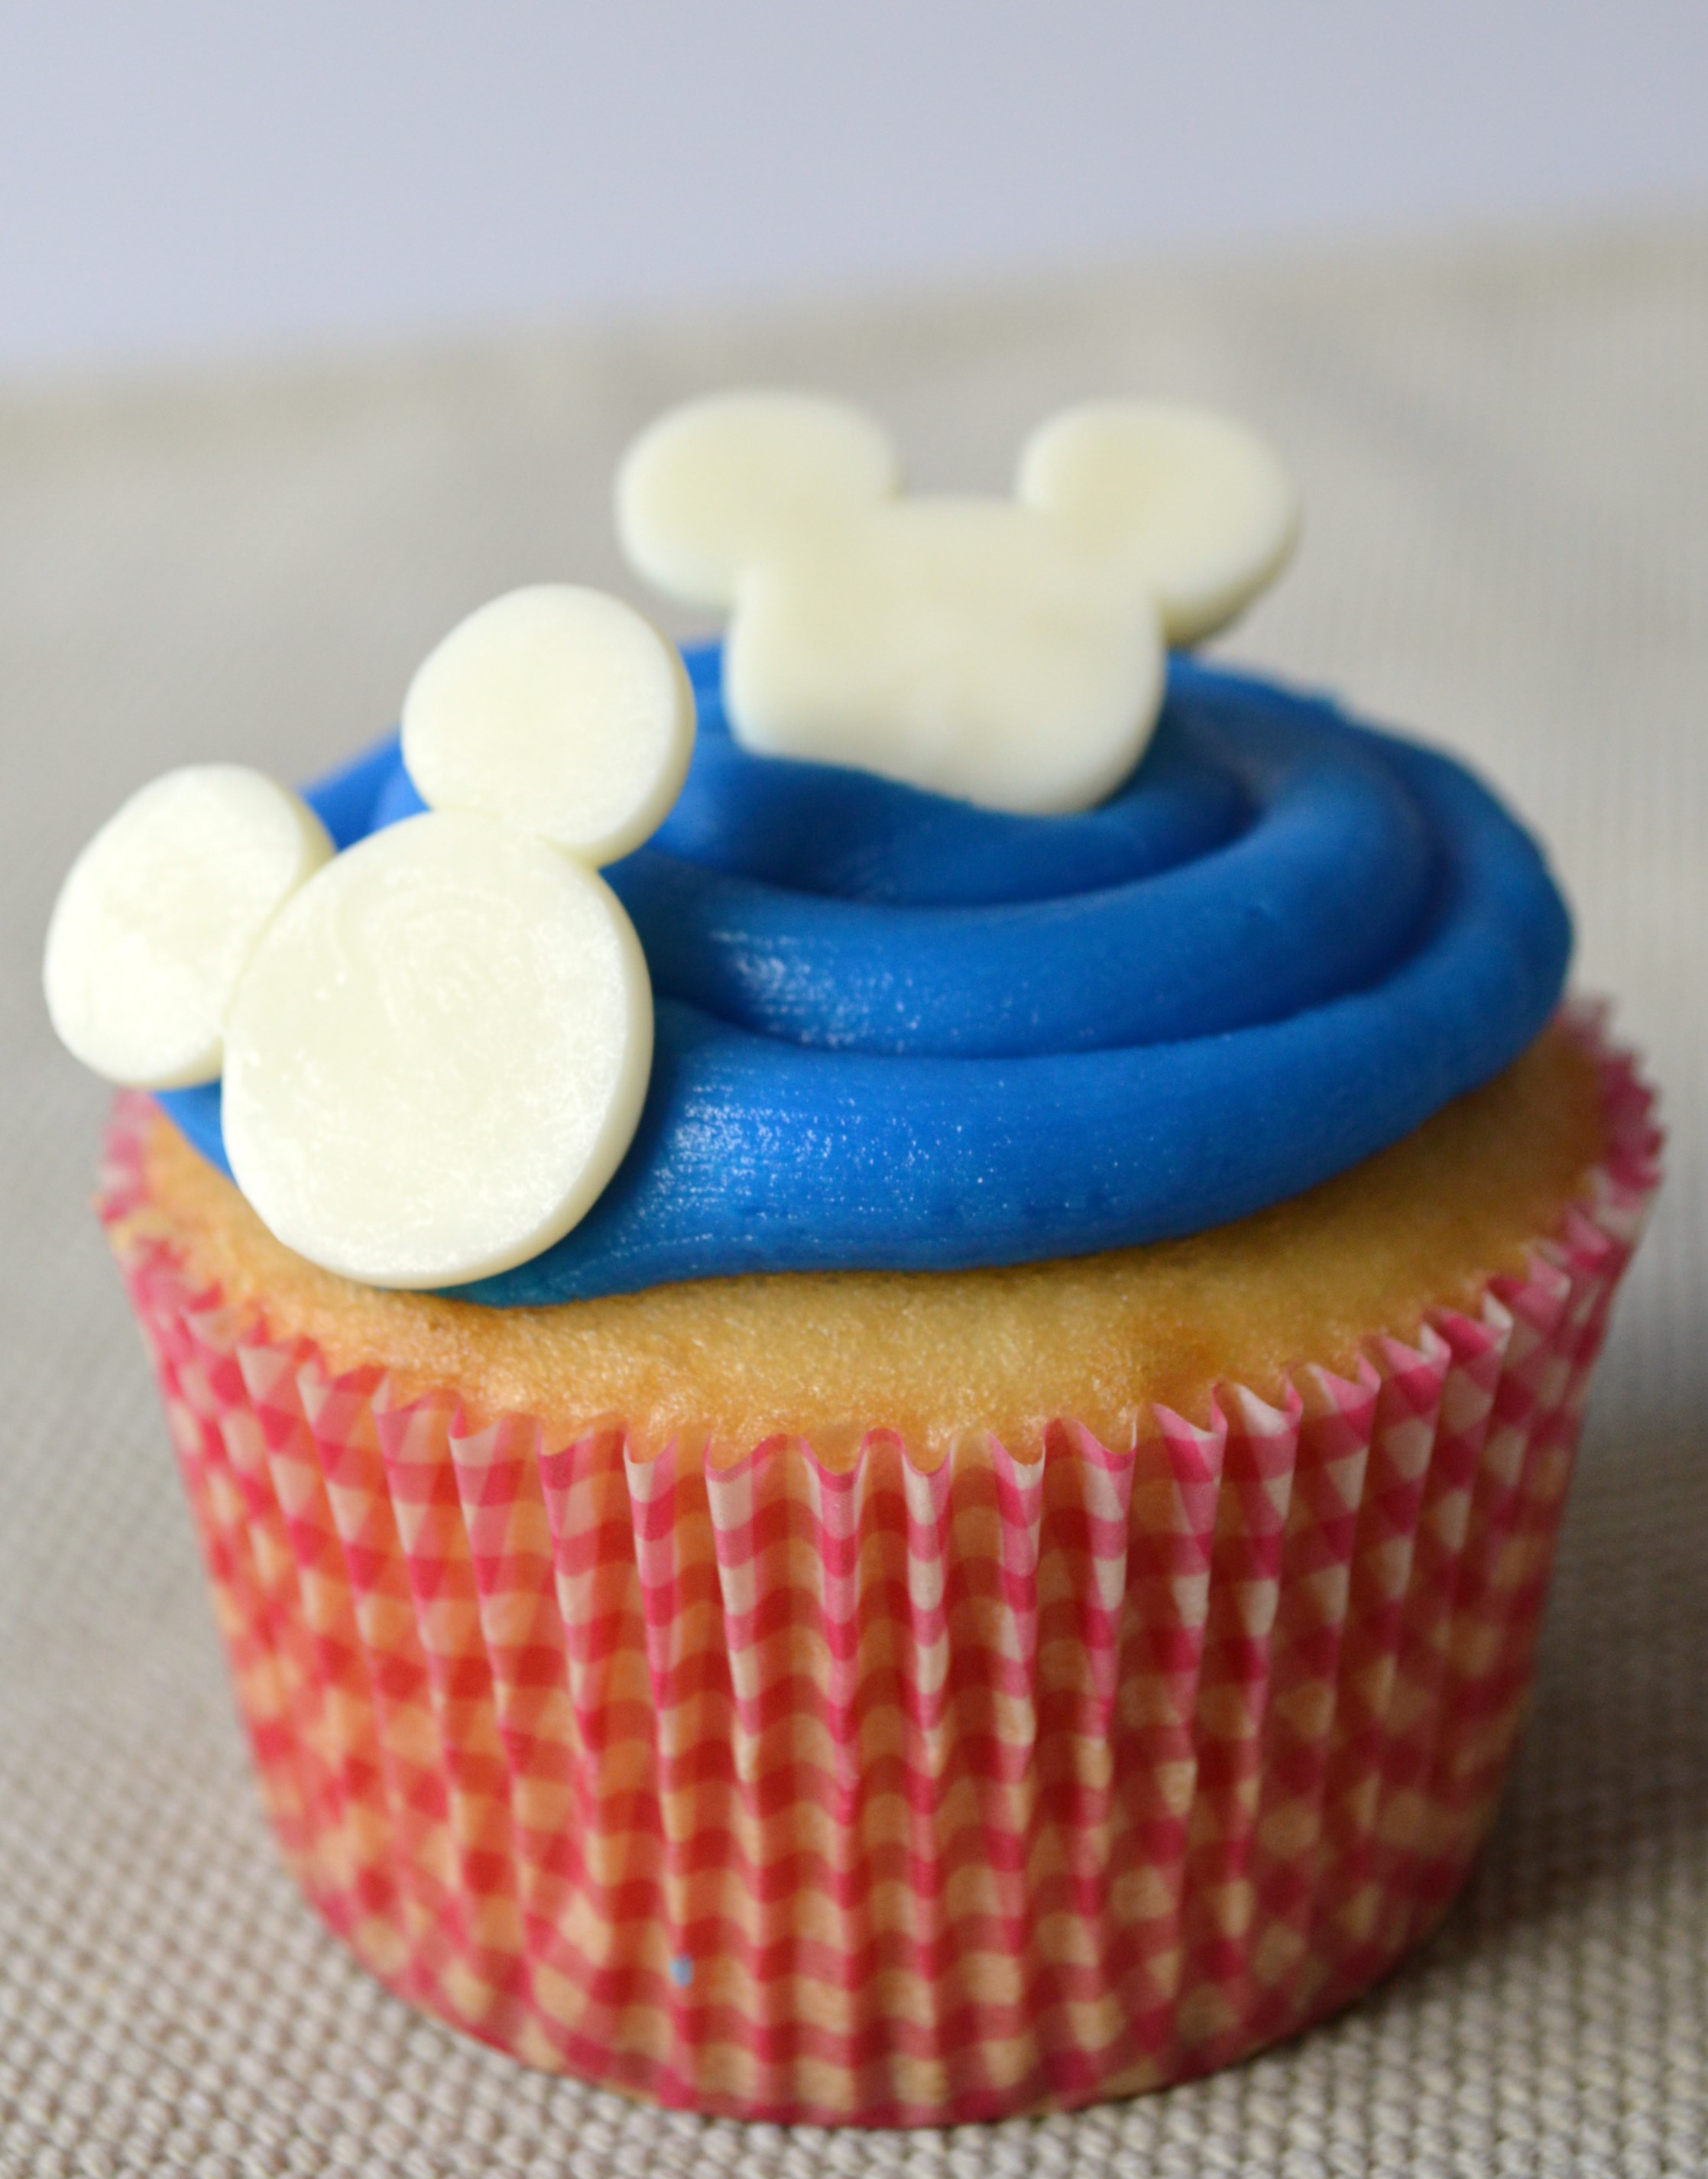
Are you planning a family picnic this Memorial Day Weekend? Add a little Disney magic to a simple cupcake by adding these easy-to-make Mickey Mouse chocolates.

Mickey chocolates

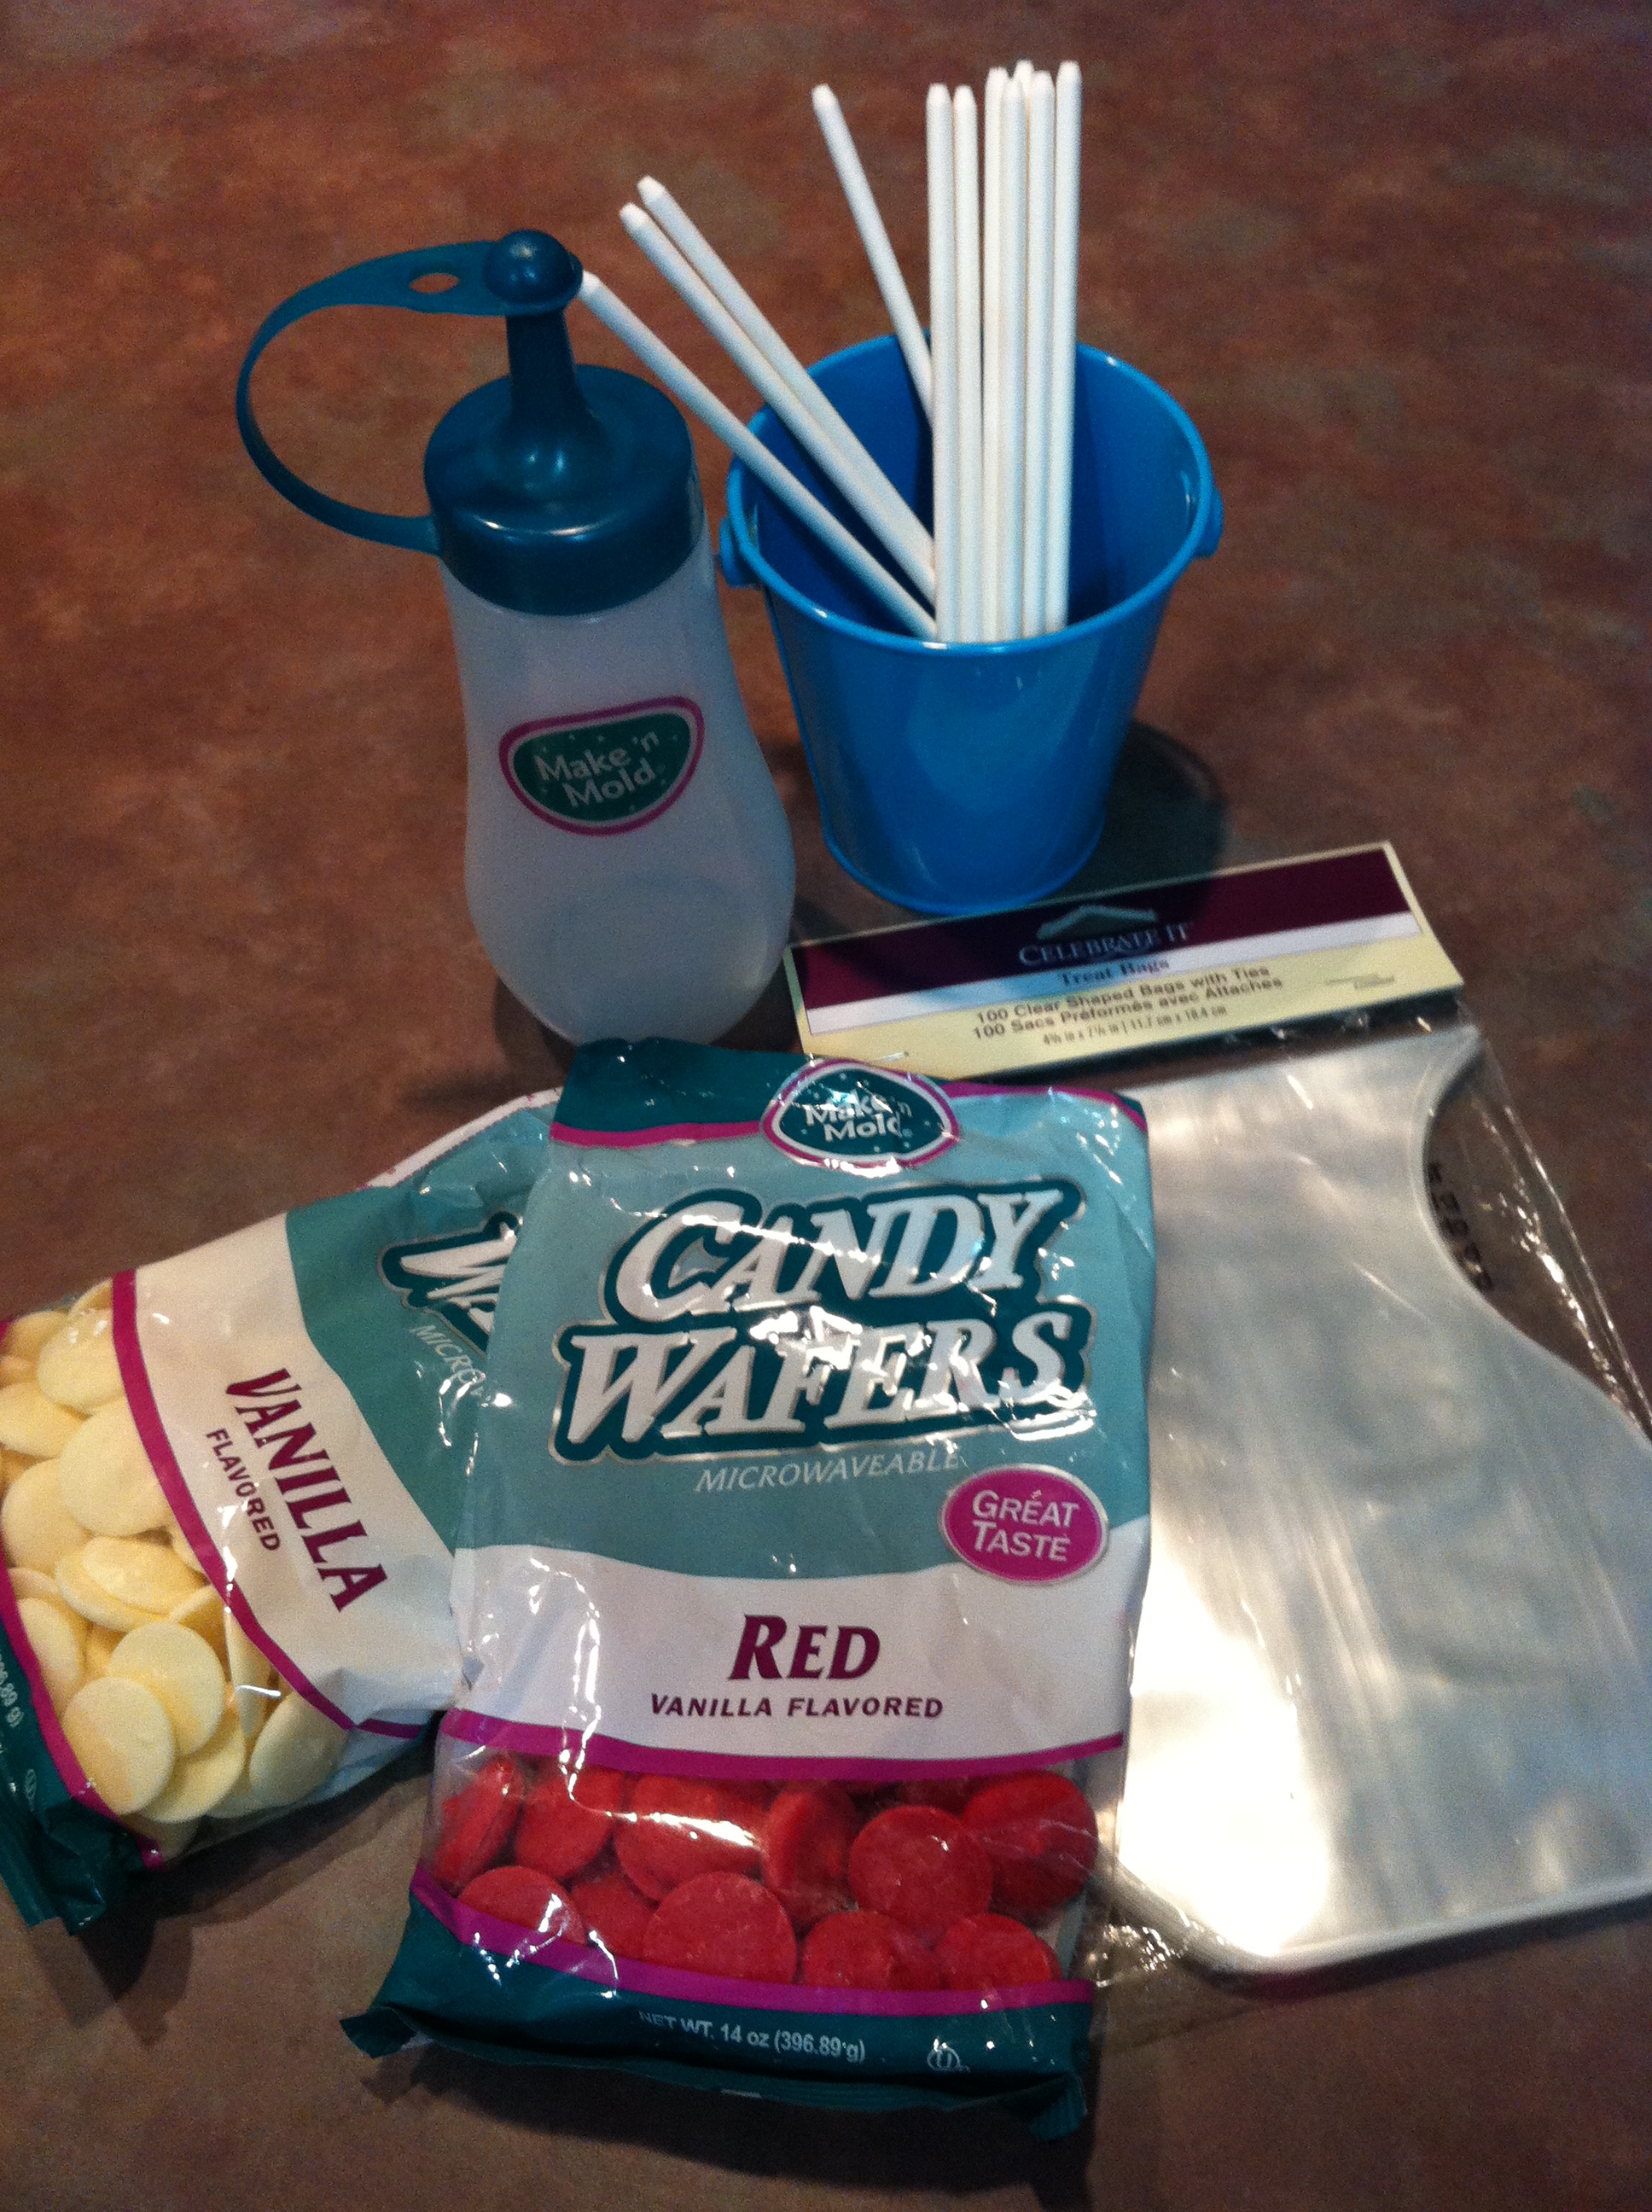
To make these chocolates you’ll need chocolate candy melts, wax paper, a microwave safe squeeze bottle or microwave safe disposable decorating bags and my Mickey Mouse template.

Below is the template that I created with the use of a Mickey Mouse craft punch.  Print it out to get started!

Mickey Mouse chocolates template

Mickey chocolates 010

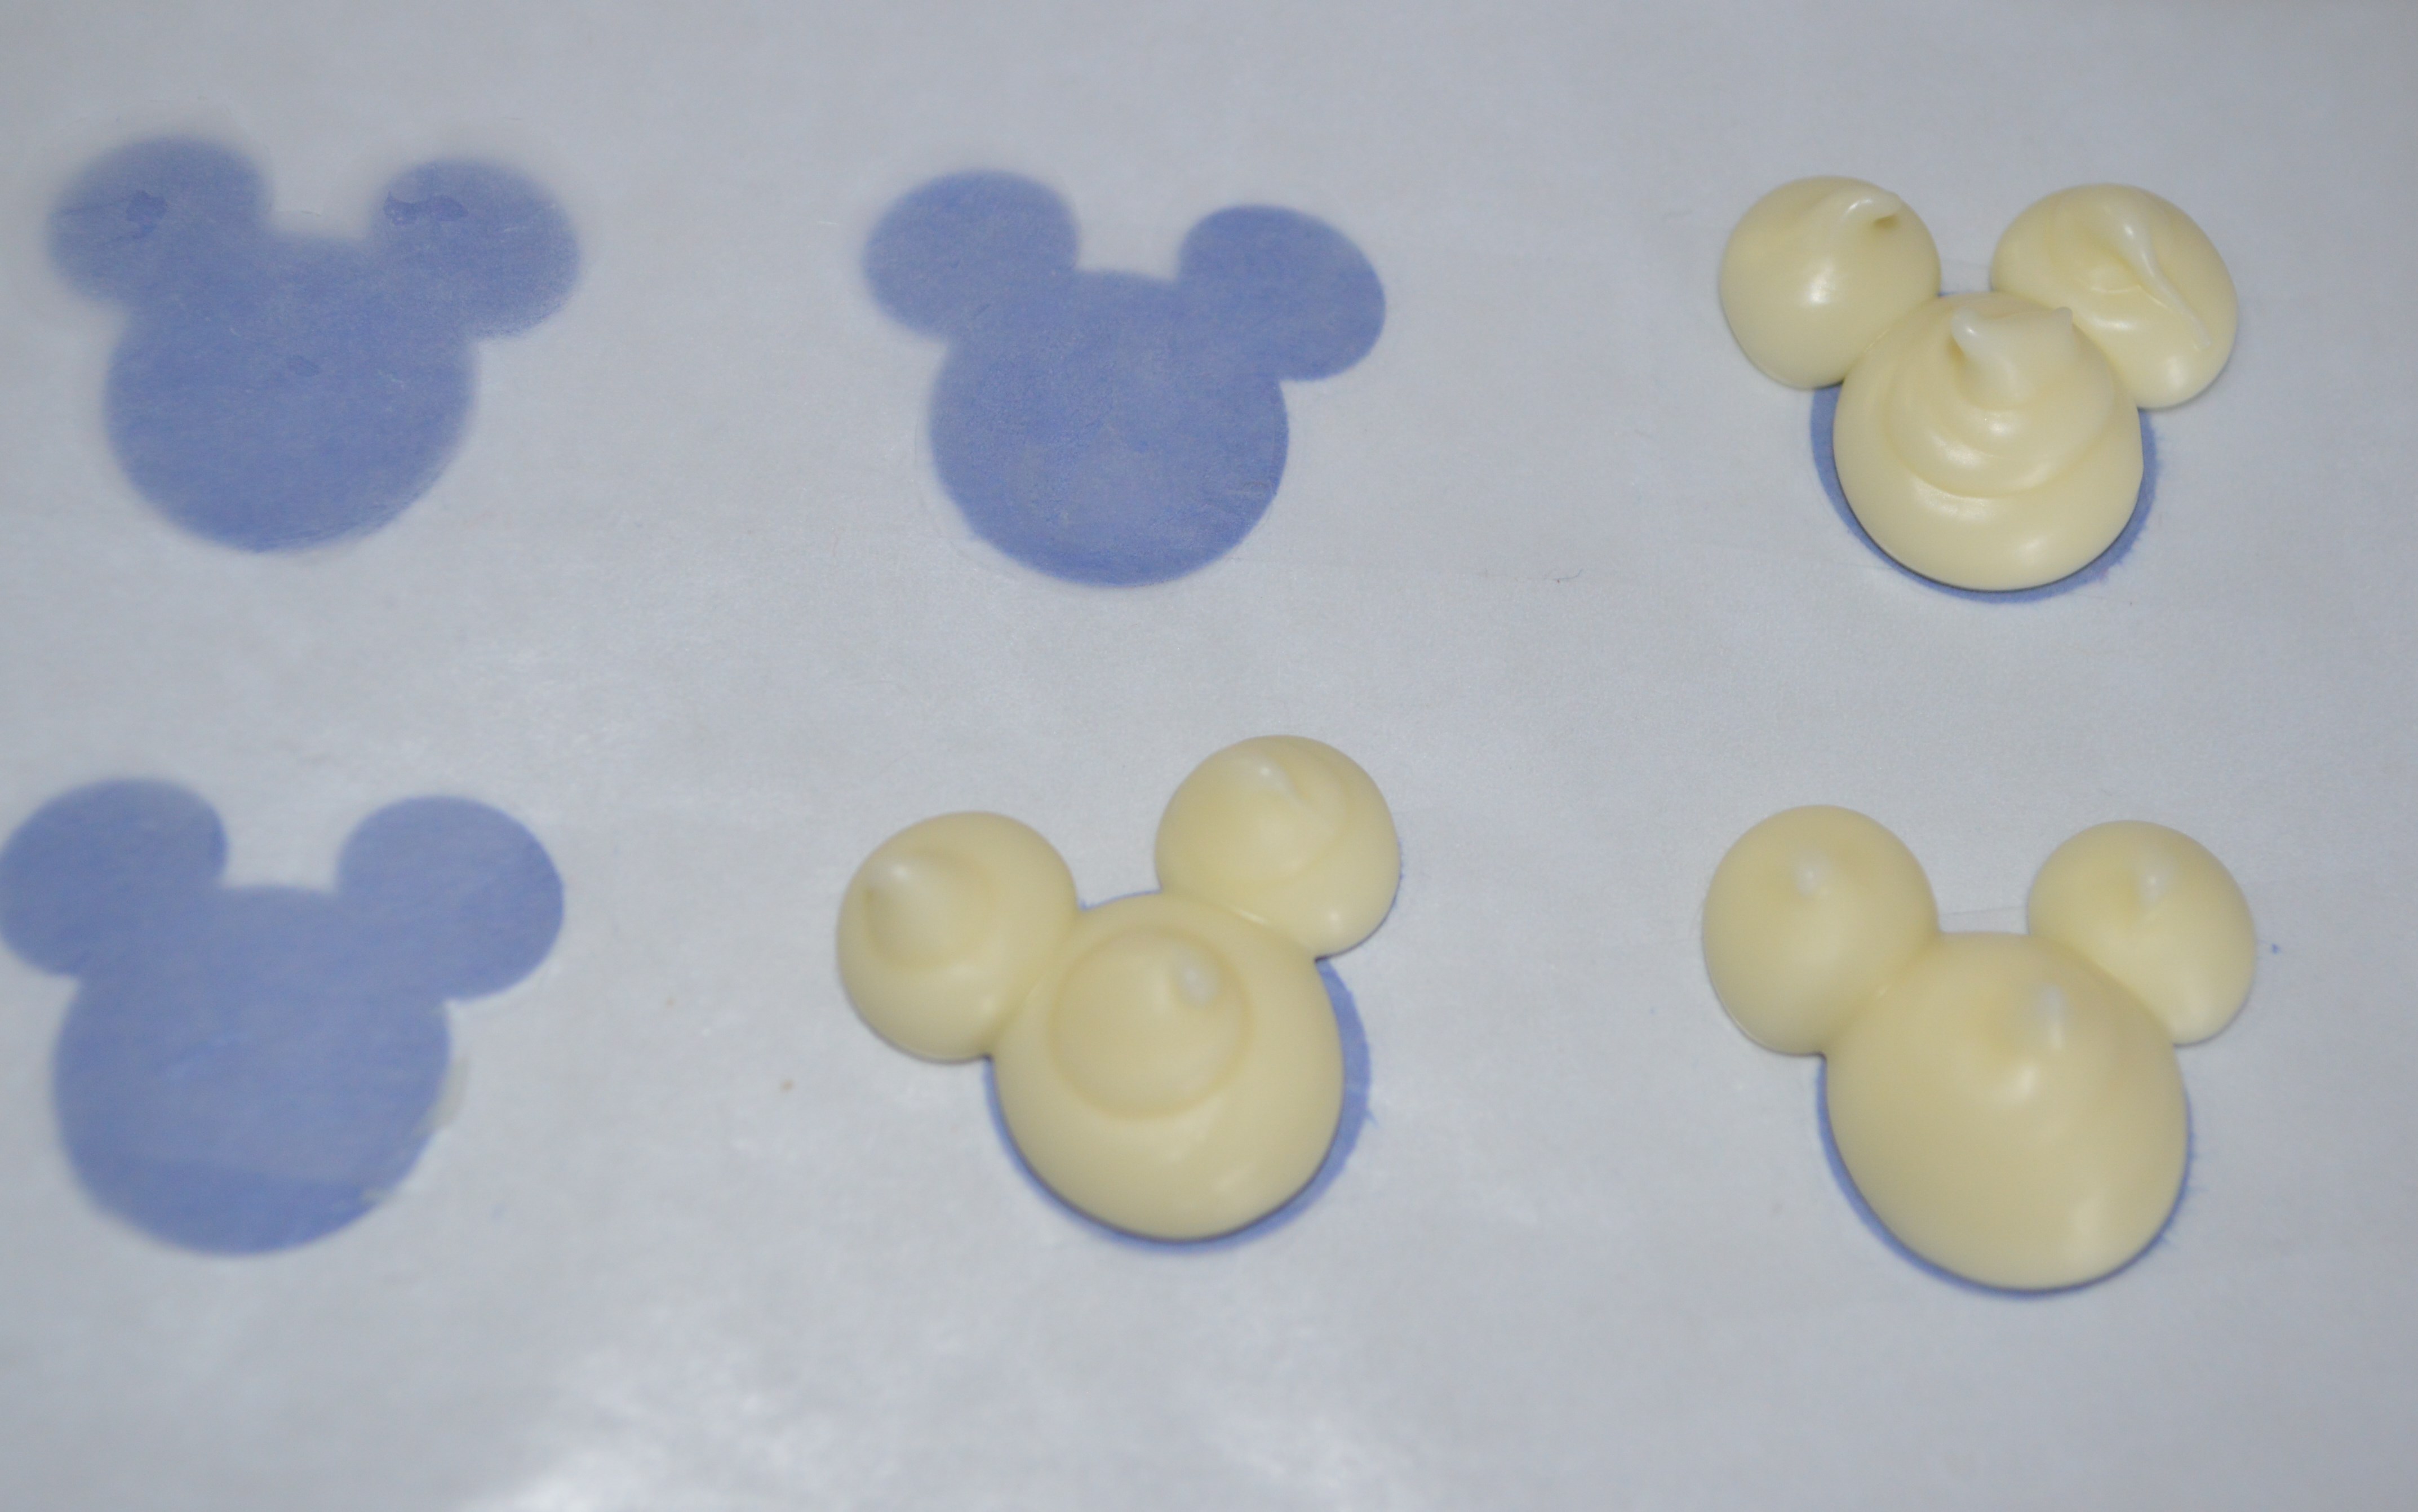
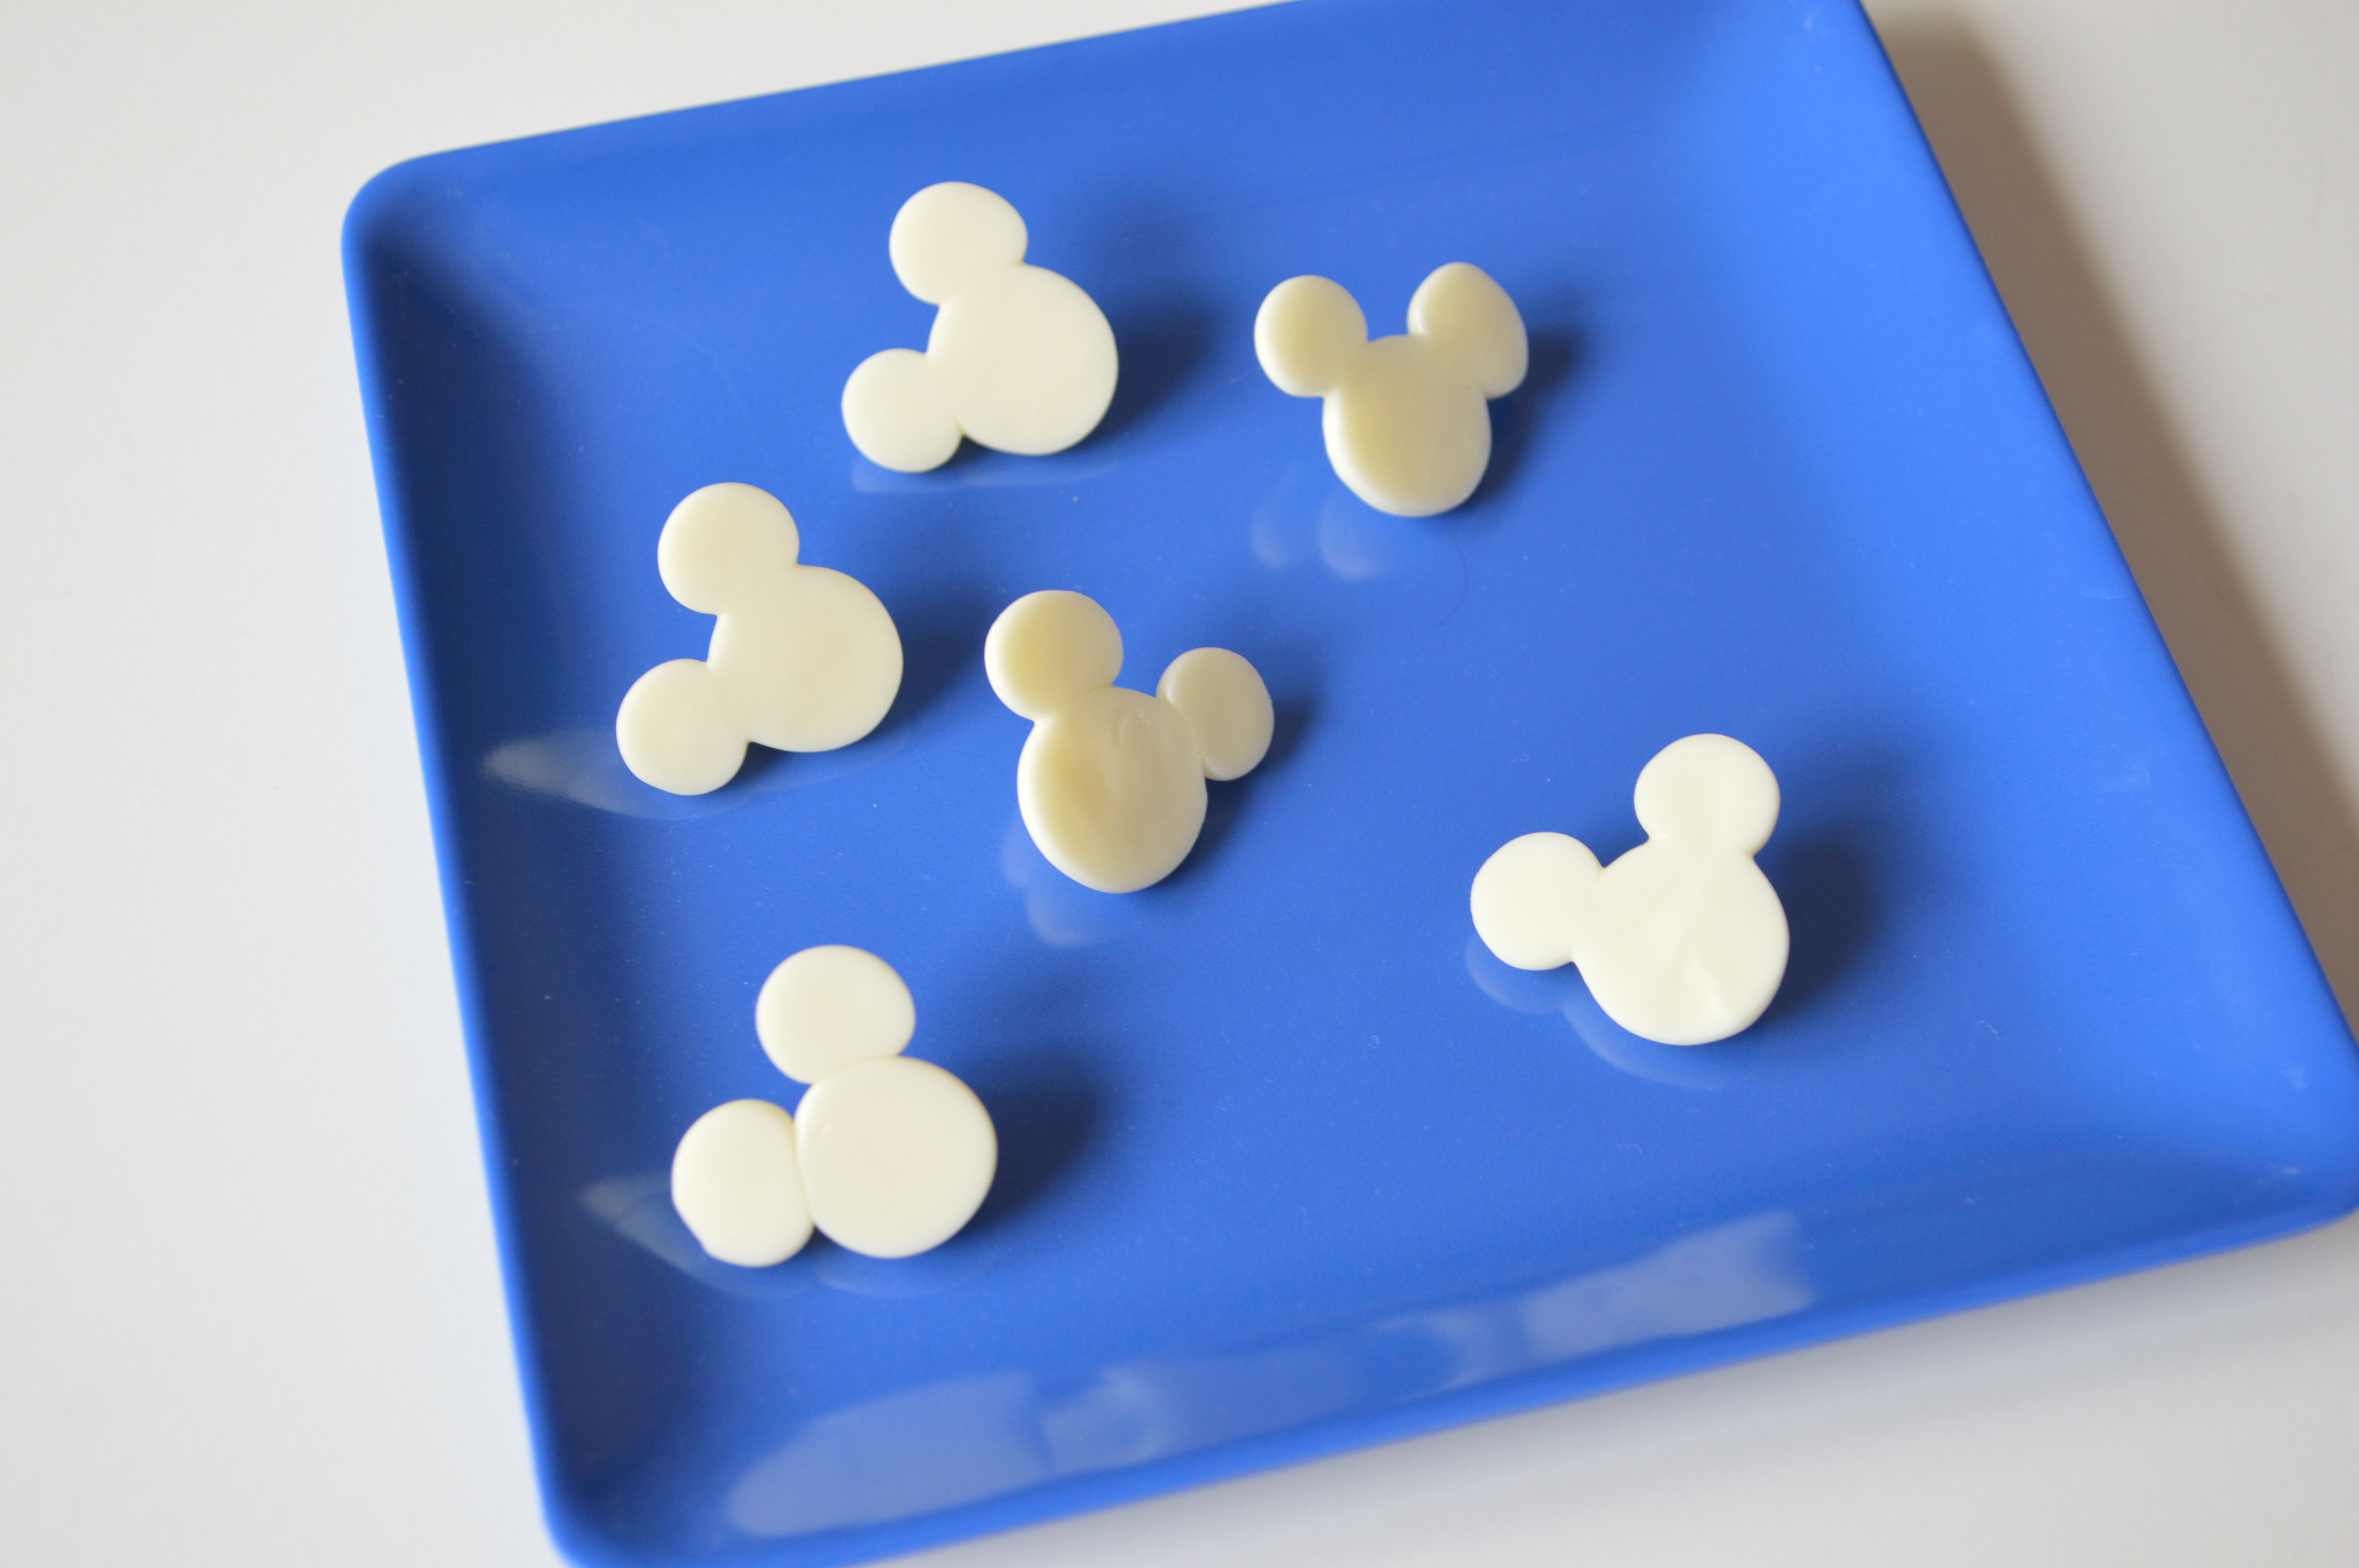
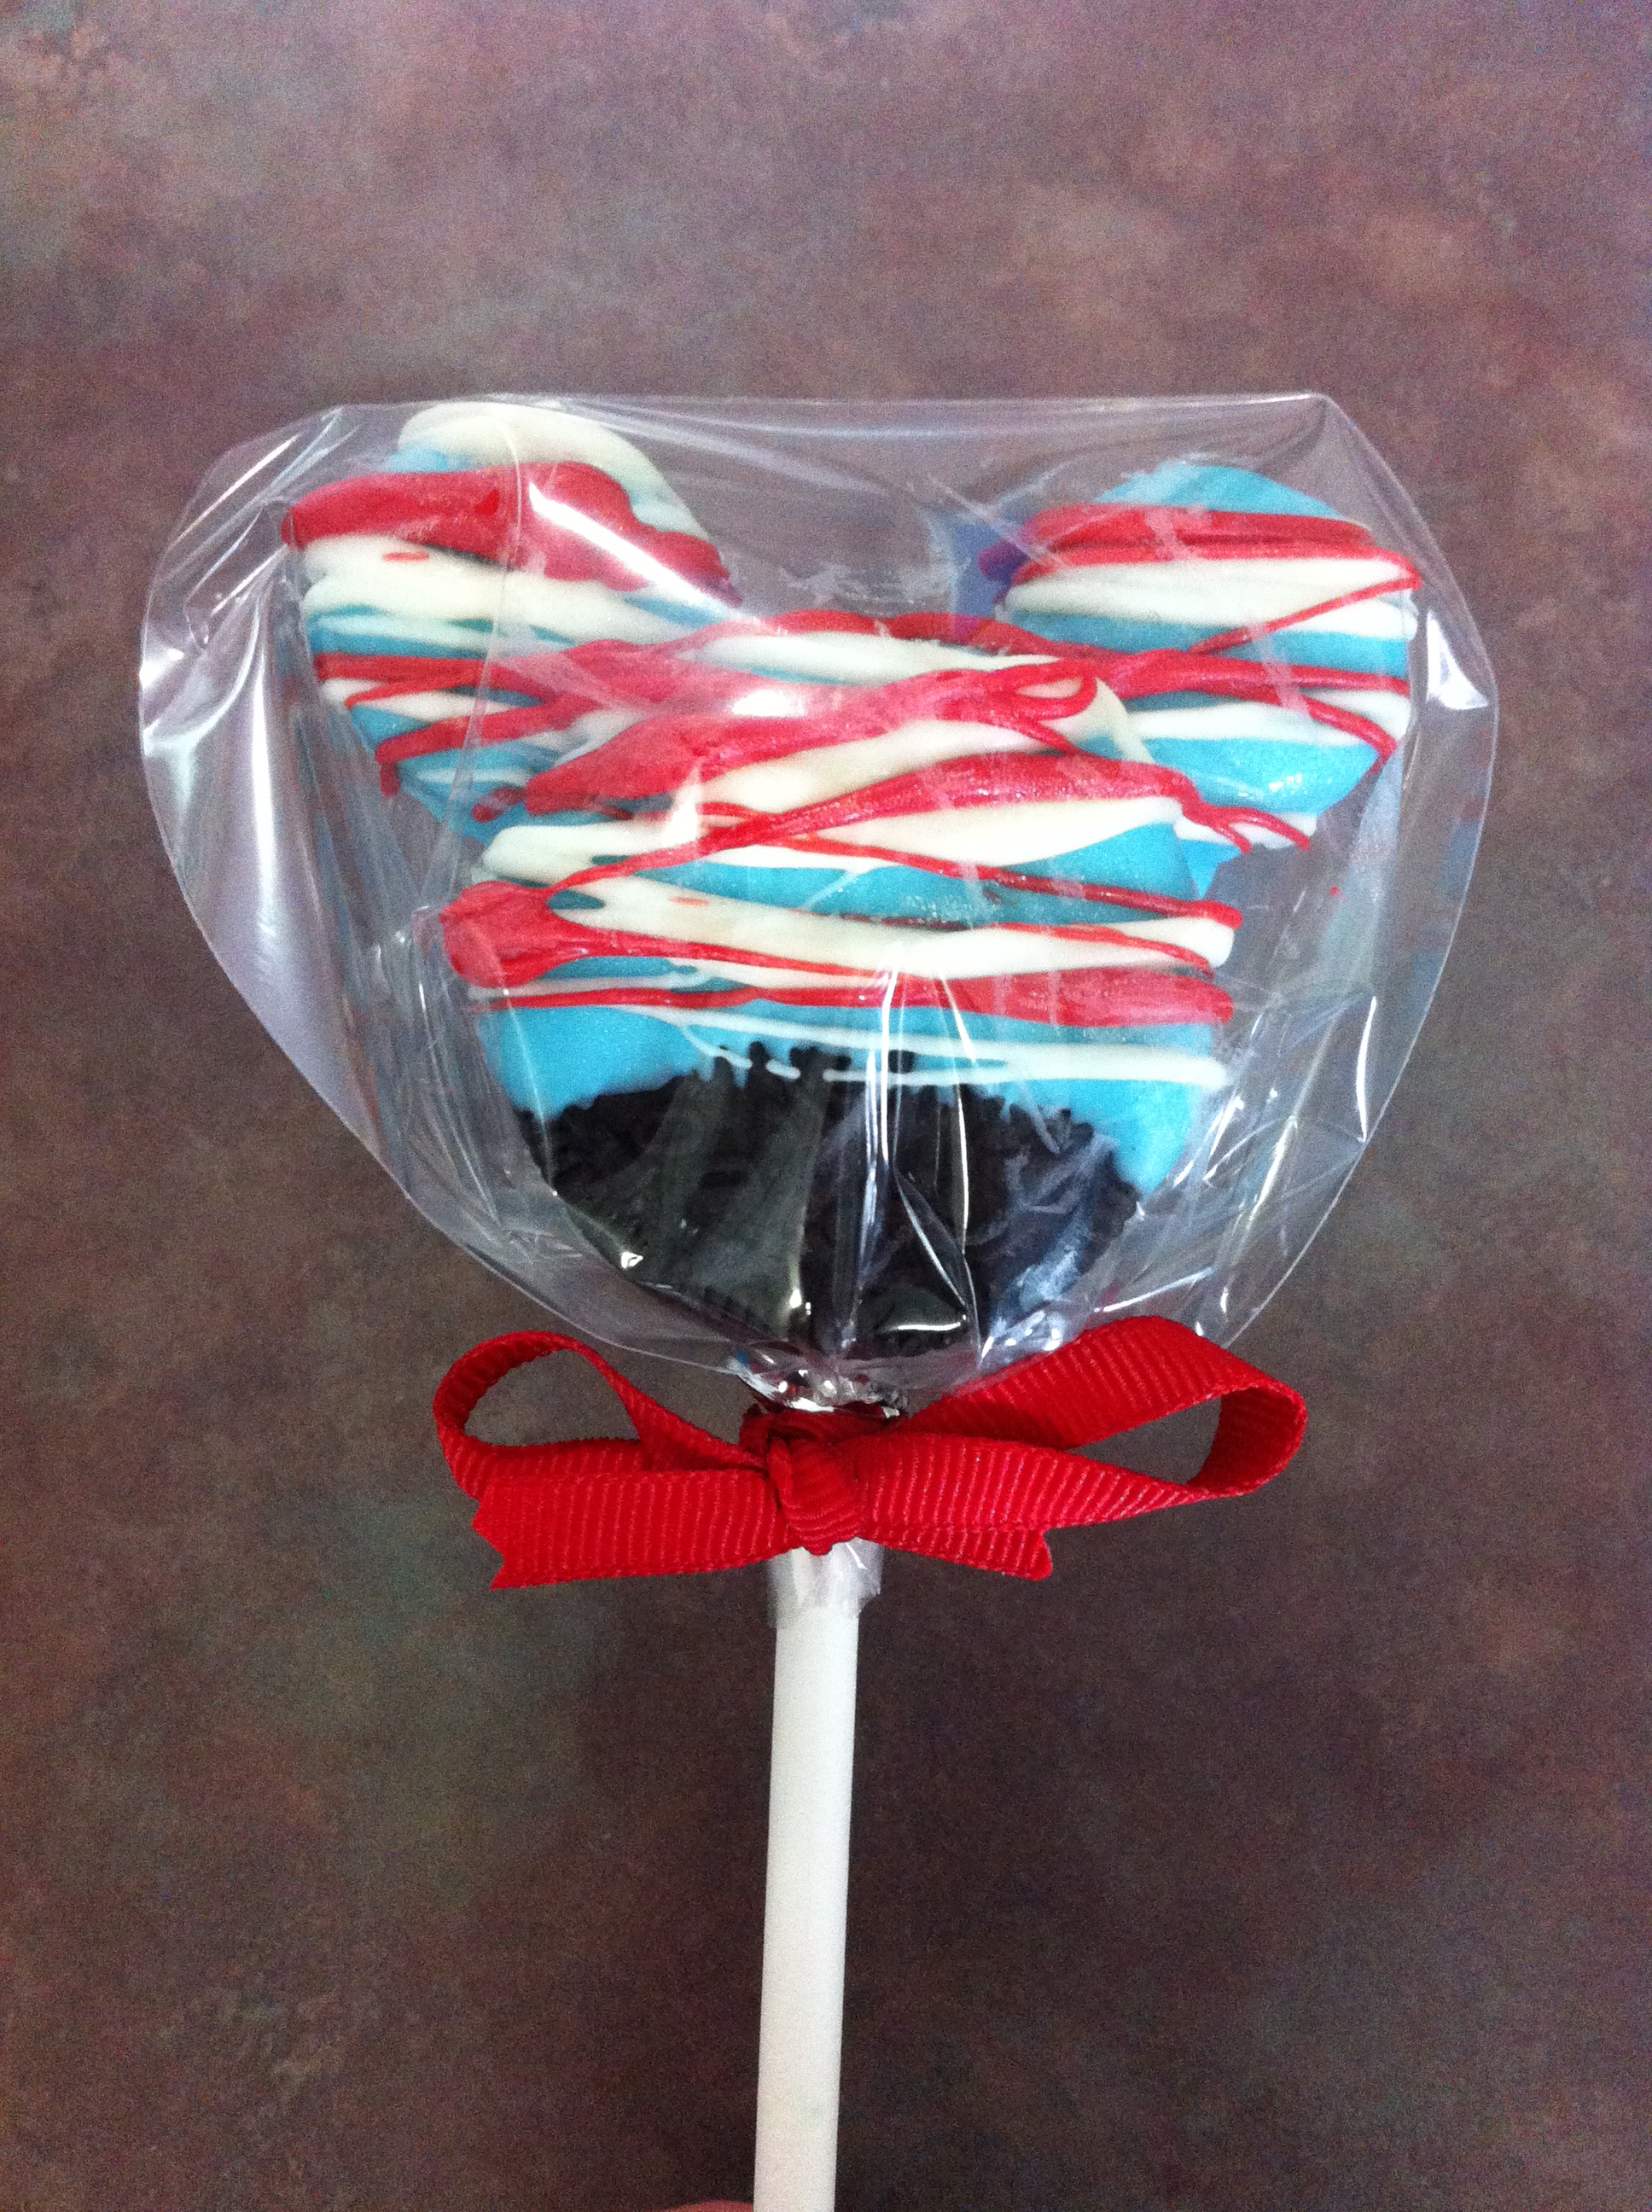
Using the template underneath a sheet of wax paper makes creating Mickey Mouse candies a breeze.  Simply melt the chocolate in the squeeze bottle or in your decorating bag, snip a small hole at the end and then cover the blue Mickey heads with chocolate. Once the chocolate has cooled, flip them over and your miniature Mickeys are ready to magically transform your cupcakes!

One important tip to make your candies fabulous ~ do not try to trace the Mickey head to create the candy.  This will give the candies bubbles on the back side, instead of the smooth finish you see on the candies pictured on the blue plate.  Instead, apply chocolate in the center of the large circle until it fills the entire circle.  Follow with adding the ears by applying chocolate again in the center of one ear until it fills the ear and then complete Mickey by adding his last ear.  Talk about easy!

Mickey chocolates 023

Have a Magical Monday everyone!


Teaching at Disney: Top 10 American History Hot Spots at Walt Disney World

Photographer: Nat Warren


Regardless of when you decide to vacation at The Walt Disney World Resort, there are always great history lessons you can teach your kids while the entire family is having fun.  Below you can find a list of what I believe are the Top 10 American History Hot Spots at Walt Disney World, grouped by theme park.

The Magic Kingdom

  1. The Hall of Presidents– The ultimate American History attraction teaches it’s audience the story of the birth of this nation.  At the end of the film the curtains will reveal all 43 American Presidents together on one stage.
  2. Replicas of the Liberty Bell and Liberty Tree– Found in Liberty Square, the Liberty Bell is an authentic replica of the actual Liberty Bell found in Philadelphia.  The Liberty Tree is over 100 years old and also pays homage to the original 13 colonies.
  3. Liberty Square Riverboat- When riding this authentic three tiered paddlewheel steam boat, guests listen to a narration from Mark Twain as he describes some of America’s historic events.
  4. Walt Disney’s Carousel of Progress– Walt’s Disney’s original New York World’s Fair attraction explores the history of 20th Century technology as it applies to one American household.
  5. Disney’s The Magic Behind Our Steam Trains Tour (10 years old+)- This is a behind the scenes tour (not included in the cost of your daily ticket admission.)  This tour will teach some historical moments in regards to the role trains played in America’s history, but more specifically the tour will teach you about the role that steam trains have played in the history of Walt Disney’s life and the life of Walt Disney World’s Magic Kingdom.

Epcot

6. The American Adventure– This 30 minute show is found in the World Showcase section of Epcot.   Telling the story of America’s history with the use of 35 Audio-Animatronics, it is an experience you won’t forget!

7. American Heritage Gallery– This exhibit, also found in World Showcase, tells the history of  African American achievements over the past 400 years.

Disney Hollywood Studios

8. The Great Movie Ride– This ride on attraction tells the great story of American film.

9. Walt Disney- One Man’s Dream – This “walk at your own pace” attraction showcases the life story of someone who lived the American Dream, Walt Disney.

The Wilderness Lodge Resort (located in the Magic Kingdom Resort Area)

10. Disney’s Wilderness Lodge Tour–  Although this tour is technically for guests of Disney’s Wilderness Lodge .  I have heard that if you are within the resort during the start of this free tour, you will not be turned away.  The tour will give you a detailed look at the resort and explain the story that the building tells about Native American History.

The next time you visit The Walt Disney World Resort I hope that you take the time to experience these American history hot spots.  Your children will return to school ready to write a history report and you never know, you might learn something about America’s amazing history too!

Patriotic Mickey Pops

Patriotic Mickey Pops

Showing American Pride Couldn’t Be Sweeter!

My sister-in-law’s birthday is on July 4th.  She’s a big Mickey fan and her FAVORITE cookie is Double Stuffed Oreos. I think that these patriotic Mickey pops will be a perfect birthday treat for her…so shhh, don’t tell her that I made these for her!

If you’d like to make these yummy treats, below is a short tutorial for you to use:

  1. Gather susome suppliespplies: red, white and blue candy melts, cookie lollipop sticks, regular size Oreos as well as mini Oreos, melting cups to use for dipping (I use a 4 cup Pyrex glass measuring cup), squeeze bottles for drizzling, wax paper,  cookie sheets and candy wrapper bags.  I used the large size candy bags that are pictured to the right.  When Mickey’s ears are attached, it’s very hard to fit the pop in a smaller bag.
  2. Separate the top from the bottom of the regular size Oreos. Place the cookie, with the filling still attached, on a waxed covered cookie sheet with the filling side facing up.
  3. Melt the white chocolate in a squeeze bottle.  Once melted, pipe a circle of white chocolate on top of the white Oreo filling.  In that circle of chocolate, place your lollipop stick and then place the top of the cookie back on the cookie, pushing very gently (as to not snap the top of the cookie in two…guess who did that like ten times!).  Continue to do this for all of the cookies you’ve placed on your cookie sheet.
  4. Place the cookies with the lollipop sticks in the refrigerator for five minutes.  This will harden the chocolate, acting like glue and secure the sticks for dipping.
  5. While you Mini Oreoswait for the chocolate to harden, lets move on to Mickey’s Ears. Line another cookie sheet with wax paper.  Then melt the red and blue chocolate in microwave safe cups that are suitable for dipping your cookies. Depending on your preference, dip the mini Oreo in either the red or blue chocolate.  I chose to do both and dipped half of my container of cookies in red and the other in blue.  To dip, I tossed the entire mini cookie in the melted chocolate and used a spoon to take it out, letting the extra chocolate slowly drip off of the cookie’s side, then placed on the cookie sheet.  When finished with them all, place them in the refrigerator and take out your regular size Oreos with the sticks.
  6. A bit less chocolate for the little Mouseketeers.
    A bit less chocolate for the little Mouseketeers.

    Dip the full size Oreos in the remaining red and blue chocolate, and place back on the cookie sheet. Once you’ve completed them all, take the mini Oreos out of the refrigerator, dip the edge of them one more time in their coordinating color and attach them to the full size cookie.  To help everything set, place them back in the refrigerator for another five minutes.  SPECIAL NOTE: To the left I have a picture of what it looks like if you chose to only dip half way.  I did this for my little Mouseketeers, that of course want to try them too!  It’s a touch less chocolate than the full dip and therefore not as heavy on little tummy’s.

  7. Once the ears are set, the drizzling starts!  A quick back and forth motion works well.  You could use a spoon to drizzle your remaining red and blue chocolate or as I did, drizzle white first with my squeeze bottle; let them set for a few minutes, then reused my bottle for the remaining color.
  8. Last but not least, wrap each pop in a candy bag and tie it shut.  Place all of your Patriotic Mickey pops in an air tight container and keep the container in a cool location.

Happy 4th of July Everyone!


Mickey Americana Pennant

Mickey Americana
“You’re a Grand Mickey Flag…”

Here’s a fun Mickey inspired way to celebrate Independence Day!  Below you will find the five easy steps, with photos, to make this pennant just in time for your 4th of July party.

Supplies1. Gather all your supplies.  You’ll need, red, white and blue card stock, a pencil, scissors, standard size hole puncher,  a Mickey Mouse craft punch, jute twine and your favorite form of adhesive.


creating patterns
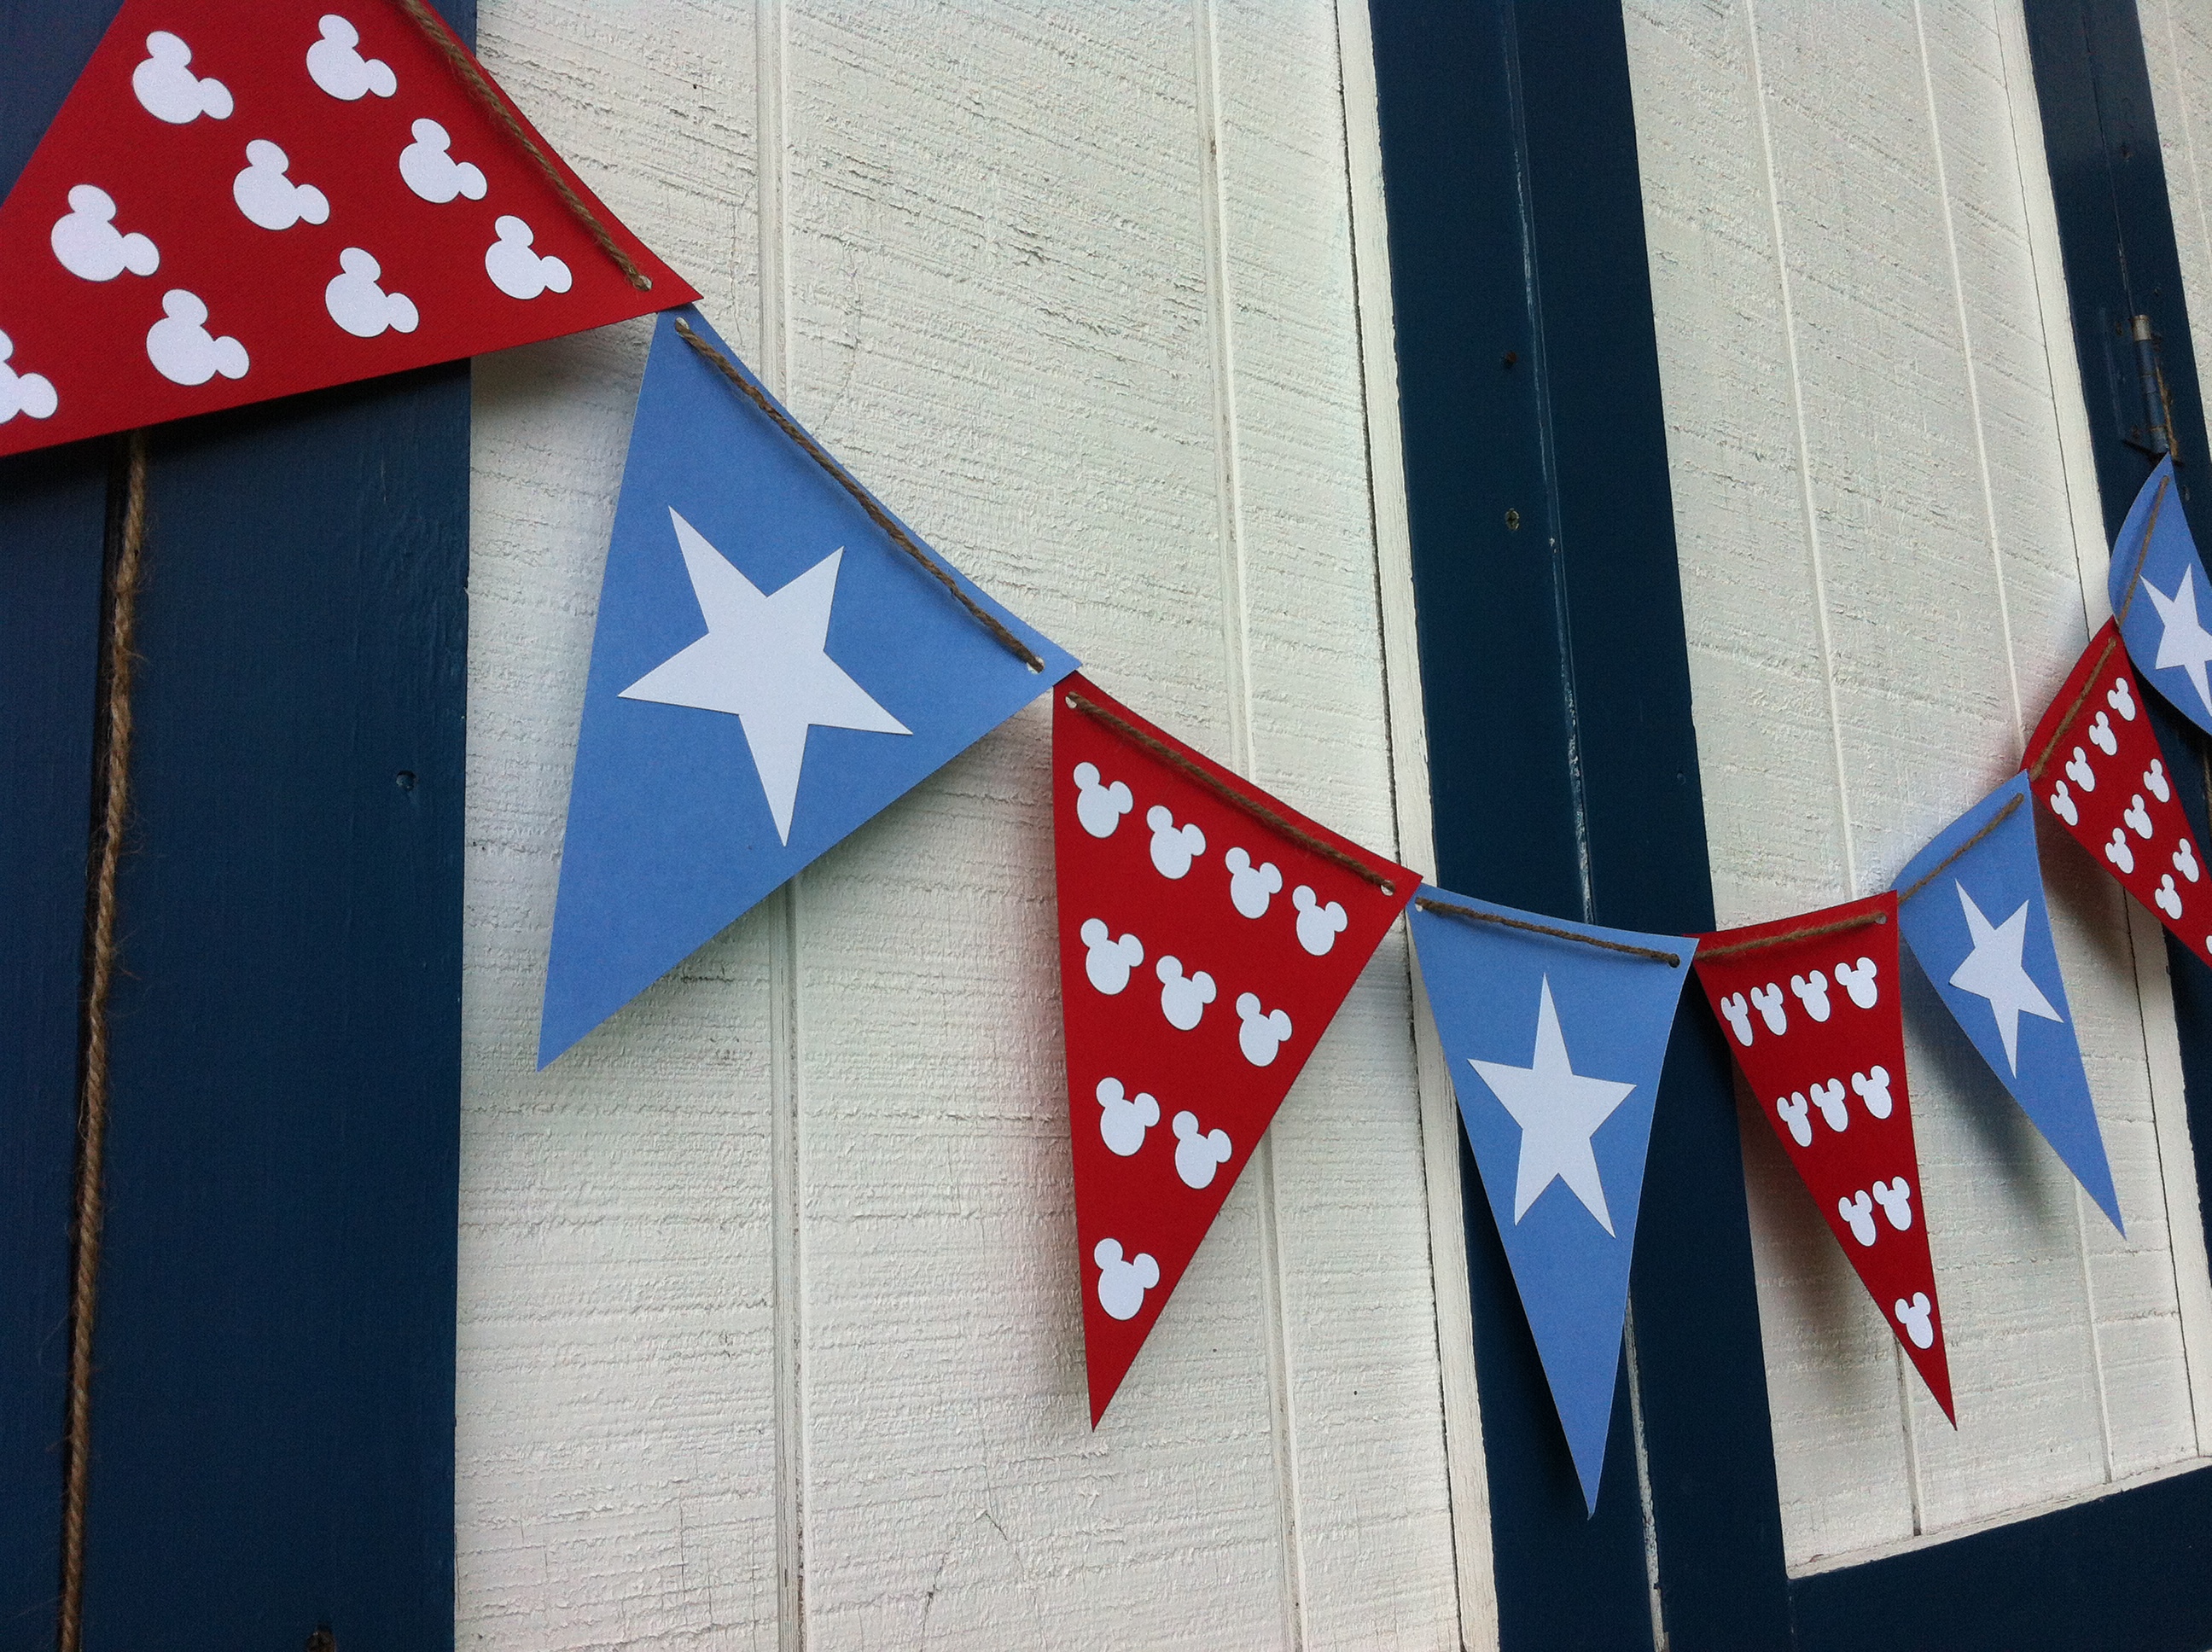
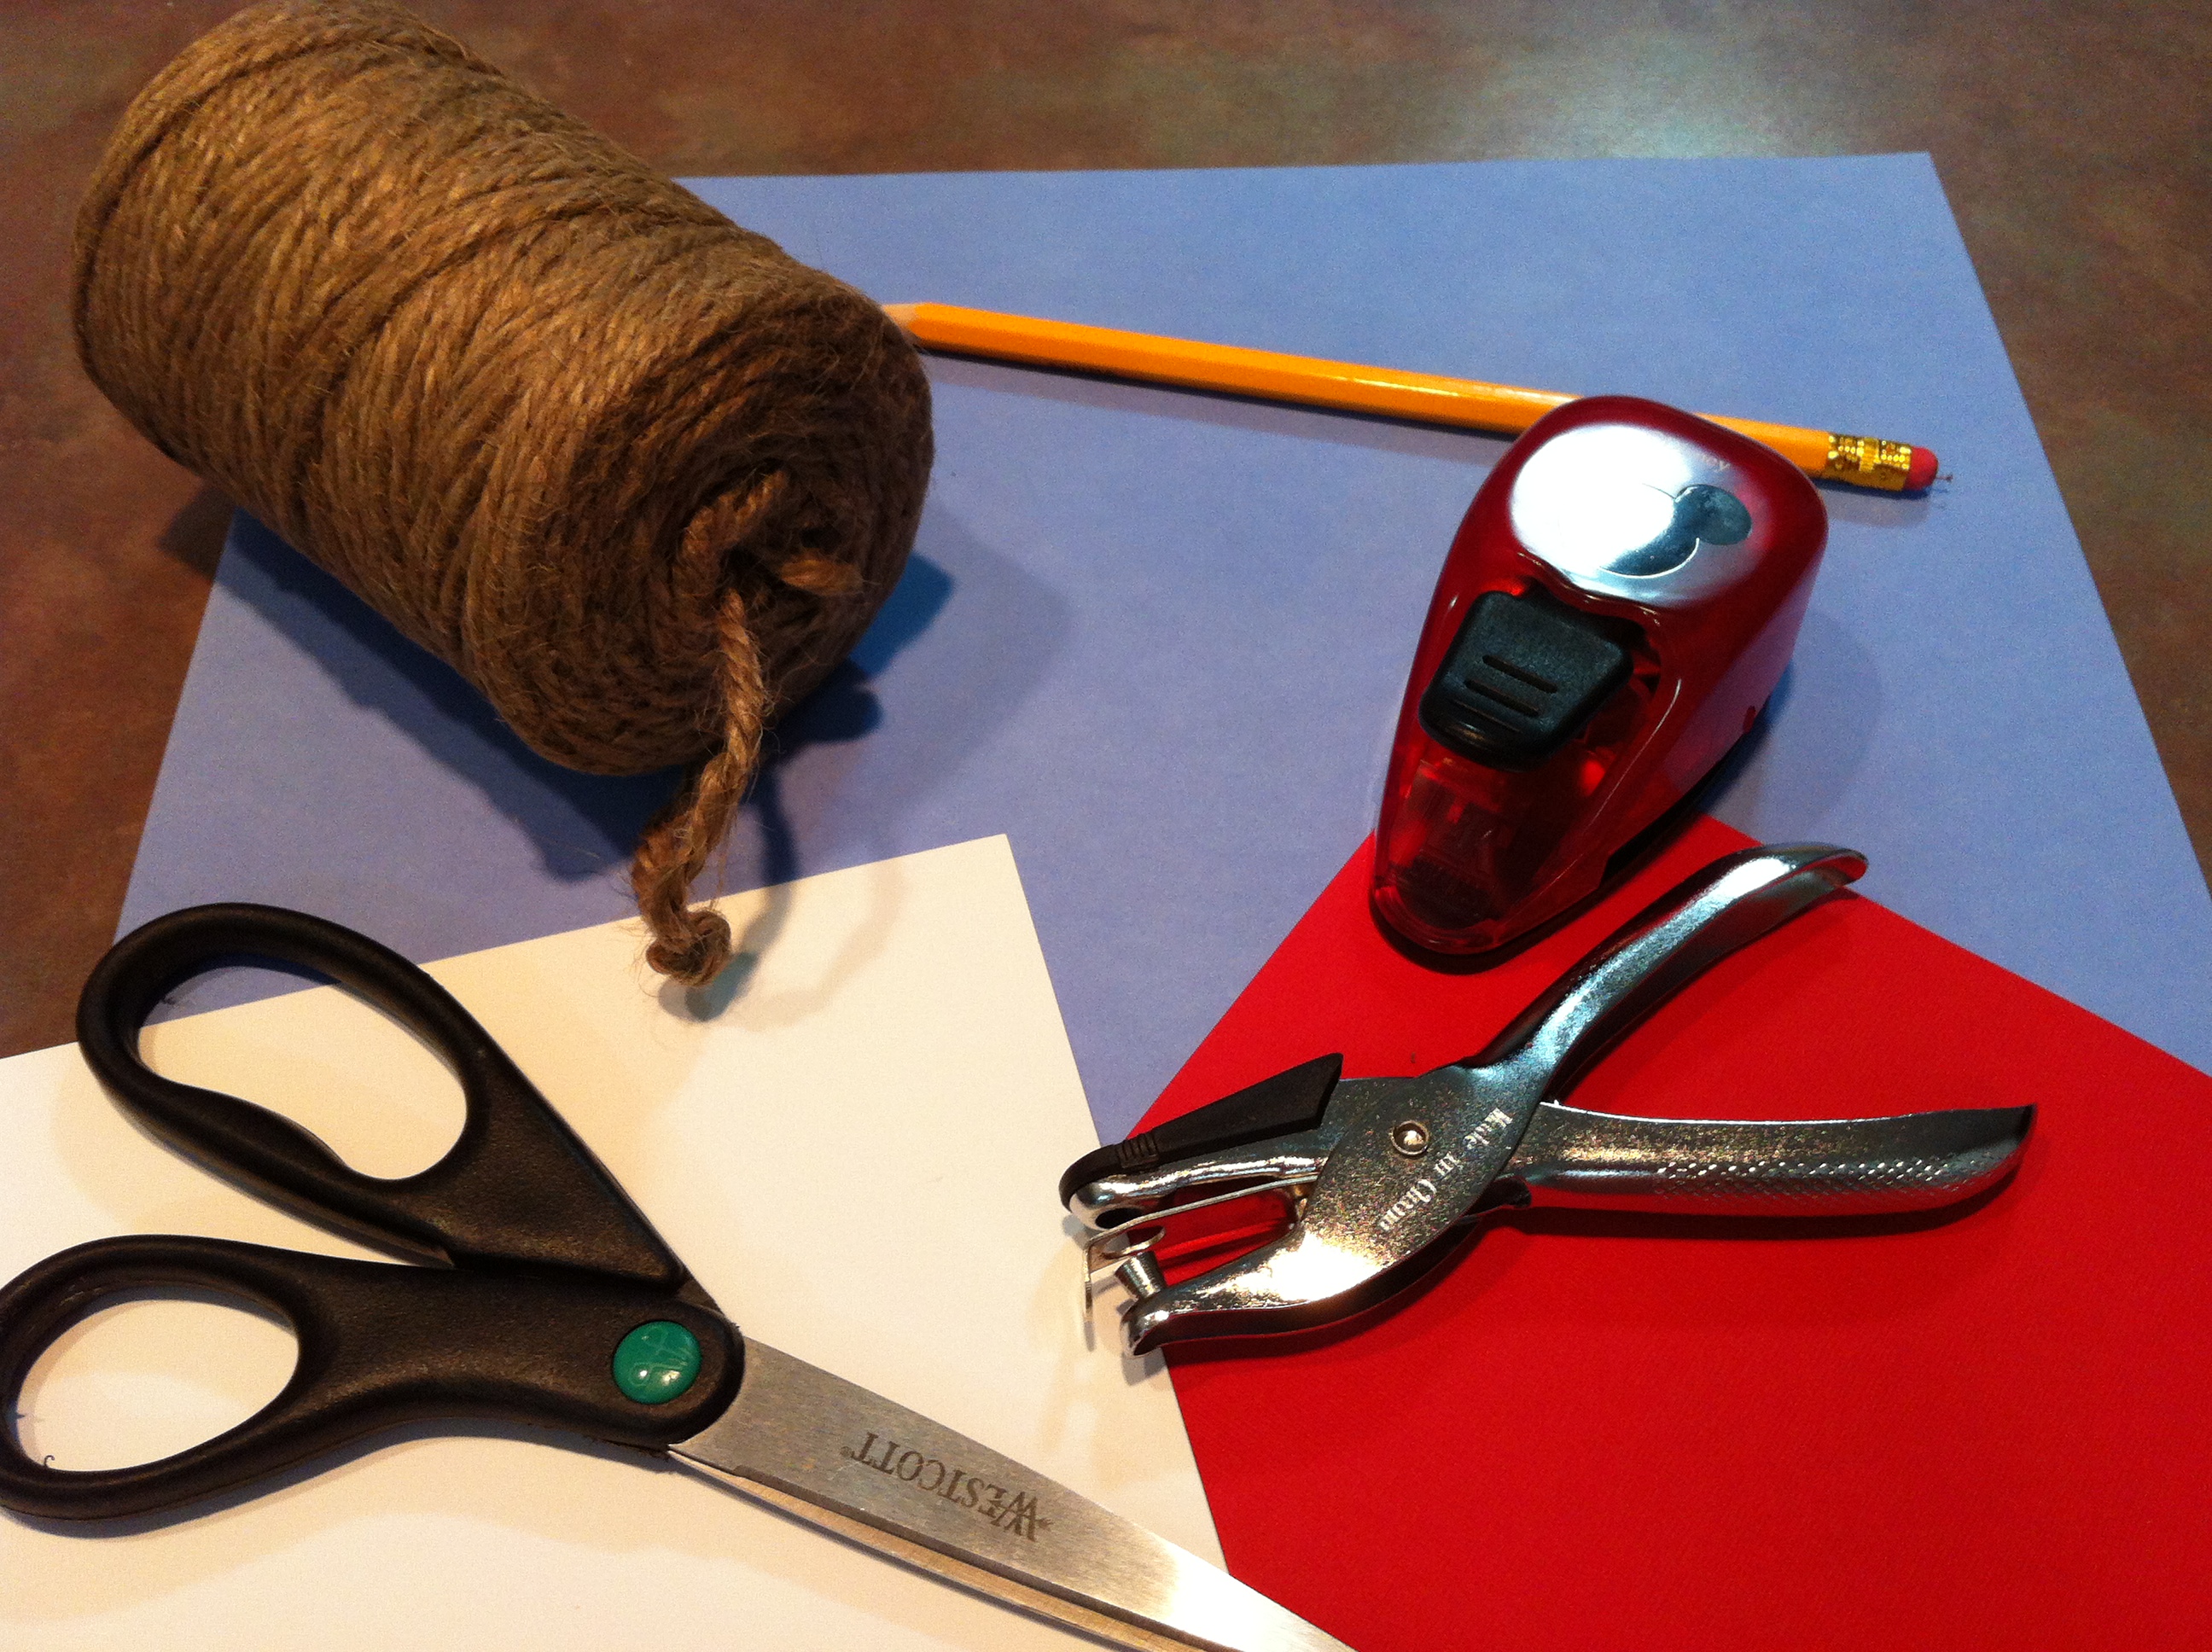
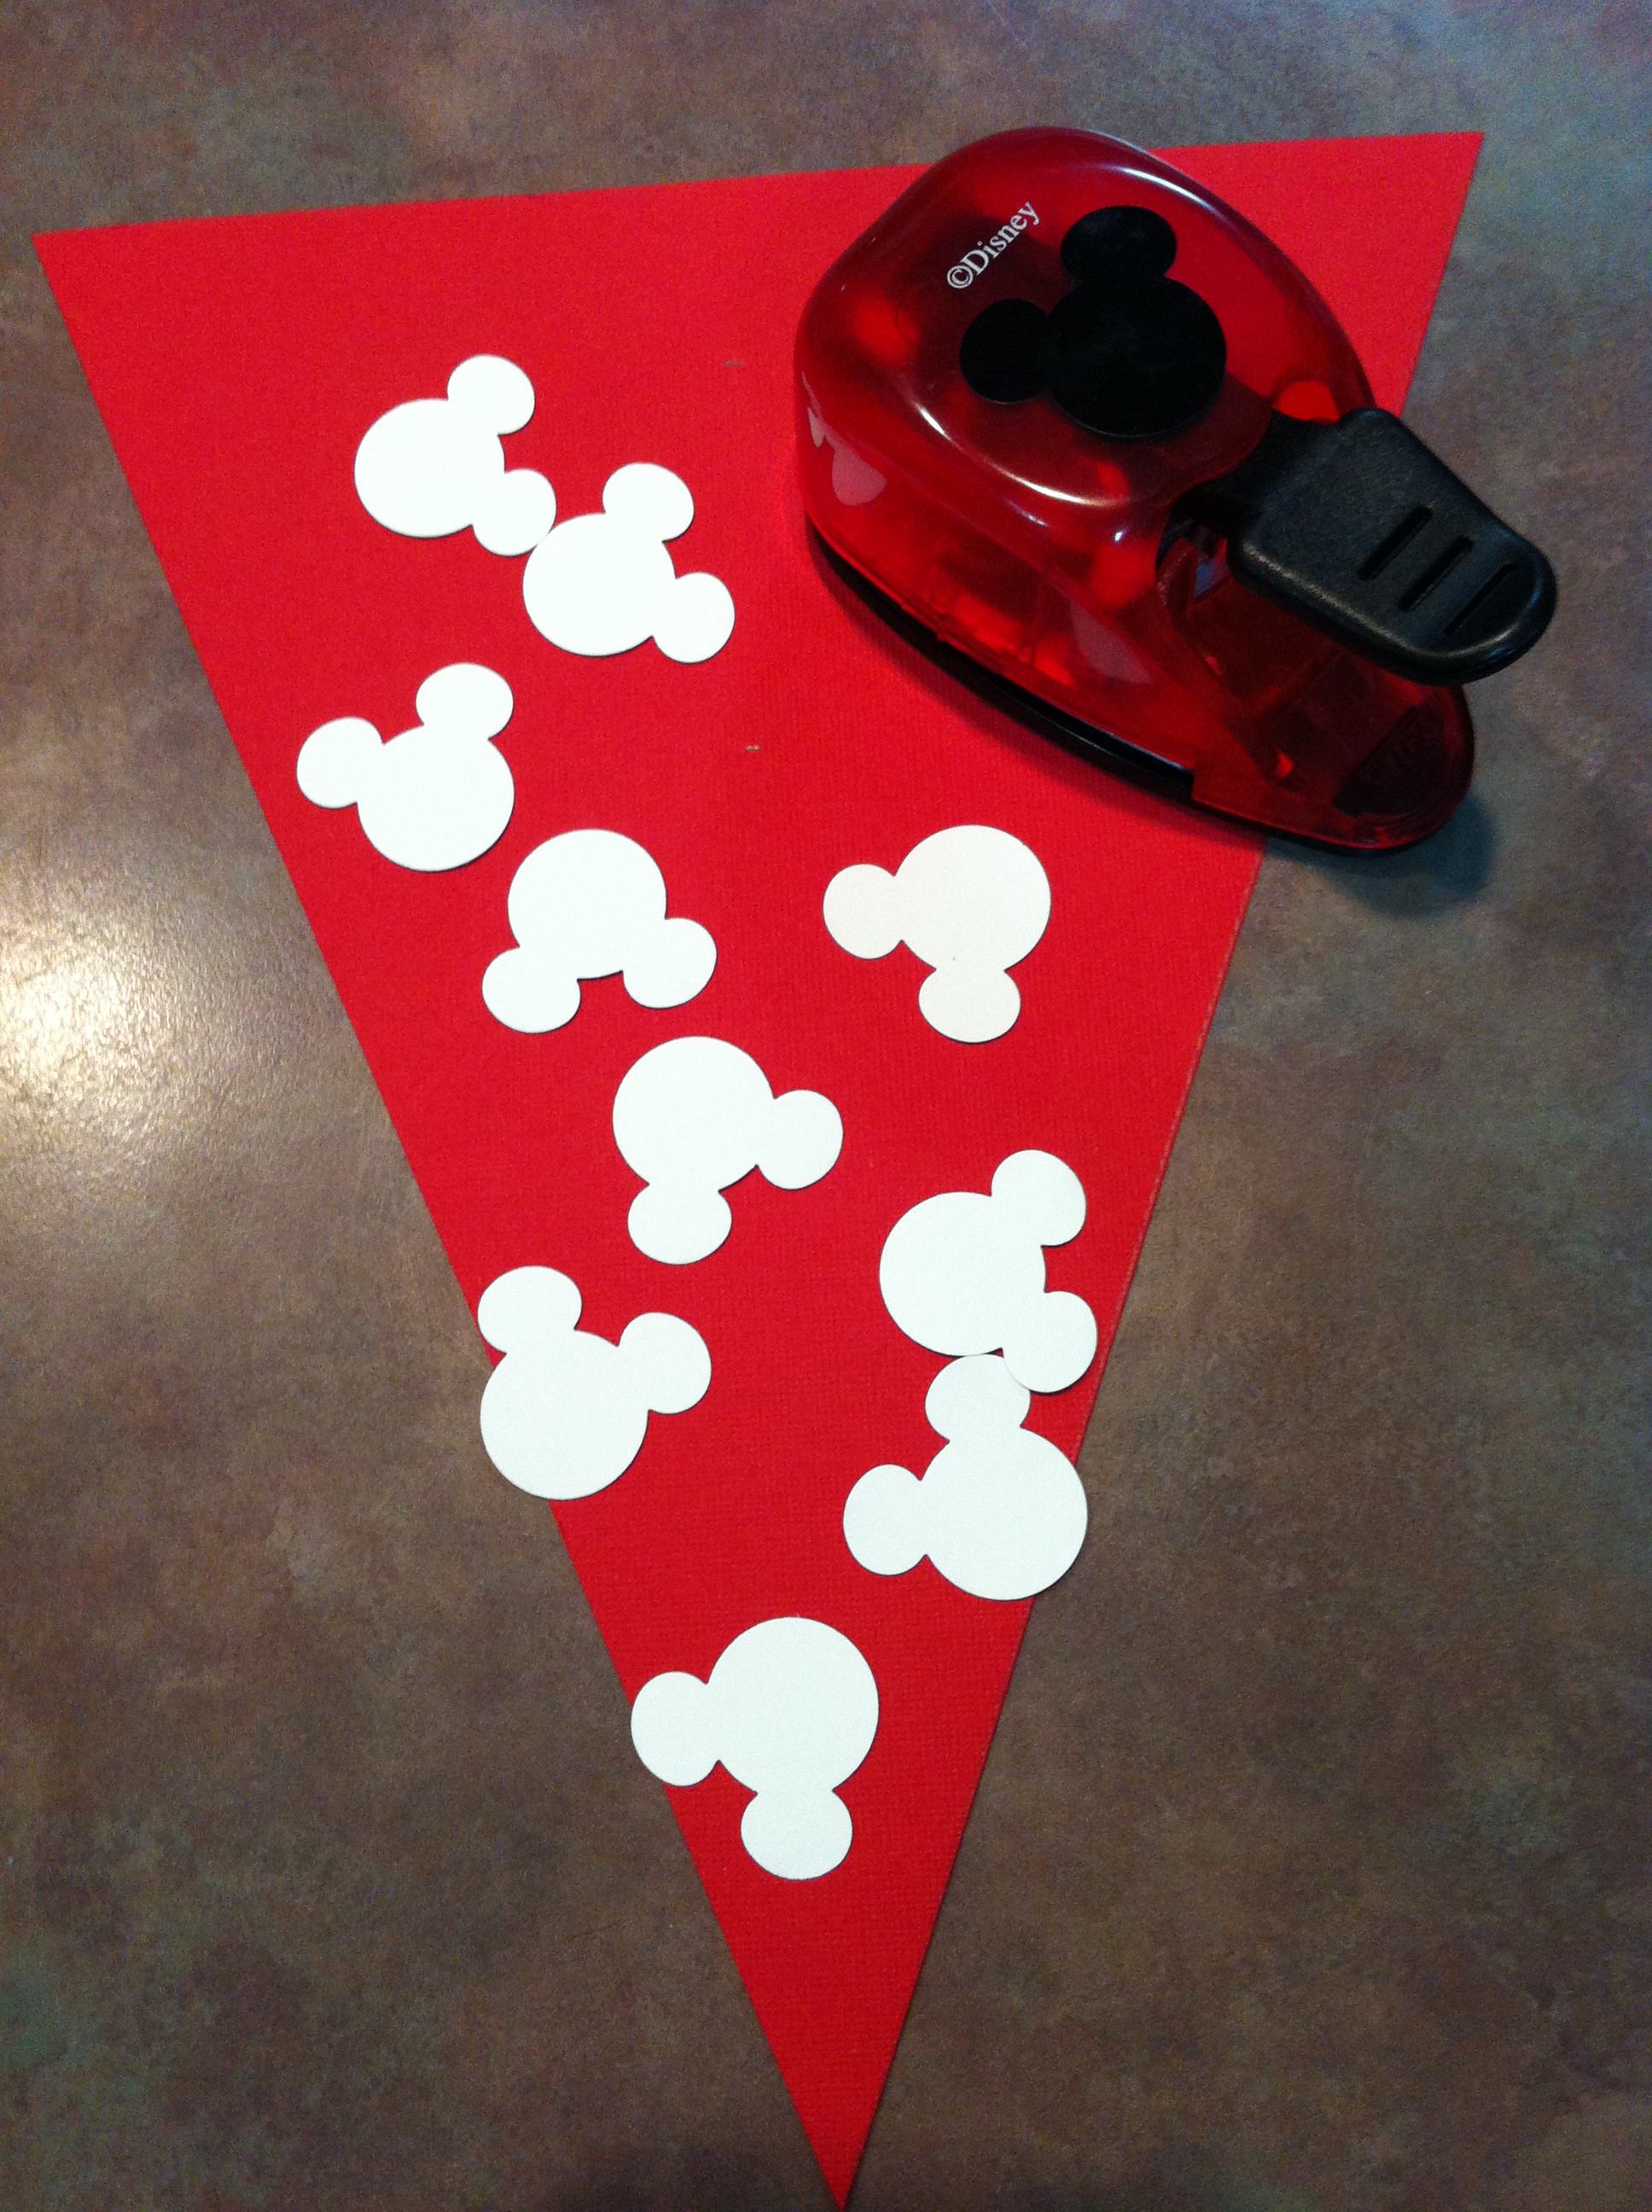
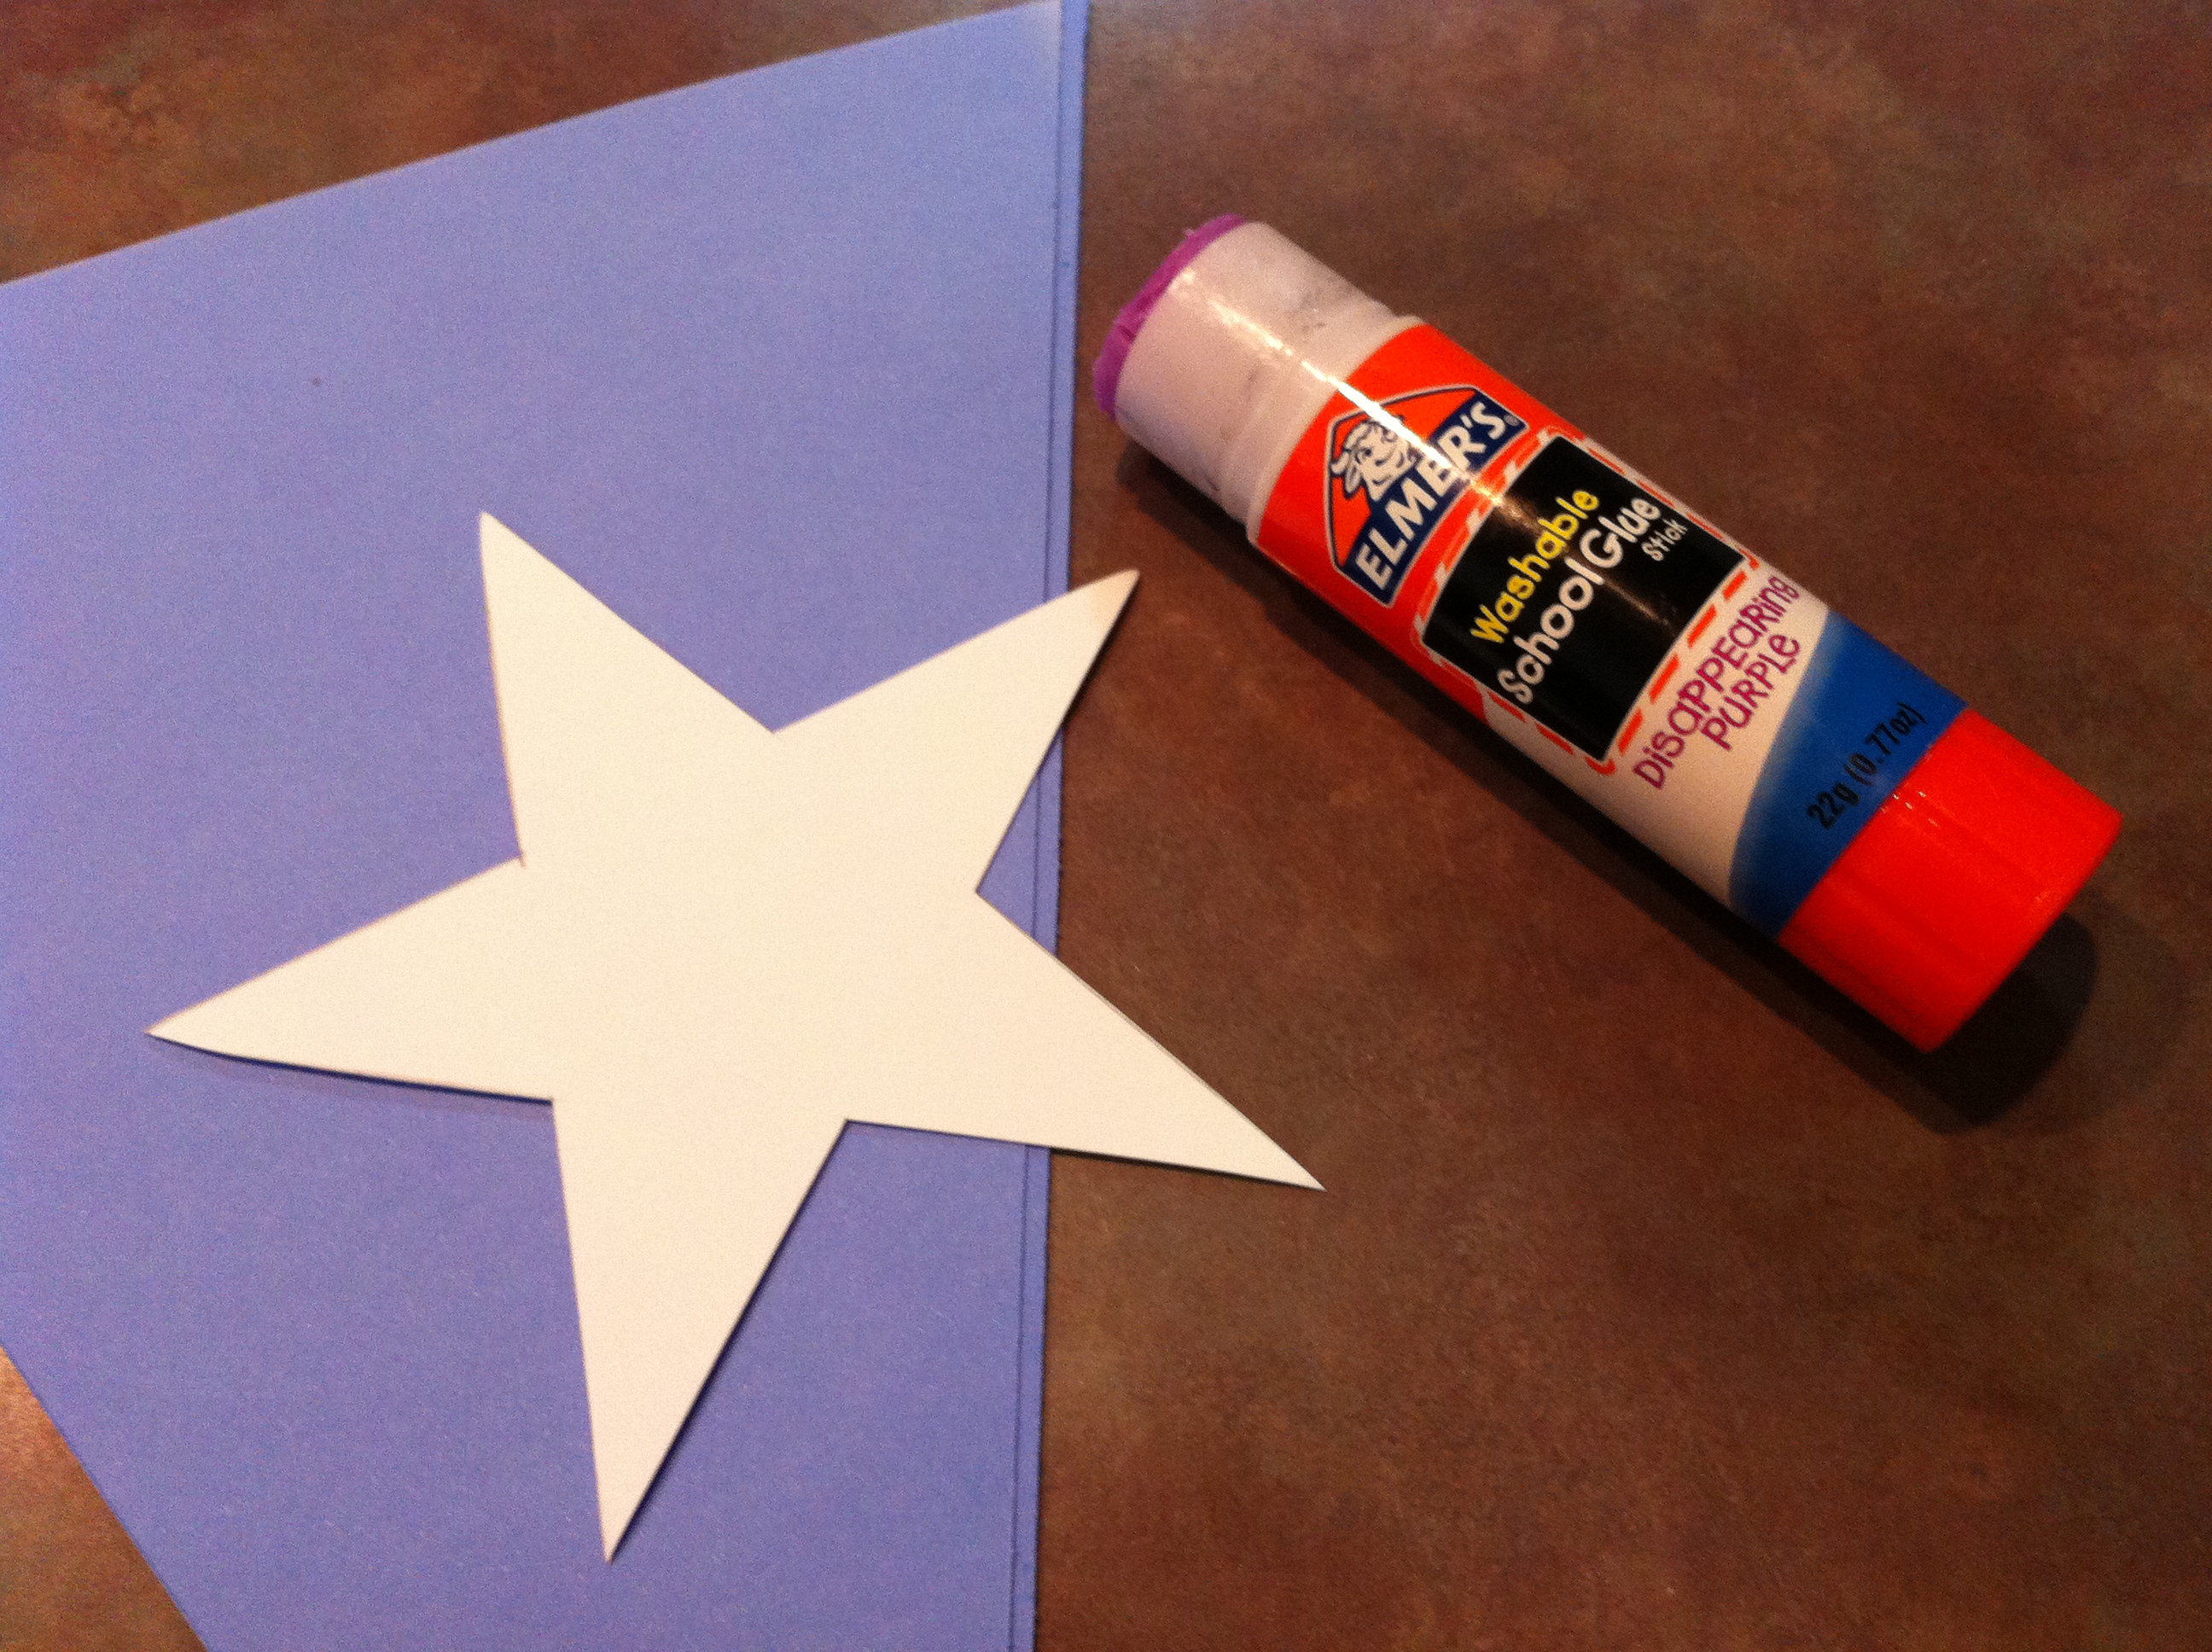
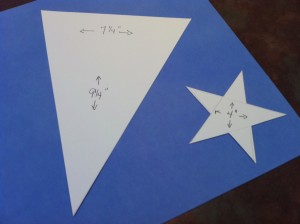
2. Create a template to use for each triangle shape flag and star.  You could easily do this using the computer, but that takes ink, so I chose to make them by hand.  The triangle is 7 1/4″ wide, by 9 1/4″ long.  The star is 4″x4″.  Once the flag template is cut, use it to make four red flags and four blue flags.   Then use your star template to make four white stars out of your white card stock.

Mickey craft punch3.  Each red flag will need ten white Mickey Mouse craft punches, so  you will need forty Mickey Mouse punches.  To make the Mickey stripes on this flag, start by measuring down from the top and marking each red flag at the following measurements: 1″, 3″, 5″, and 7″.  The top of each Mickey ears row will be in line with each mark.  Lay the Mickeys out as follows- 4 Mickeys at 1″, 3 Mickeys at 3″, 2 Mickeys at 5″ and 1 Mickey at 1″.


Glue Stick!4.  Now is the time to start adhering the Mickey’s to the red flags and the stars to the blue flags.  For placement of the stars, measure down from the top 1″ centered.  Make a small pencil mark at that spot, prepare the star to line up with the mark.  I like using my son’s craft glue stick for projects like this.  It’s a lot less expensive the scrapbooking tape and I love how it dries clear and cleans up with a little bit of water if I get it on the table.

Using Jute twine

5. Last but not least, using your hole puncher, punch a hole on the top right and left side of each flag.  Then string your twine, through the holes to connect the flags together.

Now just hang where ever you chose!  I hope you and your family enjoy a happy and safe Independence Day!