Month: January 2014

Easy Mickey Mouse-Inspired Valentine’s Day Craft

Mickey Mouse Placemat from MouseEarsMom.com
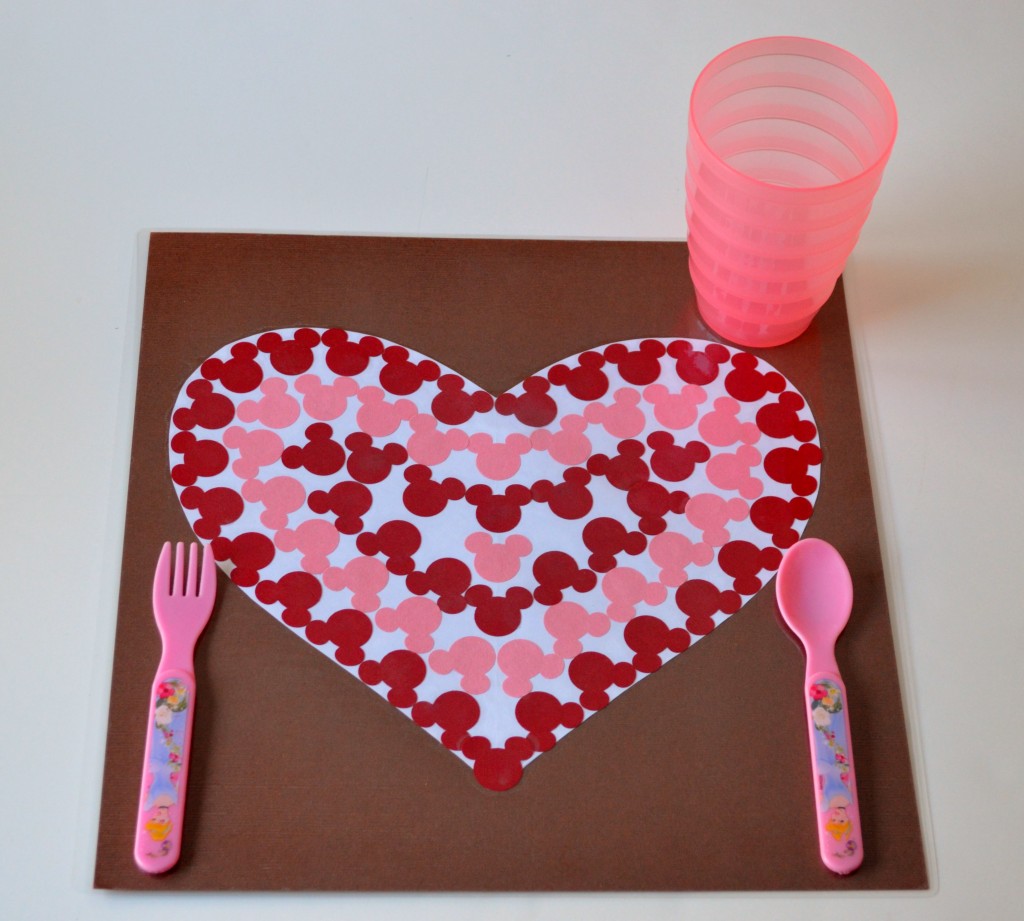
Keep your table clean with this fun and simple-to-make placemat…well at least part of your table clean.

Yesterday,  in our elementary school’s after-school Disney craft class, I had a great time helping young Disney fans make a Mickey Mouse Valentine’s Day placemat.  The first and second grade students did an excellent job and they enjoyed watching the lamination machine seal their artwork.  If you have a little Mousketeer that loves Mickey Mouse this is a perfect craft to complete with him.  If you don’t have a lamination machine, no problem.  Your local business supply store, like Staples, offers laminating services.  To laminate this project our local store would charge around $3.00US per placemat.

Here’s a break down of what you’ll need for your little artist.

placemat 035
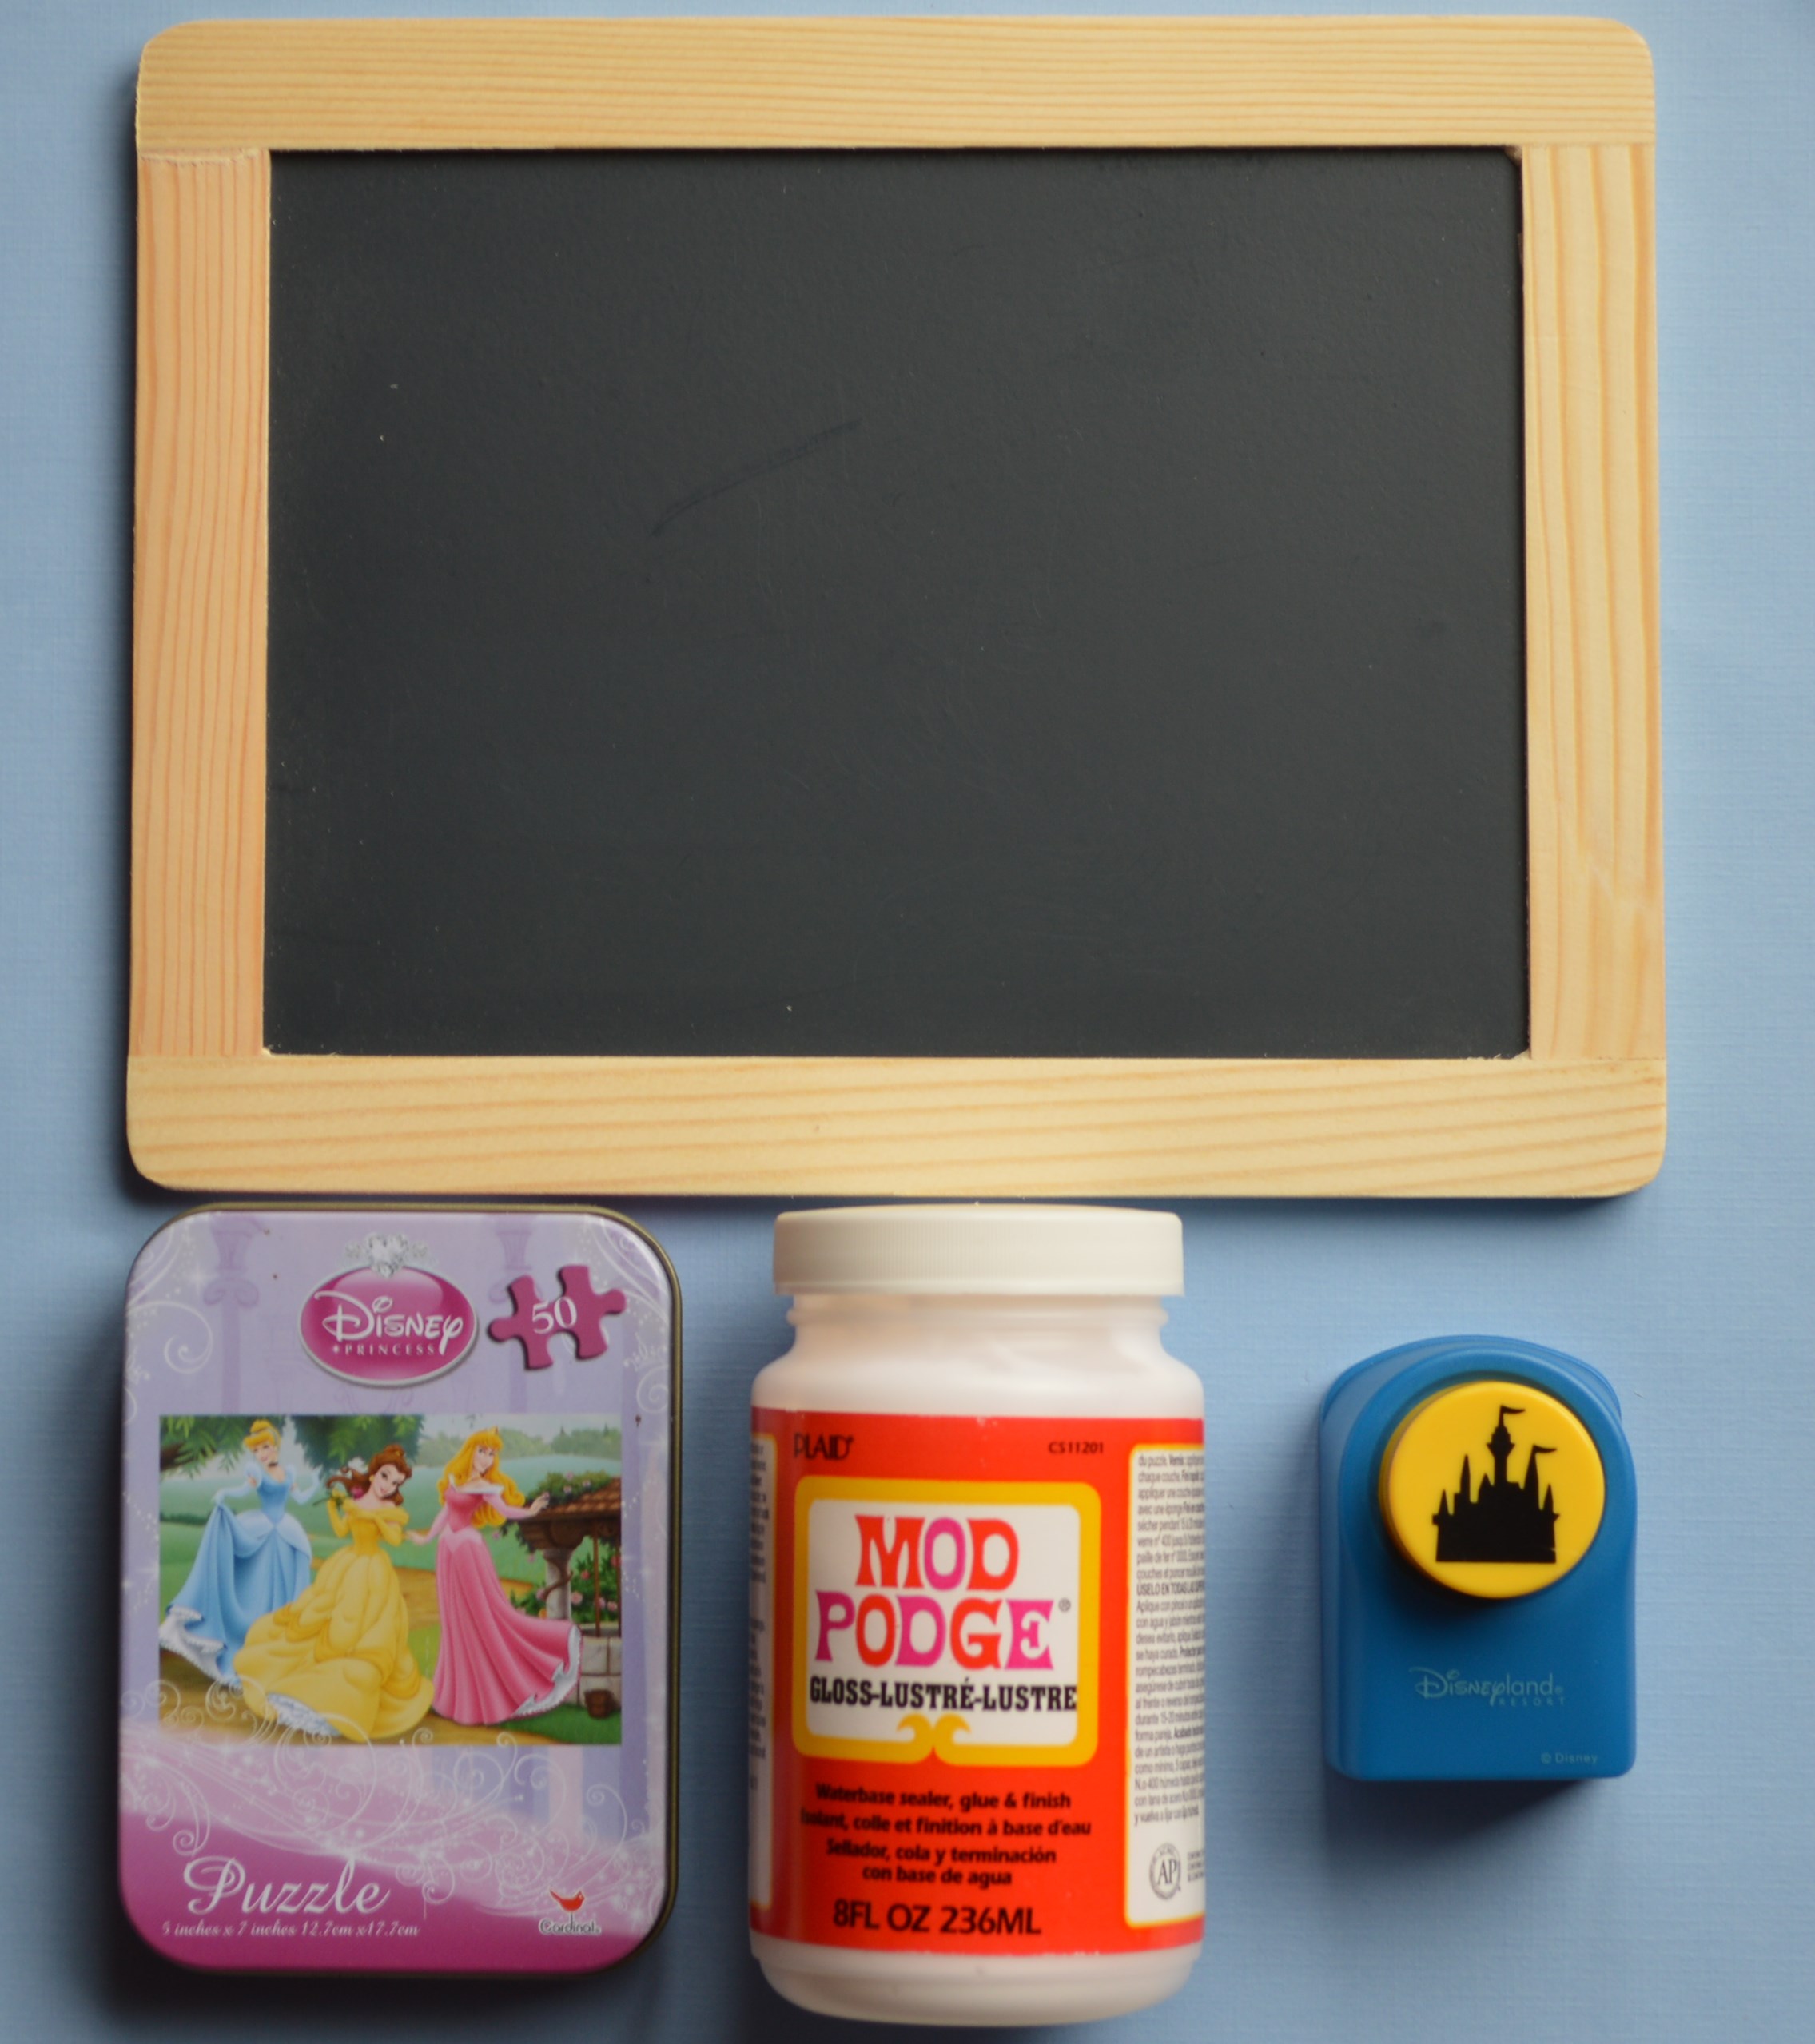
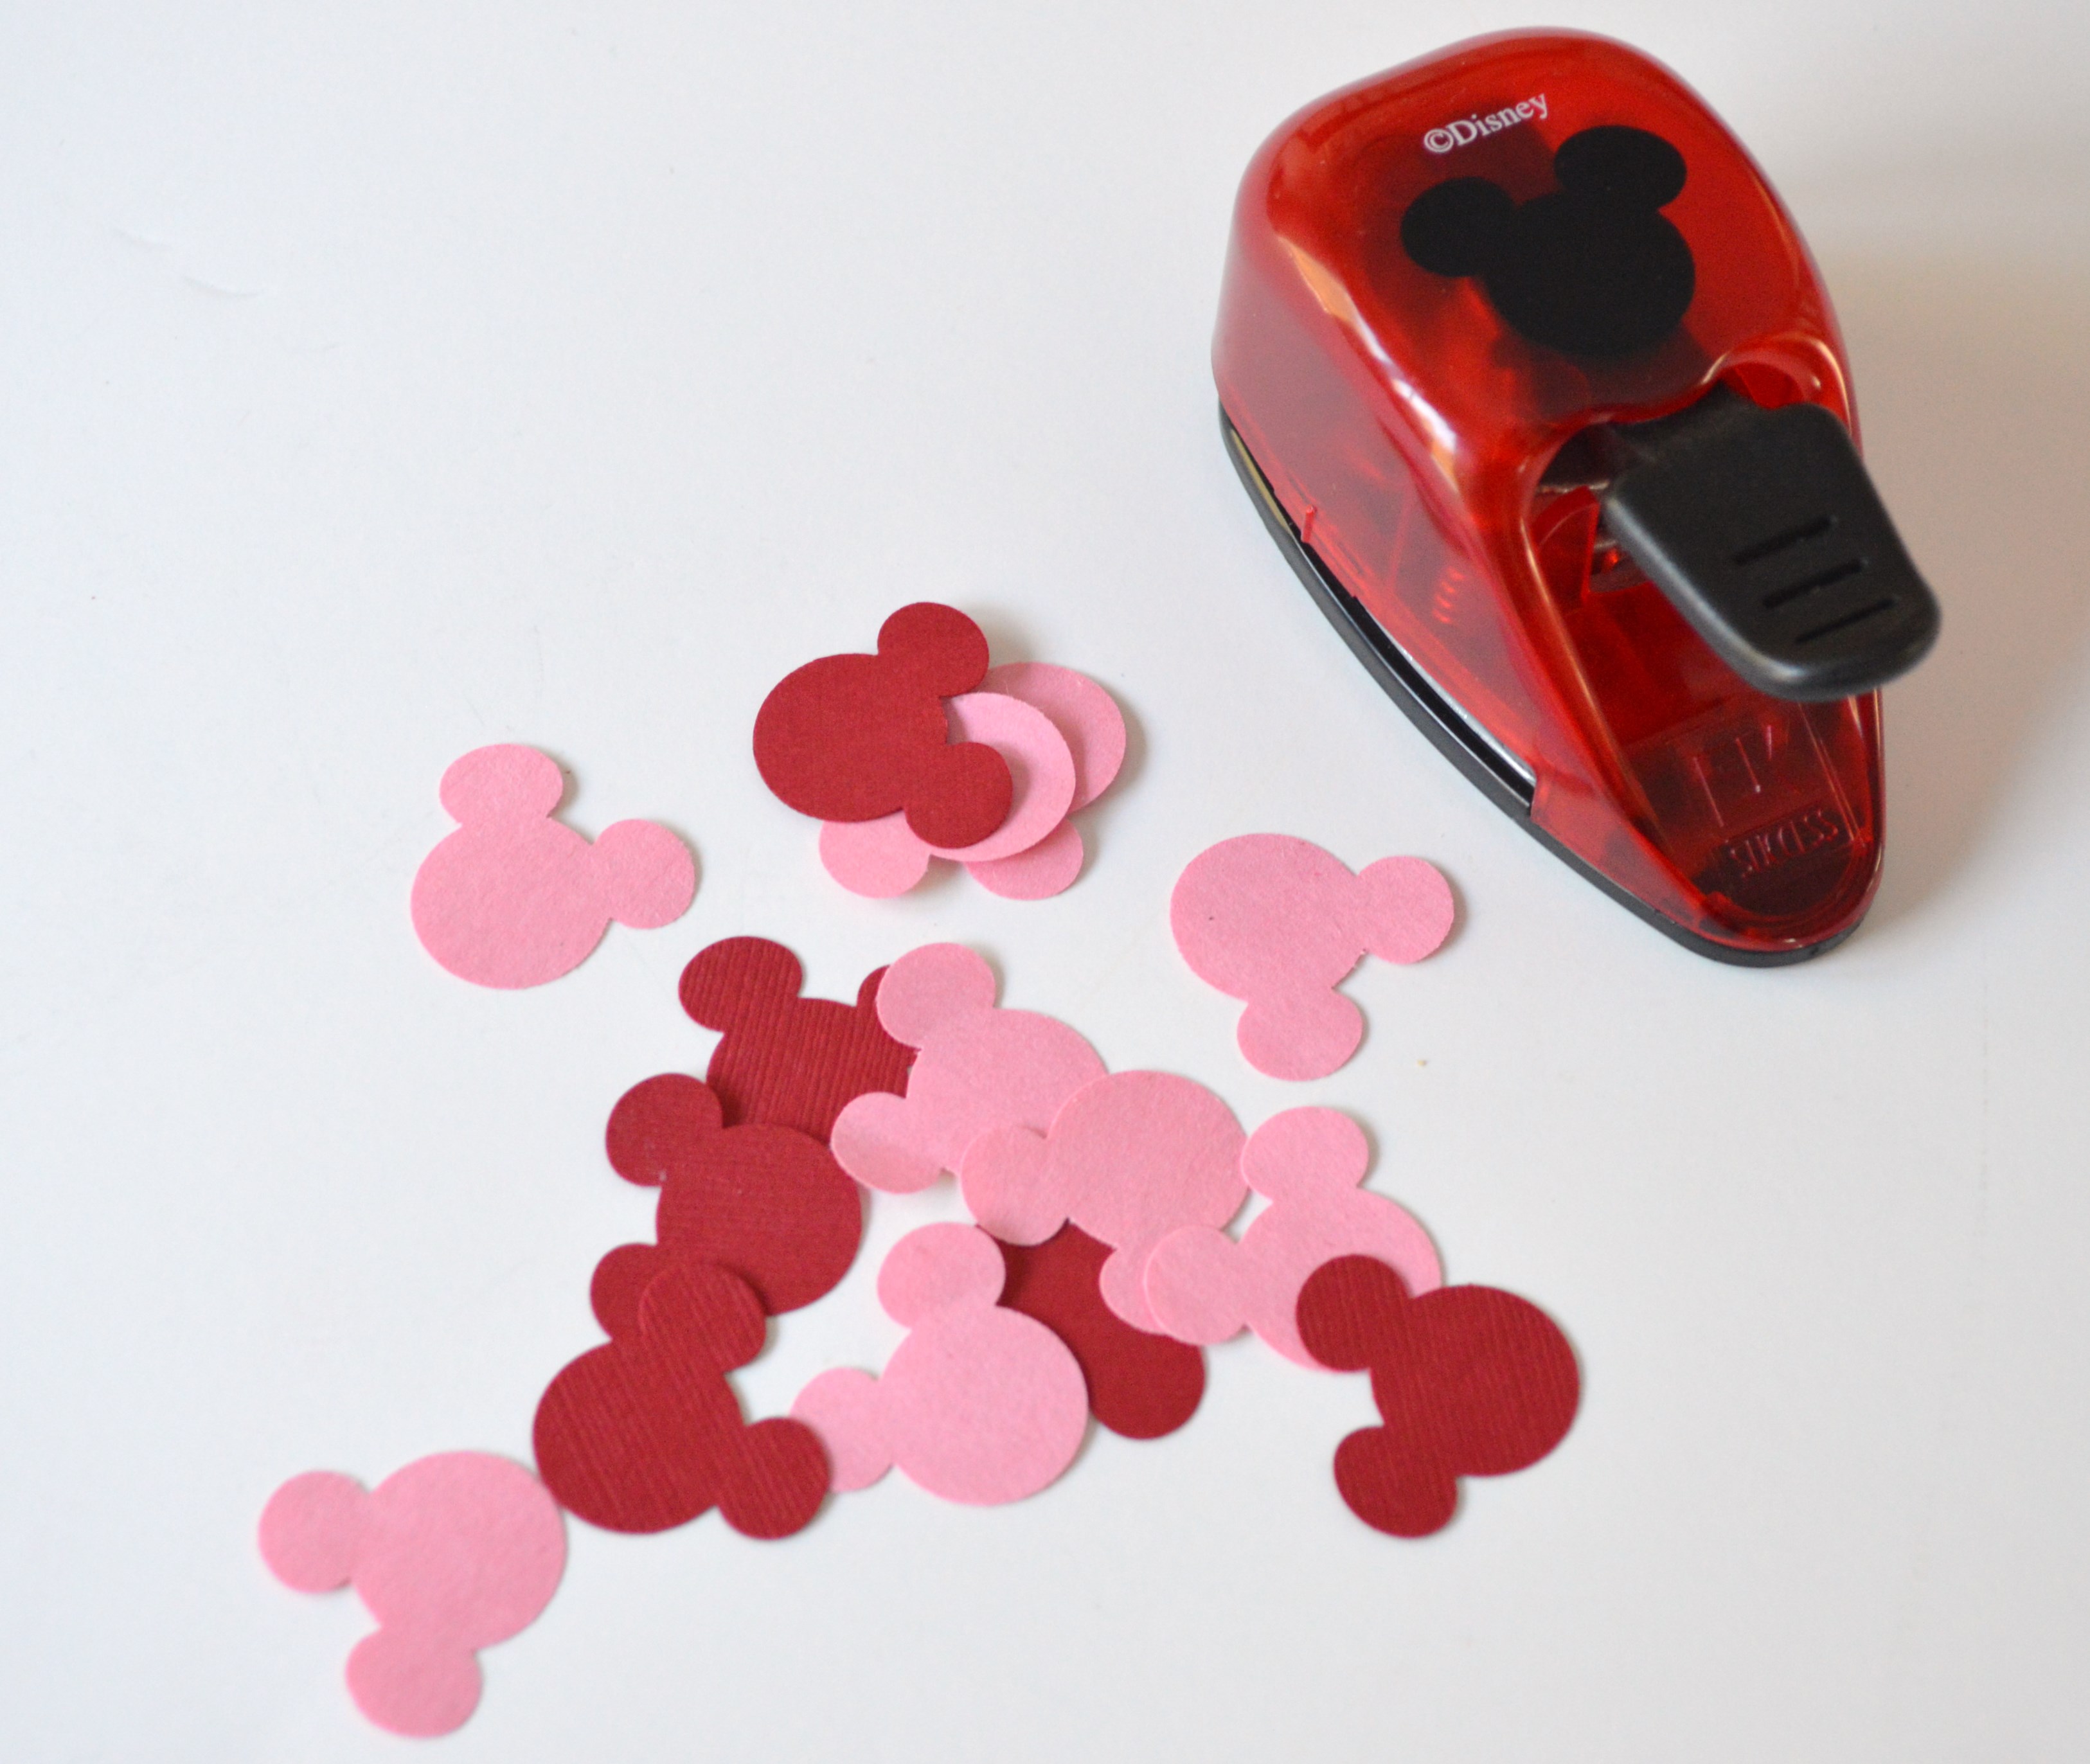
For this project you’ll need a Mickey Mouse Craft Punch.  I purchased this punch at A.C. Moore Craft Store.  On a side note, I have to tell you that you’ll love it!  If you don’t have an A.C. Moore store near you, I’ve seen the punch available for purchase on-line.  In addition, you’ll need a 12″ x 12″ piece of scrapbook paper for your base, a glue stick, an 8.5″ x 11″ piece of copy paper, and one pink and one red piece of construction paper or card stock for the Mickey punches.

placemat 001
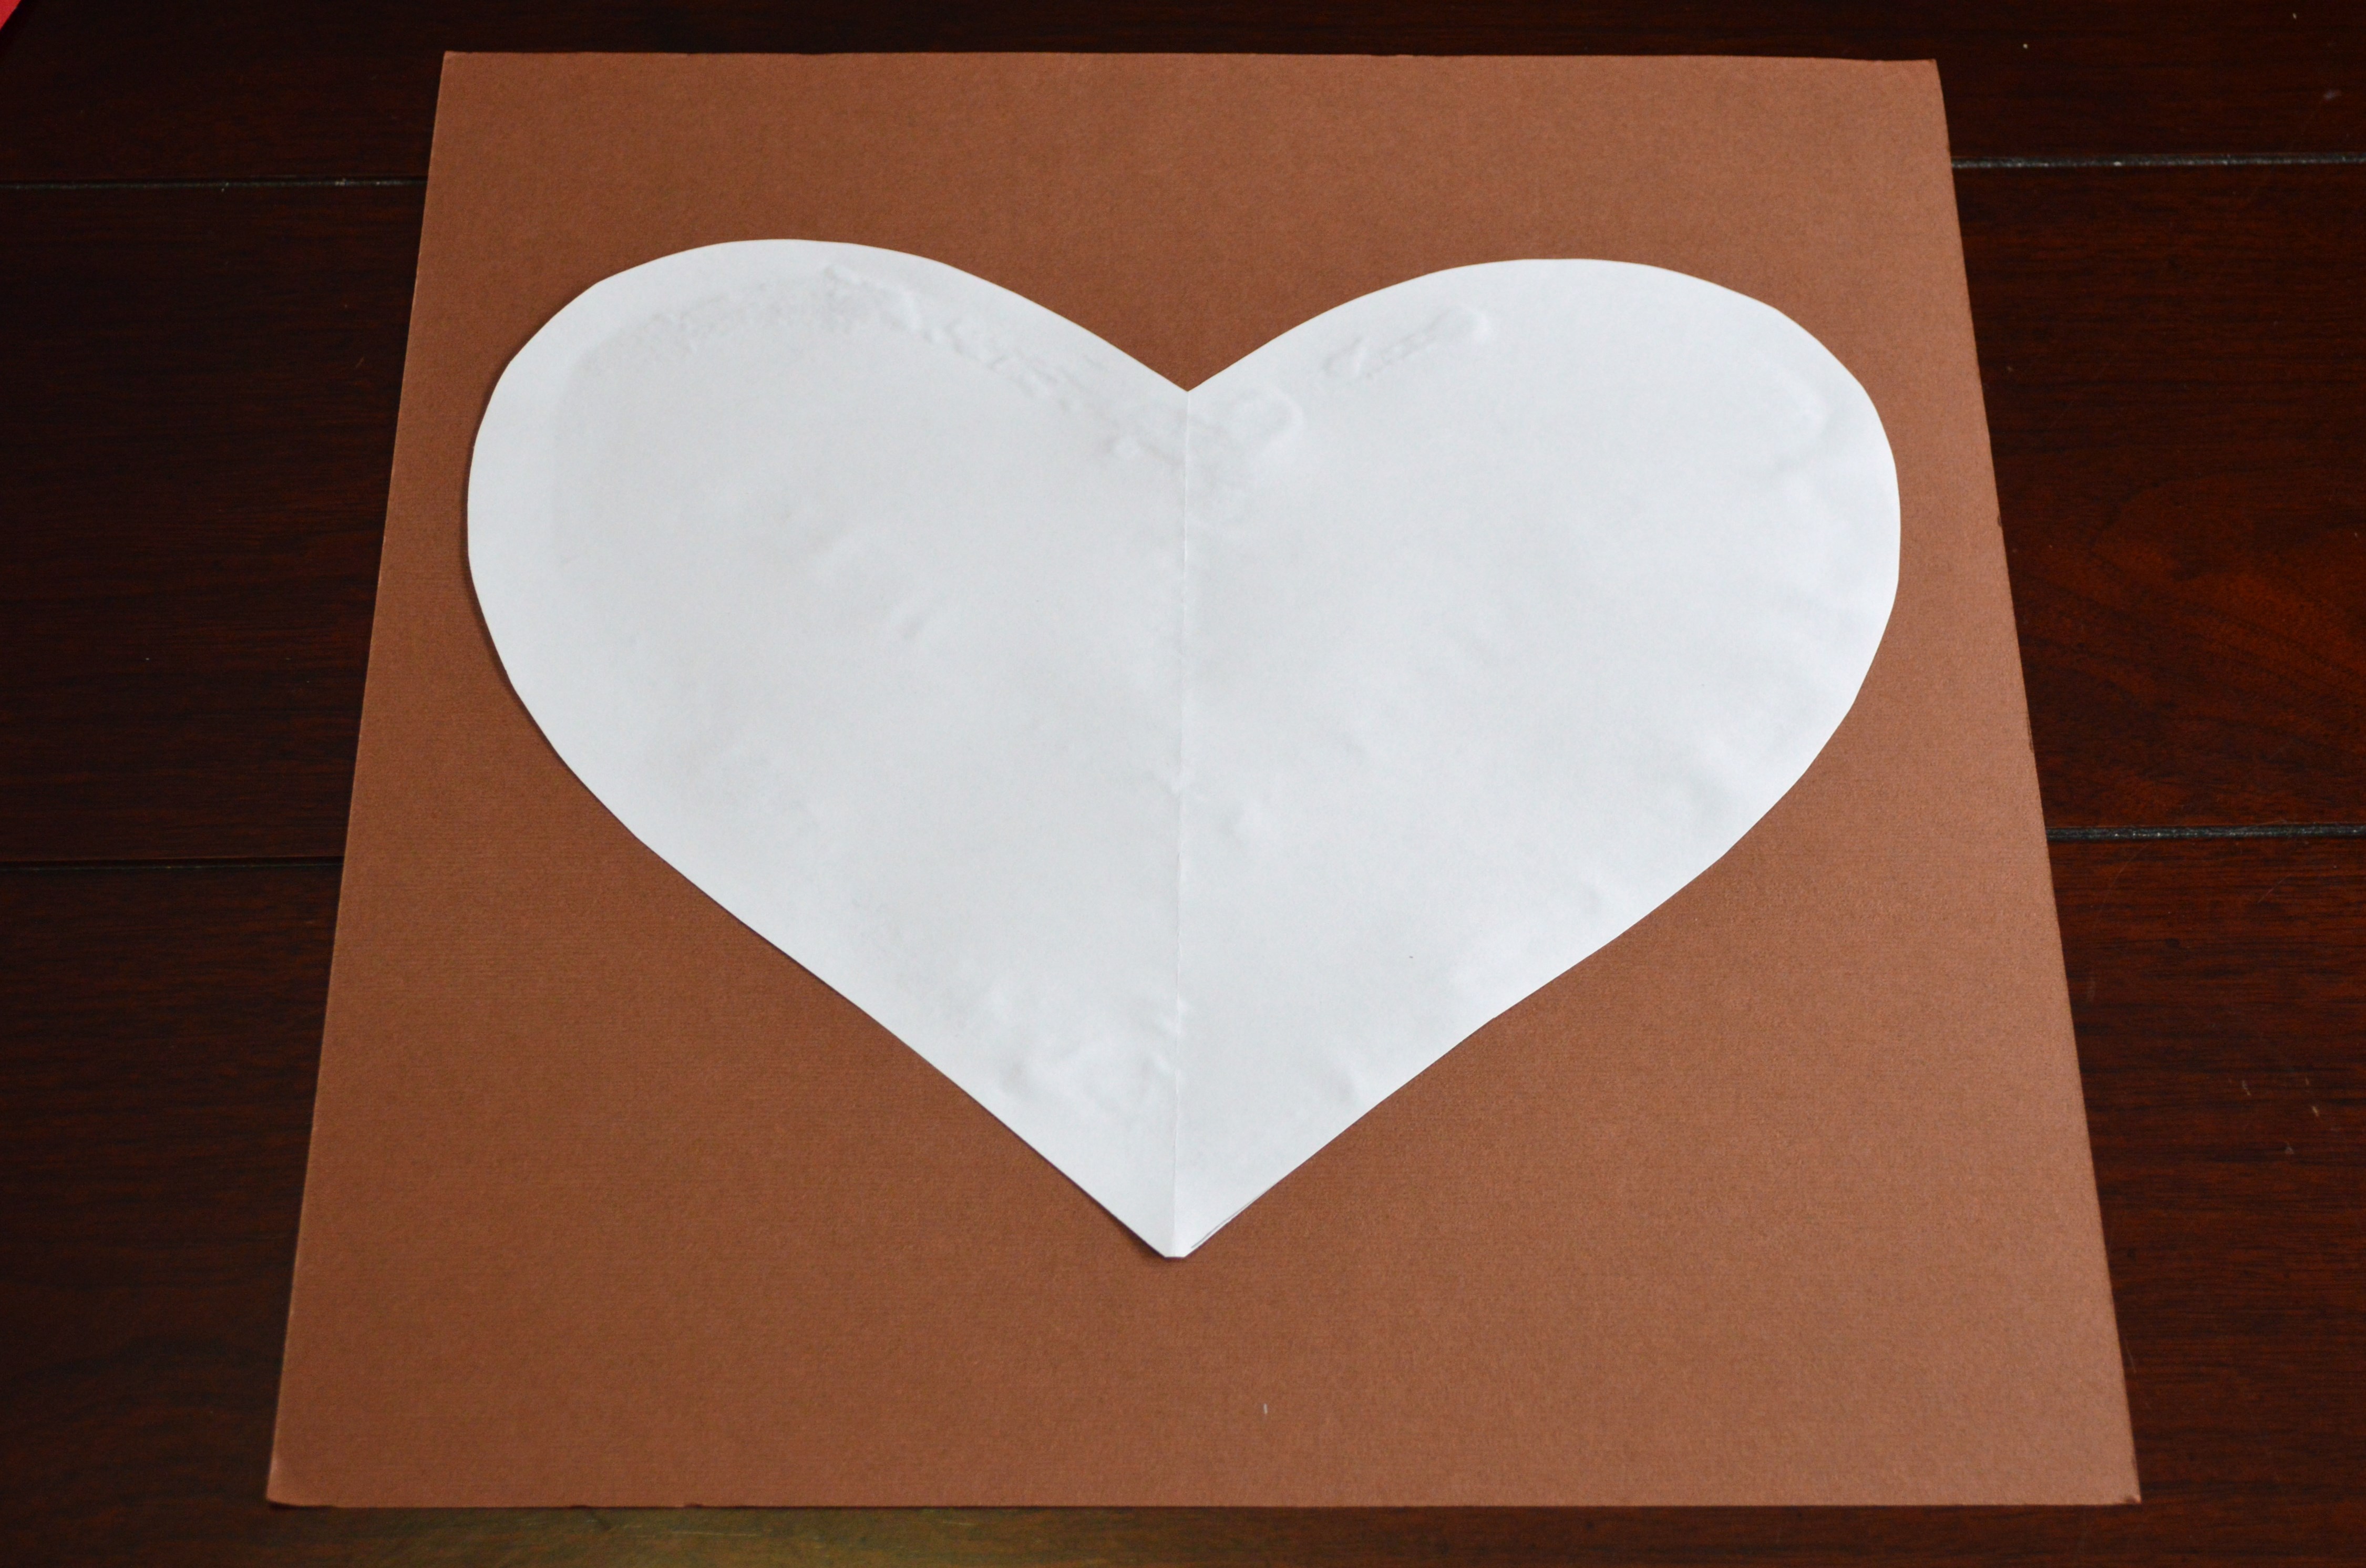
Cut your heart base out of the white copy paper by folding the paper in half and using the entire half of the paper.  Start at the bottom tip and cut to the side corner for the shoulder of the heart.  Have your child use a glue stick to attach the paper heart in the center of the 12 ” x 12″ scrapbook paper.

placemat 003
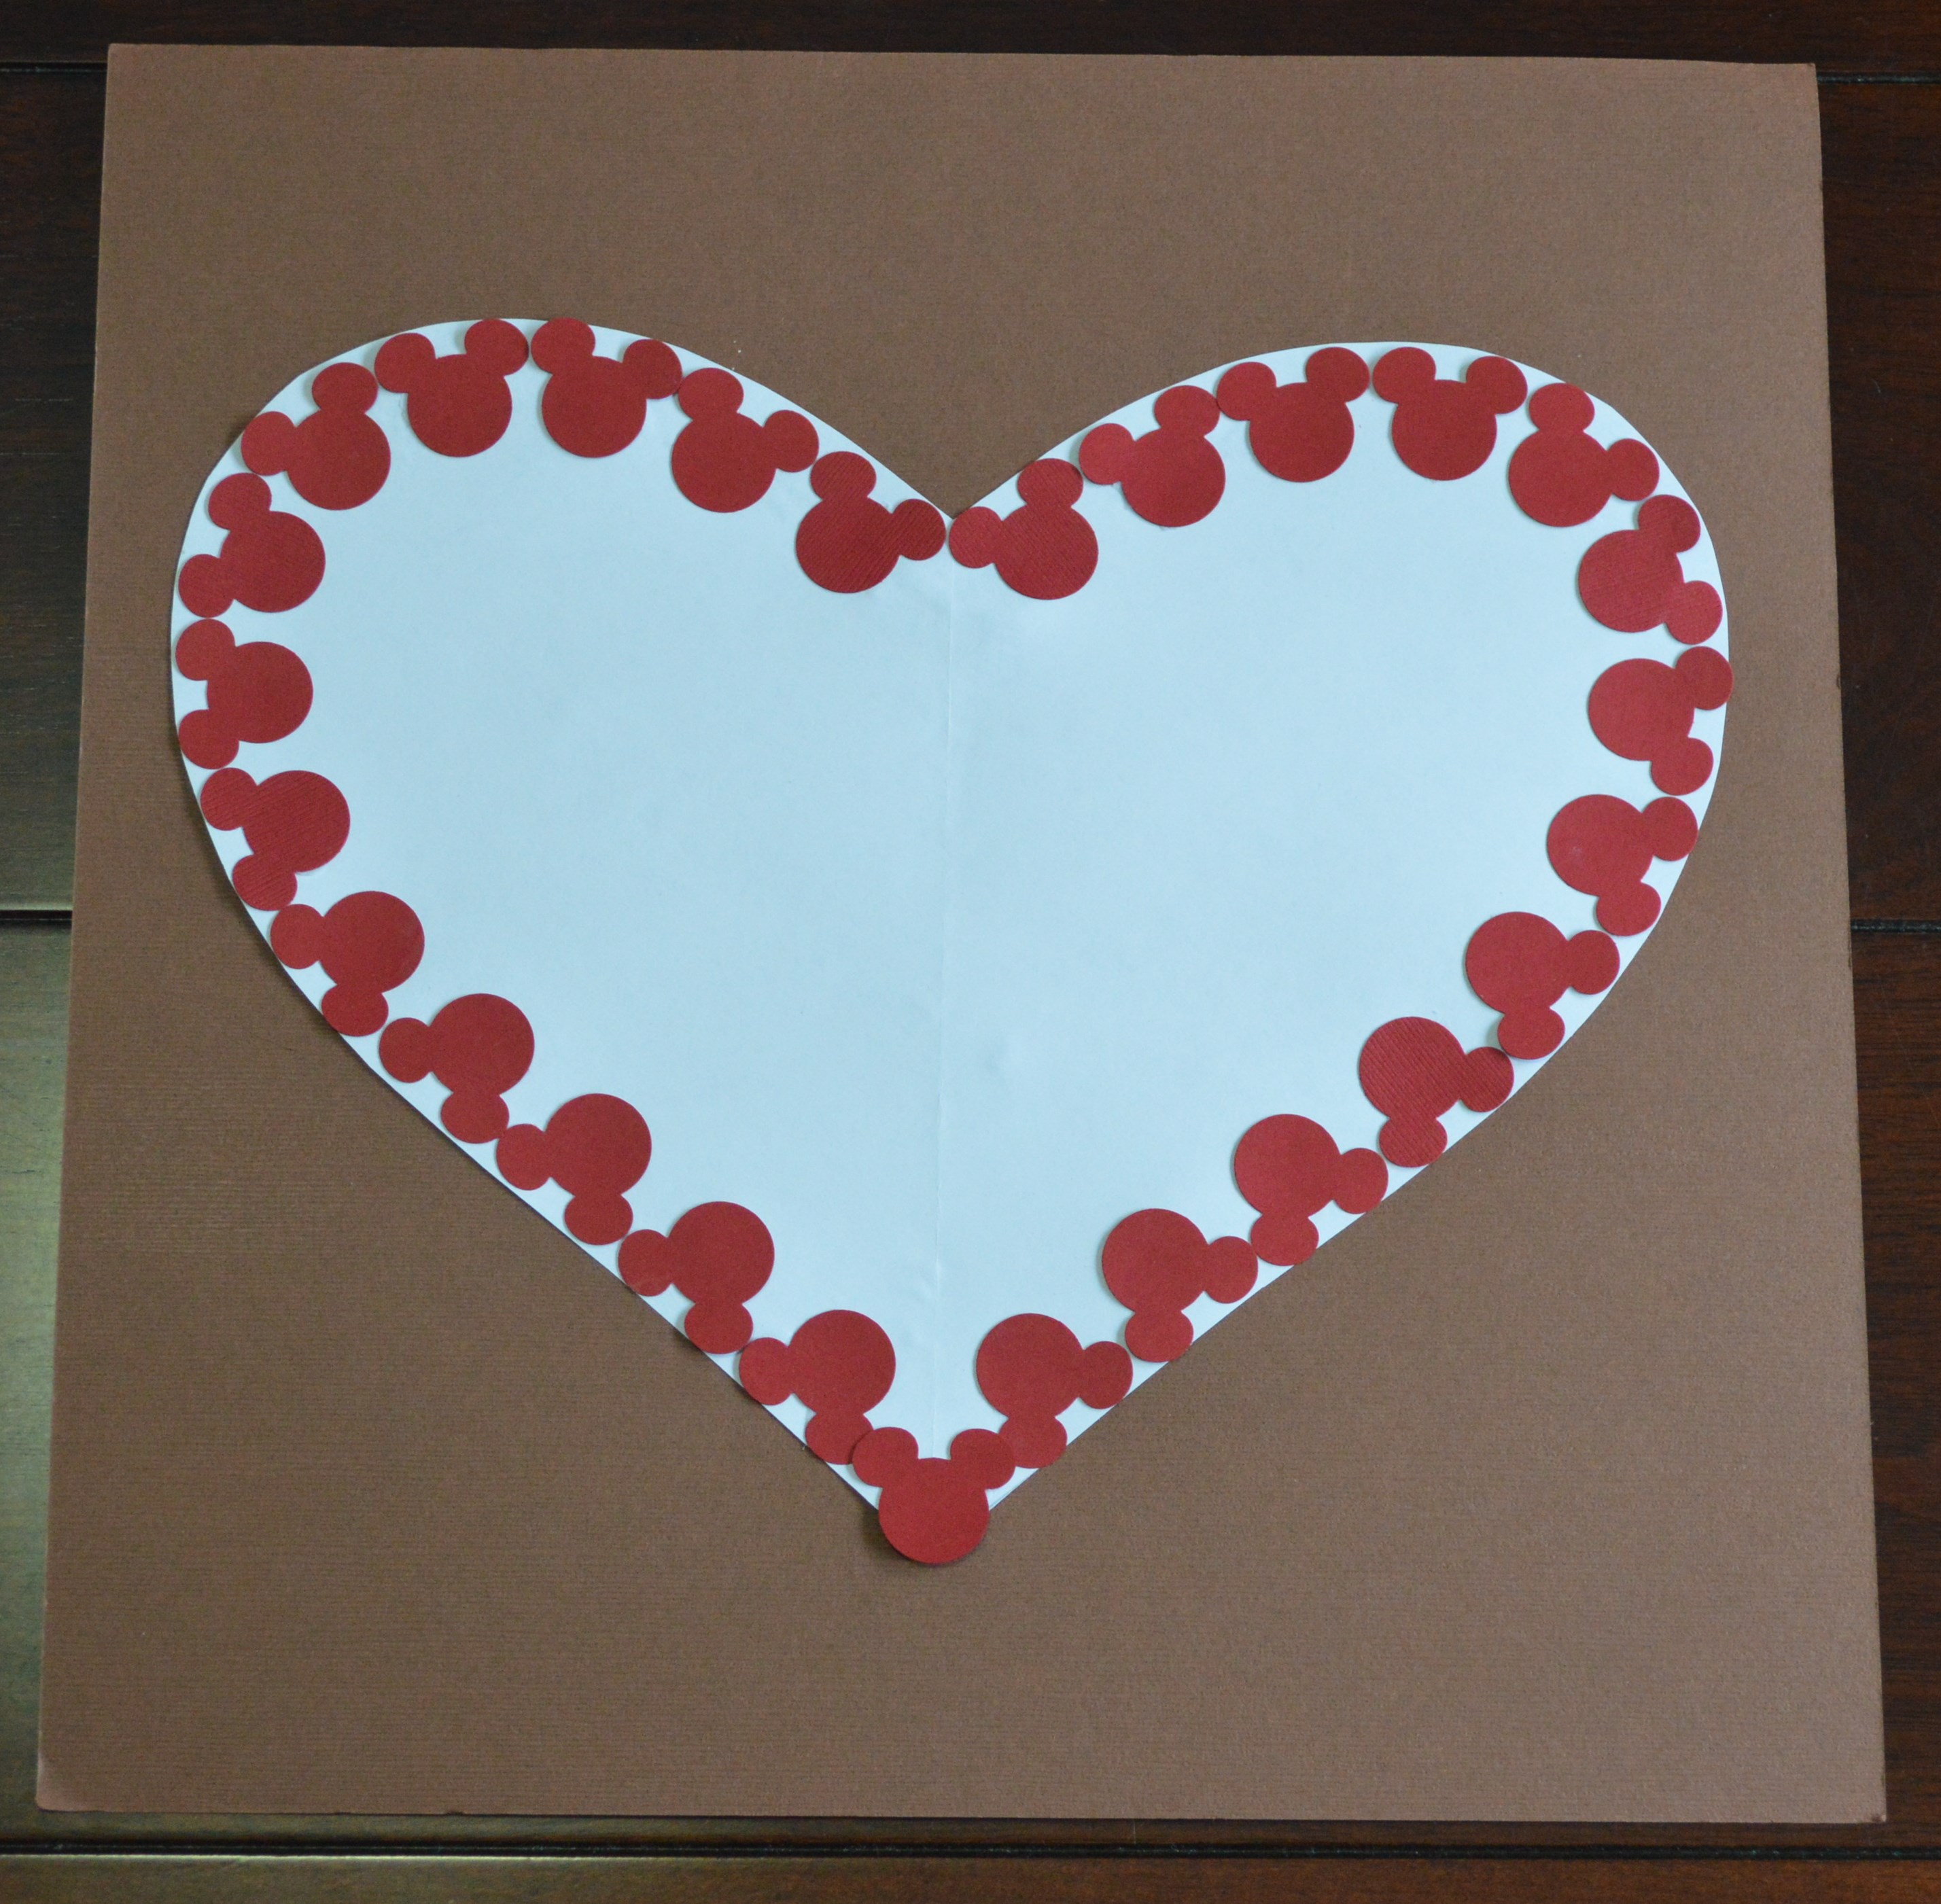
Next, fill in the white heart with the colored paper Mickey heads.  I started with the color red Mickeys and glued each one in place with the use of a glue stick.  There were a total of 41 red Mickey punches and 22 pink Mickey punches used on my placemat.  What was really fantastic about doing this project with the kids is that each child decided to complete the project their own way.  They didn’t care that I had used exactly 27 Mickeys in one row and 21 Mickeys in another row.  All the placements came out really cute and unique to each child.  I had them write their names and grade level on their finished piece, so Mom & Dad will remember how little and adorable their child was when looking at the placemat years down the road.

placemat 022
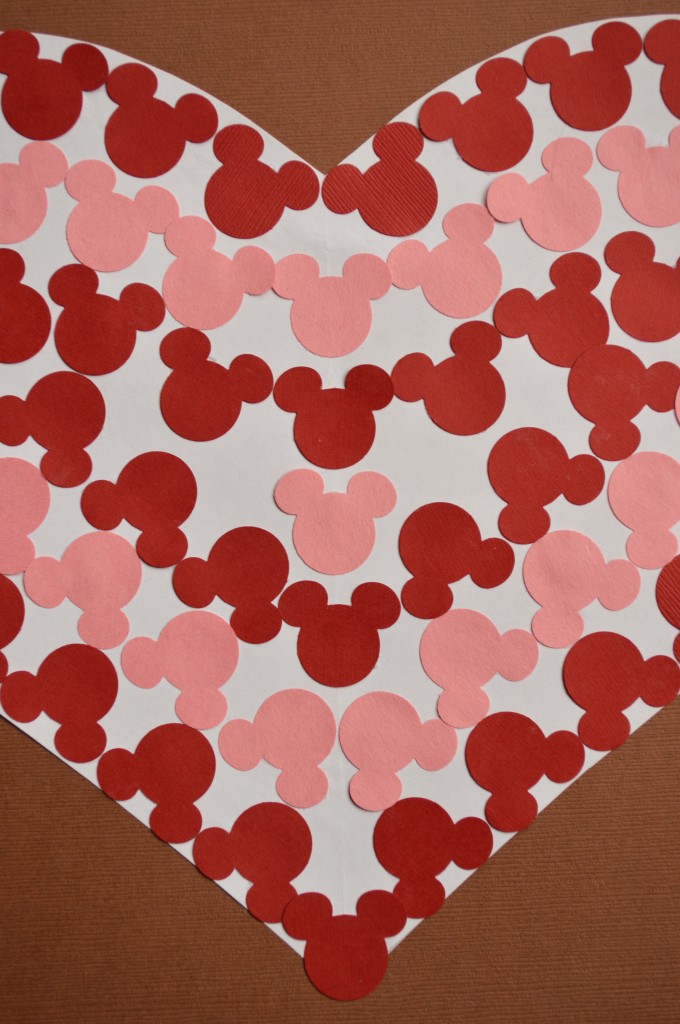
For anyone else out there that want’s to see how I glued the Mickeys onto the heart, here’s a close up of the center.

Now I have one more afterschool simple craft idea I need to come up with.  I’m thinking about teaching the students a little bit about the purpose of molds…and not the kind of mold that cause illnesses.  They’ve already learned how to take something away by using the craft punches and have used tons of glue too.

Any ideas you’d like to share?  Please do!

Thanks for stopping by the blog today!  Have a Magically Mickey Day!

Mickey and Minnie Mouse Heart cookies

Valentine dipped cookieA Minnie Heart That’s Oversized With Sweetness

Last week I shared with you an inexpensive and simple Valentine Mickey and Minnie Mouse magnet project for you to make with your little Mouseketeers.

Mickey Inspired magnetshttp://www.mouseearsmom.com/2014/01/16/inexpensive-and-simple-valentines-day-craft-for-children/

Last night I decided to turn the magnets’ designs into chocolate covered sugar cookies. My two-year old daughter, Victoria, loves Minnie Mouse and  I thought this Minnie Mouse Inspired heart-shaped cookie would be a cute Valentine to hand out.  I’ll attach a little note saying, “My Minnie Heart Is Sweet for You!”

The cookies were easy to make, but because of drying time, expect to spend a little extra time to complete the steps.   If you’d like to make them too, here are the supplies that you’ll need:

  • Heart shaped sugar cookies
  • Red chocolate
  • Bright White chocolate (for Minnie Mouse’s polka dots)
  • White M & M candies (for Mickey Mouse’s buttons)
  • Dark chocolate.  I found Chocolate Cherry Cordial Candy Melts from Wilton at our local craft store- YUM!

Valentine cookies 008

  1. Once you’ve made your sugar cookie hearts, melt your red chocolate in a shallow pan that’s big enough to allow you to lay a cookie down flat in the pan.
  2.  Lay each heart, one at a time, in the red melted chocolate.  Using your fingers, gently pick the cookie up and shake the excess red chocolate off of the heart.  Then lay it on wax paper.  To make a Mickey heart, take two M&Ms and place them on the bottom of the heart before it starts to dry.
  3. After the red chocolate has solidified, melt the dark chocolate in a small container that is deep enough to submerge the top of the hearts.Valentine cookies 004
  4. Dip the tops of each heart in the dark chocolate.  Now the Mickey hearts are done!
  5. To complete Minnie’s look –  melt a small amount of white chocolate in a decorator bag.  I like to use Wilton’s disposable bags.  Once melted, snip the very tip of the bag off, making a small hole in the bottom.  It’s important that you don’t cut off too much of the bag or it will allow too much chocolate to pour out at once.
  6. Last but not least, pipe Minnie’s white polka dots onto the bottom of the remaining cookies.  Done!

Valentine cookies 010

Are you ready for Valentine’s Day?  I’m working on it, but I still don’t know what to have Gavin hand out!  He couldn’t care less about Valentine’s Day, telling me to “Just pick something out Mommy”.  I’m wondering if it is being six years old and a boy that’s has Valentine’s Day on the bottom of his favorite holiday list.  Oh well, at least my little Minnie Mouse fan is excited!

Are you making anything special for your kids to hand out to their classmates?  I’d love to hear about it!  Have a great Sunday everyone!


Disney Princess Chalkboard Craft

Afterschool crafts 003Does your little Mouseketeer love puzzles and chalk?

Tomorrow, after school is dismissed, I’ll be hosting a Disney-Inspired craft club for 1st and 2nd grade students at my son’s school.  I’m super excited to start the four-week program with 12 creative Disney fans!  Each week that the club meets, I’ll have one hour to start the project, complete and have all 12 projects dried and ready to take home with their creators.  Since we all love to craft with our children but never seem to have enough time to make the fantastic ideas we’ve found on Pinterest, I thought I’d share with you this project idea.  It’s super inexpensive and literally takes less than one hour to have it completed.

A Disney Themed Puzzle Chalk Board

Afterschool crafts 029This week the girls will make a Disney Princess themed chalk board and the boys will complete a Toy Story themed chalk board.  My son Gavin, like many early elementary aged children, loves putting together puzzles.  So, when I was walking through our local Dollar Tree (Dollar Store) and spotted these cute little Disney themed puzzle tins I knew I had to incorporate them into a craft.  Once completed, the puzzle is 5″ by 7″.

Dollar Store Puzzle Tins

Here’s what you’ll need to complete this easy craft.


Mod Podge

I found the wooden framed and double-sided chalk boards for $1 at our local craft store called A.C.Moore.  They sell two different sizes, so make sure you purchase the one that is a 5″ x 7″ chalk board.  The Mod Podge can be purchased at any craft or art supply store and the castle craft punch was purchased at Walt Disney World.  I would have preferred to paint the wooden frame, but unfortunately due to time constraints I decided to do the castle punches on each corner instead.

Complete with these easy steps.

  1. Have  your child complete the puzzle.  It took Gavin about 15 minutes and he’s six years old.
  2. Using a paint brush, apply a layer of Mod Podge to one side of the chalk board.
  3. Place the completed puzzle onto the Mod Podged and framed area.
  4. Let this dry for about ten minutes.
  5. Apply another layer of Mod Podge on top of the puzzles and on the wooden frame.
  6. Place the castle craft punches in the corners of the frame.
  7. Let it dry for another ten minutes.
  8. Apply last coat of Mod Podge on top of castles.
  9. Let it completely dry before handling.

The empty puzzle tin can be used to store your child’s chalk.  Standard sized chalk fits perfectly.

Gavin had a blast helping me prepare this Princess-themed board for his sister.  He wanted to make another one today.  I’m hoping the rest of the kids in the club have the same reaction!


Our Family’s Experience at The Treehouse Villas at Disney’s Saratoga Springs Resort & Spa

TreehouseLooks inviting, doesn’t it?

Disney’s newly designed Treehouse Villas opened at Disney’s Saratoga Springs Resort & Spa in 2009. The Treehouse Villa’s floor plan is fantastic.  There are three bedrooms, two beautiful bathrooms and a large open-plan living/dining/kitchen area.  The living room area has a full size pull out bed sofa and chair that pulls out into a twin size bed.  The dining area has a large dining room table that seats at least six and a bar off of the kitchen area, which seats three.  Knowing how gorgeous these spaces are, why you might ask, did it take us four years to finally stay an evening in a treehouse?   The reason is that we LOVE to stay at Disney’s Bay Lake Tower at The Contemporary Resort, which coincidently also opened in 2009.  It was hard parting ways with our beloved BLT to stay in another resort, even if it was only for one night.  However, being a family of rebels, we were ready for this adventure and of course, extremely curious about sleeping in a tree!  The Treehouse Villas sleep nine people, so my brother, sister-in-law and niece shared this journey with us.  This “review” of the Treehouse Villas is totally and completely my opinion of our experience during our short stay.

Disney World September October 2013 366The common area inside and outside of the Treehouse Villa is abundant.

The number one benefit of the villa is that it’s an awesome place to entertain.  The layout of the floor plan optimizes the space to allow a large area for families to gather and enjoy each other’s company.  Although we had 8 people checked into our villa, my parents, other sibling with his family of four and a close family friend with her daughter spent time together socializing together that evening.  That’s a total 15 people using the inside of the villa and outside deck space to have a wonderful time and we didn’t feel cramped at all.

Cosmetics

Before staying in the treehouse I googled images of the units.  I can honestly tell you that the photos that I saw, and the ones you’re seeing in this post, do not do the place justice.  They simply can not capture the rustic, but yet contemporary feel of the space.

Master Bedroom’s Bathroom

Bathroom in Master Bedroom

Second Bathroom, separate from the second and third bedrooms

Disney World September October 2013 367

There is a total of two bathrooms and three bedrooms.  If we had nine adults staying in this villa, we would have needed three bathrooms to feel comfortable, but since we only had four adults in our party, the two bathrooms suited our needs.

Master Bedroom

What you can’t see in the below photos is that each room has a flat screen TV, making a total of four flat screen TVs in one treehouse.  The ceiling is also vaulted in the Master Bedroom and the bathroom is behind the door directly to the left side of the bed .  It’s an amazing room!

Disney World September October 2013 360

The Second and Third Bedrooms

Each room sleeps two people.  One room is equip with a queen size bed and the other room has bunk beds.  These rooms are smaller than the master bedroom but acceptable for our family.

Disney World September October 2013 368

Overall Review of the Villa

Sleeping “with the birds” was a peaceful experience.  Waking up in the morning, there were no sounds of buses going by or other families running around above or outside of our room.  We couldn’t even hear my brother and his family, and they stayed in the same treehouse villa!  If you’re family would like to stay in a somewhat secluded getaway, the Treehouse Villas is a beautiful option.

Would I recommend this resort for a family’s first trip to Walt Disney World?

Absolutely not.  Disney’s transportation system for the Villas is horrible.  There’s one bus route that travels throughout the Villa section of Saratoga Springs.  You have to take this bus to the main building at Saratoga Springs to then get another bus to take to any park.  Plan on waiting ALOT.  Getting to any of Disney’s four theme parks will take close to an hour of your precious vacation time.  If you rent a car while on vacation, your travel time will be better, but do you really want to take your car everywhere you go?

Location, Location, Location

Disney’s Saratoga Springs Resort & Spa is located in the Downtown Disney District.  There’s a walking path that leads you to downtown Disney and also a water ferry that can take you there.  It’s a pretty walk or boat ride, but again it takes time.  It took us about twenty minutes to walk to the Downtown Disney West Side.  Of course, your walking time will depend on where your Treehouse Villa is located in the treehouse section of the resort.

In addition to the travel time, we experienced a bit of a bug problem outside as soon as the sun went down.  The treehouses are located in a wetland area, so of course it should be expected.  Unfortunately, we weren’t prepared. So although our little boat ride to Downtown Disney was beautiful, the boat’s passengers were actually part of a buffet for mosquitoes.  Our poor children’s legs were a mess with bites.  The inside of the villa wasn’t full of bugs, but I did see an extra-large bug scurry out of the sink drain.

 Would My Family Ever Stay in a Treehouse Villa Again?

Possibly.  As I mentioned earlier, the villas are a perfect choice to have a large group of people gather.  If multiple families or friends decided to meet at Walt Disney World for a family reunion, I’d chose this resort option.  Honestly, that’s the only reason we’d return there.  As you may have guessed by this point, our next stay at the Walt Disney Resort will be back in our home away from home, Bay Lake Tower.  We miss it already!

Does your family have a favorite Disney Resort?   I’d love for you to share why it’s your favorite resort in the comments below.

If you’d like more information on Disney’s Treehouse Villa’s, stop by Disney’s site.  Here’s a link that will take you straight to Saratoga Spring Resort’s page.  https://disneyworld.disney.go.com/resorts/saratoga-springs-resort-and-spa/rates-rooms/

Inexpensive and Simple Valentine’s Day Craft for Children

Mickey Inspired magnets

Our school’s PTA has asked me to host an afterschool Disney-Inspired Craft class for ten first and second grade students.  I’m excited to work with these little Mousketeers!  But first, I have to come up with the craft ideas!  Today I’m sharing with you one of those ideas.  Since Valentine’s Day is right around the corner, I decided to design a few crafts around the holiday.

These little Mickey and Minnie Mouse-Inspired heart magnets are 3″ wooden pieces that I purchased at Michael’s Craft store for 29 cents each!

Valentines magnets 007

 Using washable paint, give one heart a coat of red paint and the other a coat of pink.  Leave it dry for five minutes and clean your paint bush.  Then paint the top of the heart black for Mickey & Minnie’s ears.  Using a Q-Tip dot two spots on the bottom of the red heart for Mickey’s buttons and a bunch of dots on the bottom of the pink heart for Minnie’s polka dots.  Then let the hearts dry.  The wood really soaks in the paint so they dry relatively quickly.

Valentines magnets 006Once they’re dry, it’s time to apply the magnet to the back.  To save time, I used ProMag Magnetic Tape.  To apply all the children have to do is peel the back off and stick it to the non-painted side of the heart.

Tip: Since the tape is curved, once you’ve applied the tape it’s a good idea to place the dried hearts under a book to help flatten out the magnet.

The afterschool program consists of four sessions.  One idea done!  Now it’s time to create three more.  Any ideas you’d like to share?

If you liked this idea and would like to read more, including additional Disney-Inspired craft ideas, sign up to receive my posts by email.  Each time I post something new on the blog, you will receive that post in your email in box.  You can subscribe at the top right hand side of this page!

Have a great day and thanks for stopping by!