Tag: Disney Craft

Craft Time with Preschool and Early Elementary Age Disney Fans

Bottle cap necklaces

During the next three weeks I will be sharing some simple and inexpensive Disney – inspired craft ideas that are perfect for preschool and early elementary age children. I completed each of these crafts with a fun group of 1st and 2nd grade students and they’ve proved that the projects can be completed in less than an hour!

Today’s craft is Bottle Cap Jewelry.

My Supplies:

  • White card stock
  • Glue Stick
  • 1 inch circle hole punch
  • 1 inch Bottle caps with loop (I used Darice brand- note, that the size of the loop was not consistent and some of the loops broke, so I’d recommend purchasing from a craft store so you can inspect them before purchase.)
  • 1 inch Epoxy stickers (I used Beadaholic brand.)
  • Silkies brand necklaces and bracelets (The simplicity in using these necklaces with young children was wonderful!)
  • Craft beads (If you choose to use Silkies brand necklaces and bracelets, purchase craft beads with a wide opening to fit over the end.)

www.mouseearsmom.com

Tutorial:  (I’d recommend completing steps 1 & 2 before starting the project with the kids.)

  1. Google images of your child’s favorite Disney characters, for example “Disney’s Frozen characters.” Pick out a clear image of the characters faces and save them to your computer. (Note: The images are most likely copyrighted images from Disney so make sure you are using them for personal use only.)
  2. Import the image into Microsoft Publisher and resize the character image so that the face is no larger than 1 inch. Print your images out on card stock.
  3. Using a 1 inch circle hold punch, create the circle images for the inside of the bottle caps by punching the images from the printed card stock.
  4.  Apply glue to the back of the 1 inch circle card stock with the character image.
  5. Center the image on the bottle cap using the loop as the top of the image.
  6. Place an epoxy sticker on top of the image.
  7. String the beads and bottle caps onto the necklace or bracelet.

That’s it!  I worked on this project today with 17 little ones and I was shocked at how quiet the room got when the kids were stringing their beads.  This was serious business people!!

Now it’s your turn ~ make a bottle cap necklace or bracelet with your little Mousketeers!

Simple Mickey and Minnie Mouse Inspired Valentine Garland Craft

 Mickey and Minnie Valentine Garland by MouseEarsMom.com

Get out the paper, glue sticks, scissors, ribbon, and cookie cutters, it’s time to beat the snowed-in boredom!

We’ve had quite a few snow days lately. If you have children, then you know that playing in the snow doesn’t fill an entire day for our little Mouseketeers.  The kids and I have been occupying that time with some fun Valentine crafts. Today I’m sharing how we made our Mickey and Minnie Mouse inspired valentine garland.

Supplies:

  • red cardstock
  • black cardstock
  • white card stock
  • standard hole punch
  • 1″ hole punch
  • two different size heart cookie cutters
  • glue stick
  • pencil
  • ribbon

www.mouseearsmom.com

Now start tracing and cutting out your hearts from the red and black cardstock.

Both Mickey and Minnie Mouse hearts are made by cutting off the top half of a black heart and gluing the black piece onto the top half of a red heart. The Mickey Mouse inspired hearts have his two white buttons and the Minnie hearts have her polka dots.  For Mickey’s buttons, punch two 1″ circles from the white card stock and glue the circles onto the red bottom half of a heart. For Minnie’s polka dots, we used a stand hole punch on white card stock and punched out 10 miniature circles.  (Remember to empty your hole punch before making Minnie’s polka dots.  It’ll save you from the clean up when your son dumps a hundred punches all over the table….experience has taught me.)

Once your hearts are glued and dried, use the standard hole punch to create holes on both sides of each heart. Connect the hearts together with some cute ribbons. Now you and your Mousketeers have made the cutest little Mickey and Minnie Valentine Garland in town!

Mickey and Minnie Inspired Valentine Garland www.mouseearsmom.com

Have you made any Disney-inspired Valentine’s Day decorations this year? I’d love for you to share them with me! Post a photo of your project on the Mouse Ears Mom Facebook page or if you’re a blogger and you have a tutorial, great!  Share the link in the comments!

D.I.Y. Olaf Inspired Frozen Heart Pillow

Olaf Frozen No Sew Heart Pillow

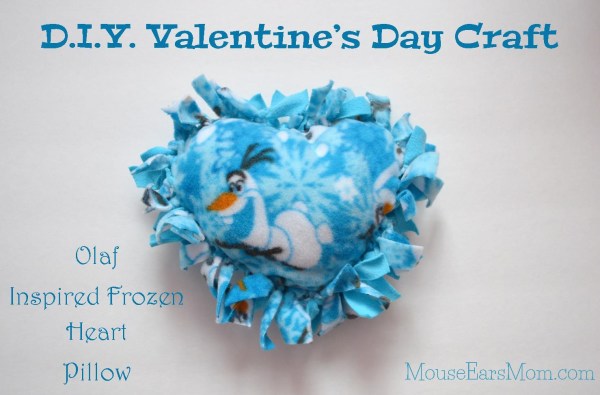
Looking for a fun and inexpensive Frozen-Inspired Valentine’s Day craft to make with your children?

At JoAnn Fabrics this past weekend I found adorable Frozen themed fleece on sale for 40% off! With Valentine’s Day just around the corner I thought it would be cute to make a miniature (5.5″ wide x 7″ high) “Frozen” heart pillow with the kids.  After completing this one, Victoria, my three-year-old daughter, snatched it up for her Bitty Baby doll to use and Gavin, my seven-year-old son, immediately wanted to make one “all on his own.” How could he not? Don’t we all love this warm hug-loving little snowman?

I’m not the first person in the world to come up with the idea of a “no-sew” heart pillow. In fact, a quick Google search of “no sew heart pillow” will give you a ton of tutorial options to read. Regardless, I’ve included my tutorial in this post to give you some insight on how we made our pillow.

Supplies

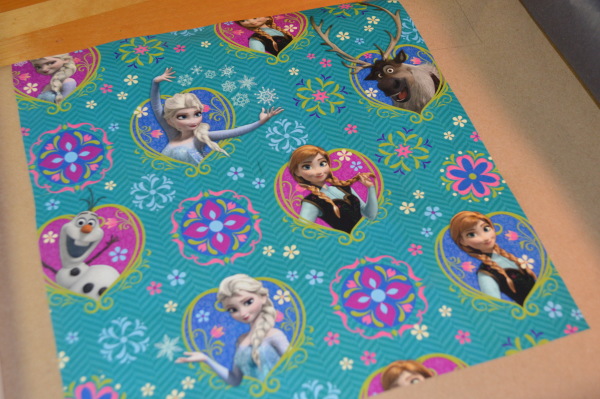
Disney licensed material of any type is significantly more money per yard than your typical run of the mill fabric. So for this project I decided to use the licensed character fleece on one side and a generic blue on the opposite side.  In addition, if you’re planning on following my directions for this project to make more than one pillow, note that you’ll need more of the Olaf print than the blue fleece. Why? Due to the character placement on the fleece, you will end up with a pillow that doesn’t have Olaf’s face represented and instead you’ll have Olaf’s feet or a partial face. It’s important to decide what images you want shown on the pillow and measure out from there before you start cutting.

Here are the exact sizes and supplies I used for making one pillow.

  • 8″ x 7″ hand drawn heart template cut out of card stock
  • Measuring tape
  • Fabric scissors
  • Marking tool – I used a fine tip marker but a fabric pencil would have been easier.
  • 18″ x 14″ piece of fleece “Olaf Winter Snowflakes Scene by Disney for Springs Creative Products Group, LLC. (NOTE: This material is for noncommercial home use only.) Why this large? If you are choosing to make multiple pillows, I found that allotting this size piece will guarantee at least one Olaf image as a focal point for the pillow.
  • 14″ x 13″ piece of complimentary-colored solid blue fleece
  • Polyester Fiberfill

10 Simple Steps Tutorial

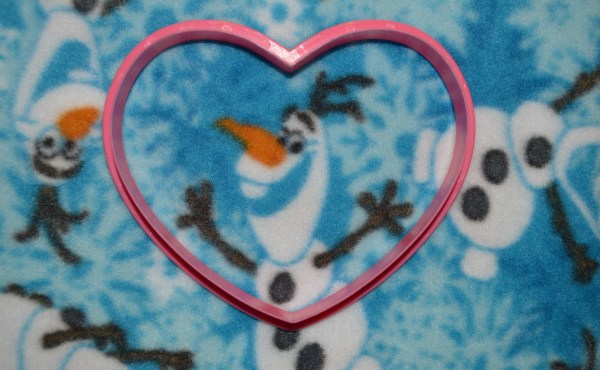
1. Using the heart template that you drew out of card stock, decide how you’d like the pillow to lay out. Below is an example of how I started. (However I chose to go larger as the original cookie cutter idea was way too small.)

Olaf Fabric www.mouseearsmom.com

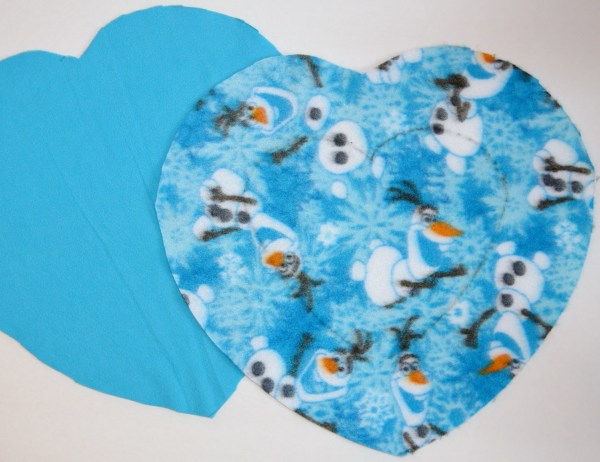
2. Draw your heart outline onto back side of the Olaf fabric using your template.

3. Measure three inches from all sides of the heart to create an outside heart image around the originally drawn heart.  (This three-inch border will be the area that you’ll need to mark and then cut for knotting.)

4. Cut an equal size heart out of the solid blue fleece. I did this by tracing my Olaf fabric heart after I cut it out.

Materials for Frozen hearts  www.mouseearsmom.com

5. Using your measuring tape and marking tool, mark off 3/4″ to 1″ pieces around the perimeter of the heart. They will act as guide lines to follow when creating your fringe to later knot.

6. With the two pieces of fleece fabric placed on top of each other, cut three-inch strips into both layers of fleece at the same time.

www.mouseearsmom.com

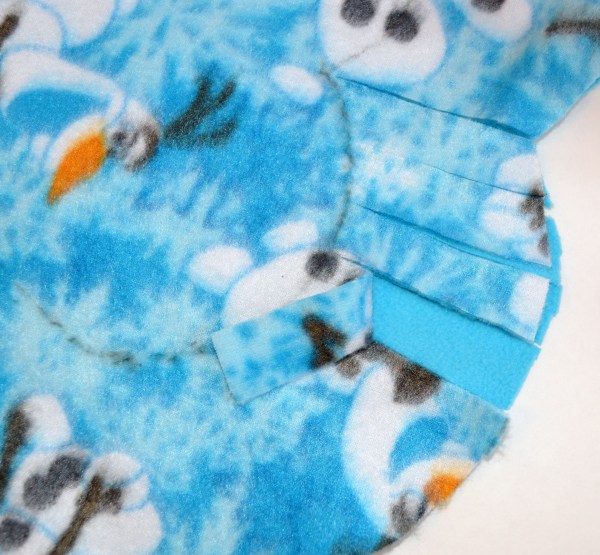
7. Continue to cut three-inch strips from the outside of the heart to the center heart marking until you’ve cut the entire outside heart.

Frozen Heart Pillow www.mouseearsmom.com

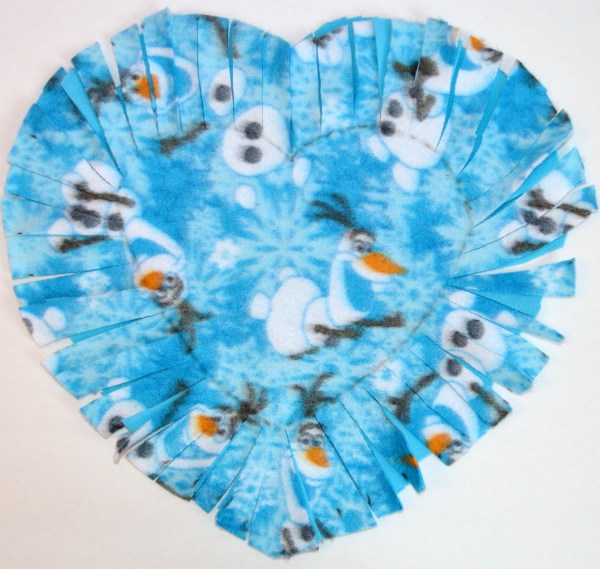
8. Start knotting!  Making sure that the correct side of the fabric is facing outwards, double knot each strand from the top fleece to the bottom fleece, stopping only when there is a about four or five strands left to knot.

9. Stuff the heart with Polyester Fiberfill.

10. Double knot the remaining strands and you’re done!

Olaf's Frozen Heart Pillow www.mouseearsmom.com

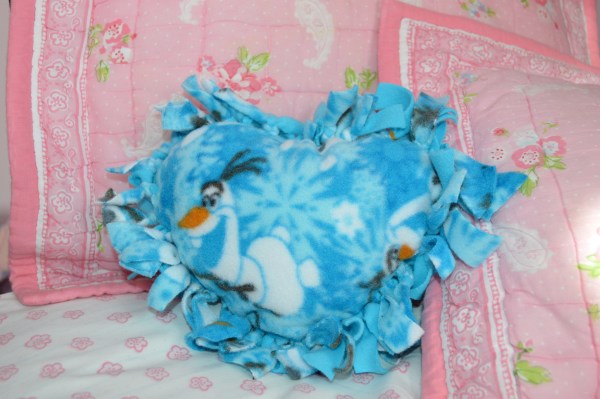
Although this little Valentine heart is frozen blue, I’m sure the hug-loving snowman on the outside will warm up the heart of your child this Valentine’s Day.

Have a great day and thanks for stopping by!

DIY: Celebrating a Disney-Inspired Valentine’s Day


Mickey and Minnie Mouse Valentine Boxes

During this past Christmas season my kids loved counting down to Santa’s big arrival using various advent calendars.  They quickly hopped out of bed each morning and the opening of doors, boxes and pulling little plush characters from pockets began. But now it’s over and depressing January is upon us.  Victoria has resorted to asking me daily when Santa will be returning.  So to combat the January blahs, I made these Mickey and Minnie Mouse Inspired Valentines Boxes to use each day as we celebrate the days counting up to Valentine’s Day.

Yay! Valentine’s Day is only one month away!

The idea is that each day the kids leave a special note to each other each night for the first two weeks in February and Mommy and Daddy leave them each a small Disney surprise inside their boxes. Last weekend, I shopped at Dollar Tree store and found a ton of great Disney branded items, including Valentines! Here are a few of the things I found. I was thrilled to find all of the Frozen-branded, Princess-branded and even Star Wars-branded items!

Dollar Tree Disney Finds

Every one of these items fits nicely in the kids’ surprise boxes too!

If you’d like to join in on the fun and make your own Mickey and Minnie Mouse Valentine boxes, here’s how I made them.

Supplies

 Supplies for Mickey:

  • “Celebrate It” brand mail box (Or any red box that has a lid you can cut a slot in.)
  • 2 sheets of black card stock
  • 2 heart stickers (Part of a bag of stickers that included the small hearts used for the Minnie Mouse box. I purchased the sticker bag for $1 at Dollar Tree.)
  • Glue Gun
  • Scissors

DIY Disney Inspired Valentine Box

  1. Since the box I chose to use was already red, all I had to do was wrap the lid in black card stock.  To make sure that the wrap was tight, I used a hot glue to keep the card stock in place.
  2. Next to make Mickey and Minnie inspired ears, all you have to do is trace the top of an average drinking glass, but flatten the bottom of the ears by adding a little flap to fold over. Wanting to make sure they stay put, I hot glued them onto the top of the box. (See photo below.)
  3. Add the stickers and you’re done!

www.mouseearsmom.com


I’m hoping the kids will enjoy this daily celebration of our family’s love for each other.  I’m certain the kids will enjoy the daily Disney treats but personally I’m looking forward to reading Gavin’s kind hand-written “nice” notes to his baby sister and Victoria’s “surprise” valentines to her big brother. Victoria has started making her Valentine’s already!

www.mouseearsmom.com


Have you started celebrating Valentine’s Day yet?

Simple and Inexpensive Frozen-Inspired Olaf Ornament Tutorial

Olaf Ornament

I found the cutest little Disney’s Frozen tissue boxes at our local Dollar Tree store. I can honestly tell you that I was shocked to find ANYTHING Frozen branded that cost only one dollar bill! Of course, I snatched up six boxes! The artwork is so adorable that I decided to re-purpose a now empty box to make today’s super simple ornament!

Dollar Store Olaf Ornament Tutorial

Here are the supplies that I used to make the Olaf ornament:

  • Tacky Glue
  • Sprinklets (or any glitter you’d like)
  • Small wooden frame (I found these 3″ x 3″ frames for 29 cents on clearance at a local craft store.)
  • Disney Frozen Tissue Box (Dollar Tree store is where I found mine!)
  • Bakers Twine
  • OPTIONAL: Spray Adhesive

Tutorial

  1. To make this ornament, pick up an Olaf tissue box from your local Dollar Tree store and cut off one side of the box.
  2. Brush the Tacky Glue on the front of the unfinished frame. (I used Tacky Glue because it dries clear, so it’s not as easy to see the Boo-Boos.)
  3. Dump that glitter on!
  4. OPTIONAL: Once the glitter dried, I sprayed the frame with Spray Adhesive and then allowed it to dry again. This step helps the glitter stay put!
  5. Cut the Olaf artwork out of the side panel just slightly larger than the frame’s opening.
  6. Glue the panel on the back of the frame and allow to dry.
  7. Add your twine for hanging purposes.

www.mouseearsmom.com

 If you can’t locate any Frozen tissue boxes, you can use wrapping paper!

I found this great wrapping paper at Hallmark!  Speaking of Hallmark, I’m certain you’ve seen the beautiful Disney Frozen ornaments that they had for purchase this holiday season.  Our local stores are completely sold out!  This ornament is a great alternative if your store is sold out or if you’ve already purchased a gift and didn’t want to spend an additional $15 per ornament.

Frozen ornament tutorial

The key to using wrapping paper for the ornament’s center image is to use spray adhesive (I used Scott’s brand.) to attach the wrapping paper piece to thicker material for backing.  As you can see in the photo above, I used brown heavy-duty craft paper. It’s actually the center of a used up roll of wrapping paper.

Disney Frozen Anna Hand Made Ornament


 Adorable- right?  My three year old little girl loved the ornaments and I hope you did too!

Olaf and Anna ornaments