Category: Free Printables

Free Printable Airplane Garland Template

Airplane GarlandDecorating with Planes

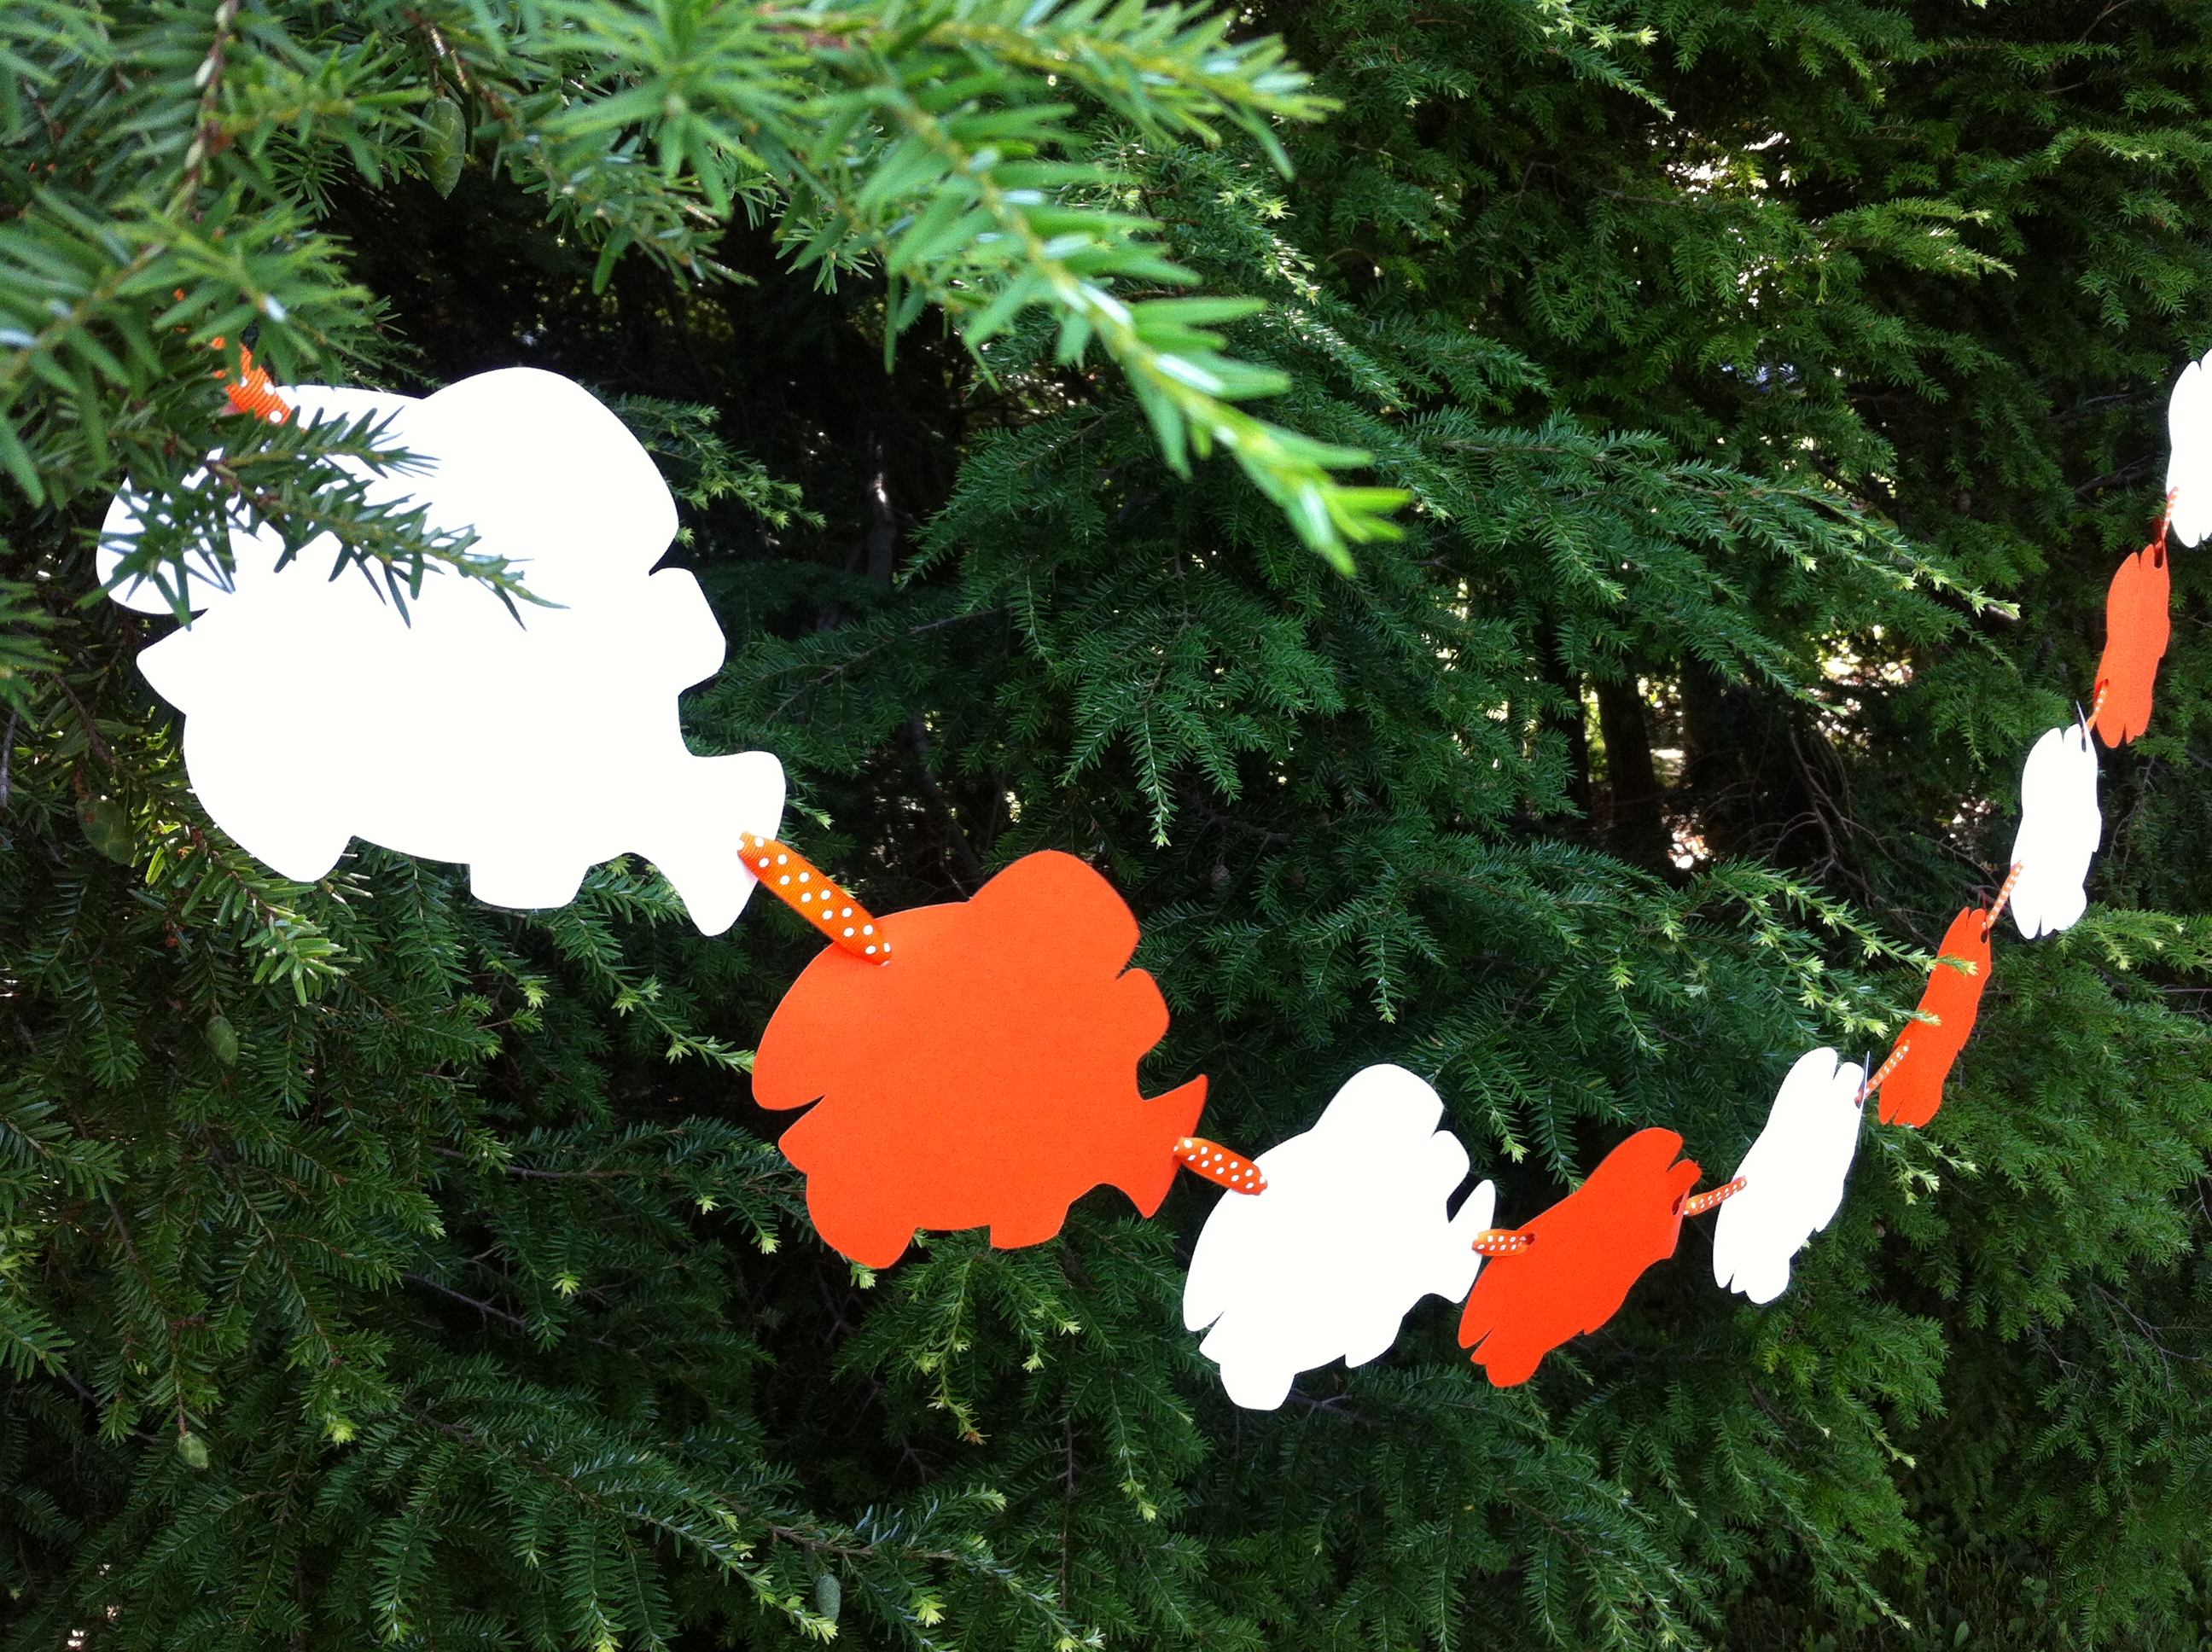
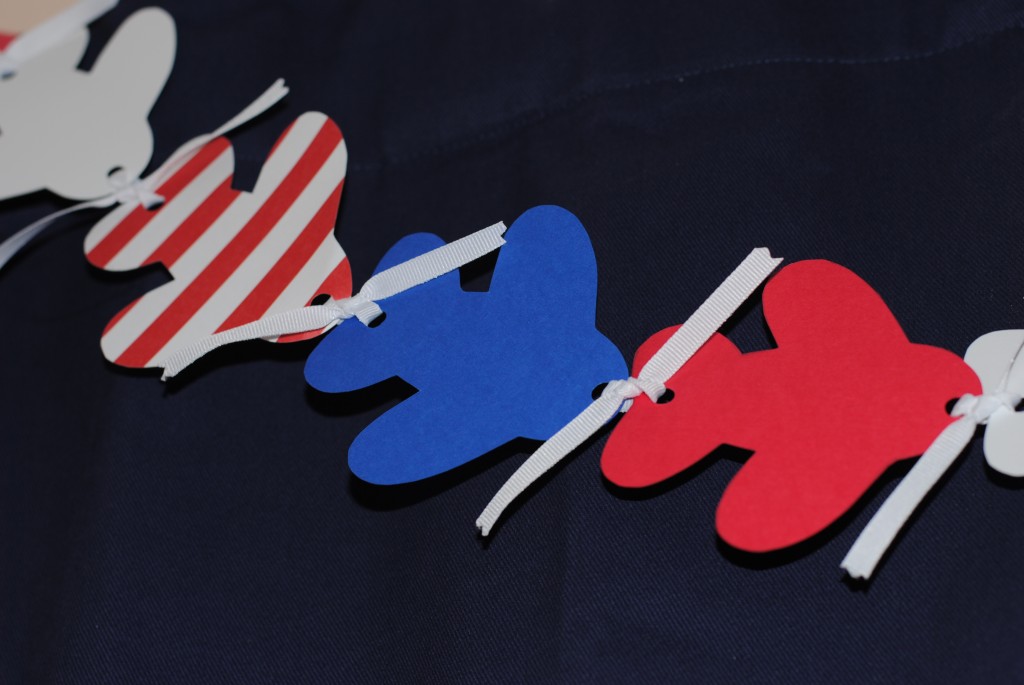
Do you live with a little aviator?  If so, an airplane garland is the easiest and cheapest way to decorate his room with a touch of plane décor.    He can even help you make it!  All you need is cardstock, a hole puncher, ribbon and a pair of pinking shears.  To get the consistent airplane shape I used a Wilton airplane cookie cutter as my “template”.  If you can’t find this cookie cutter, I traced if for you.  Just click on the Airplane template link below and print it out.  I would recommend printing it on cardstock.  It’ll make it easier to use it as a template.

Airplane template

Five Steps to Make an Airplane Garland:

  1. Trace the airplane cookie cutter or template on to cardstock.
  2. Cut out the airplane shapes.
  3. Punch one hole on front of each plane and one hole on the back of each plane.
  4. Cut ribbon.
  5. Tie the planes together with the ribbon.

DSC_2183
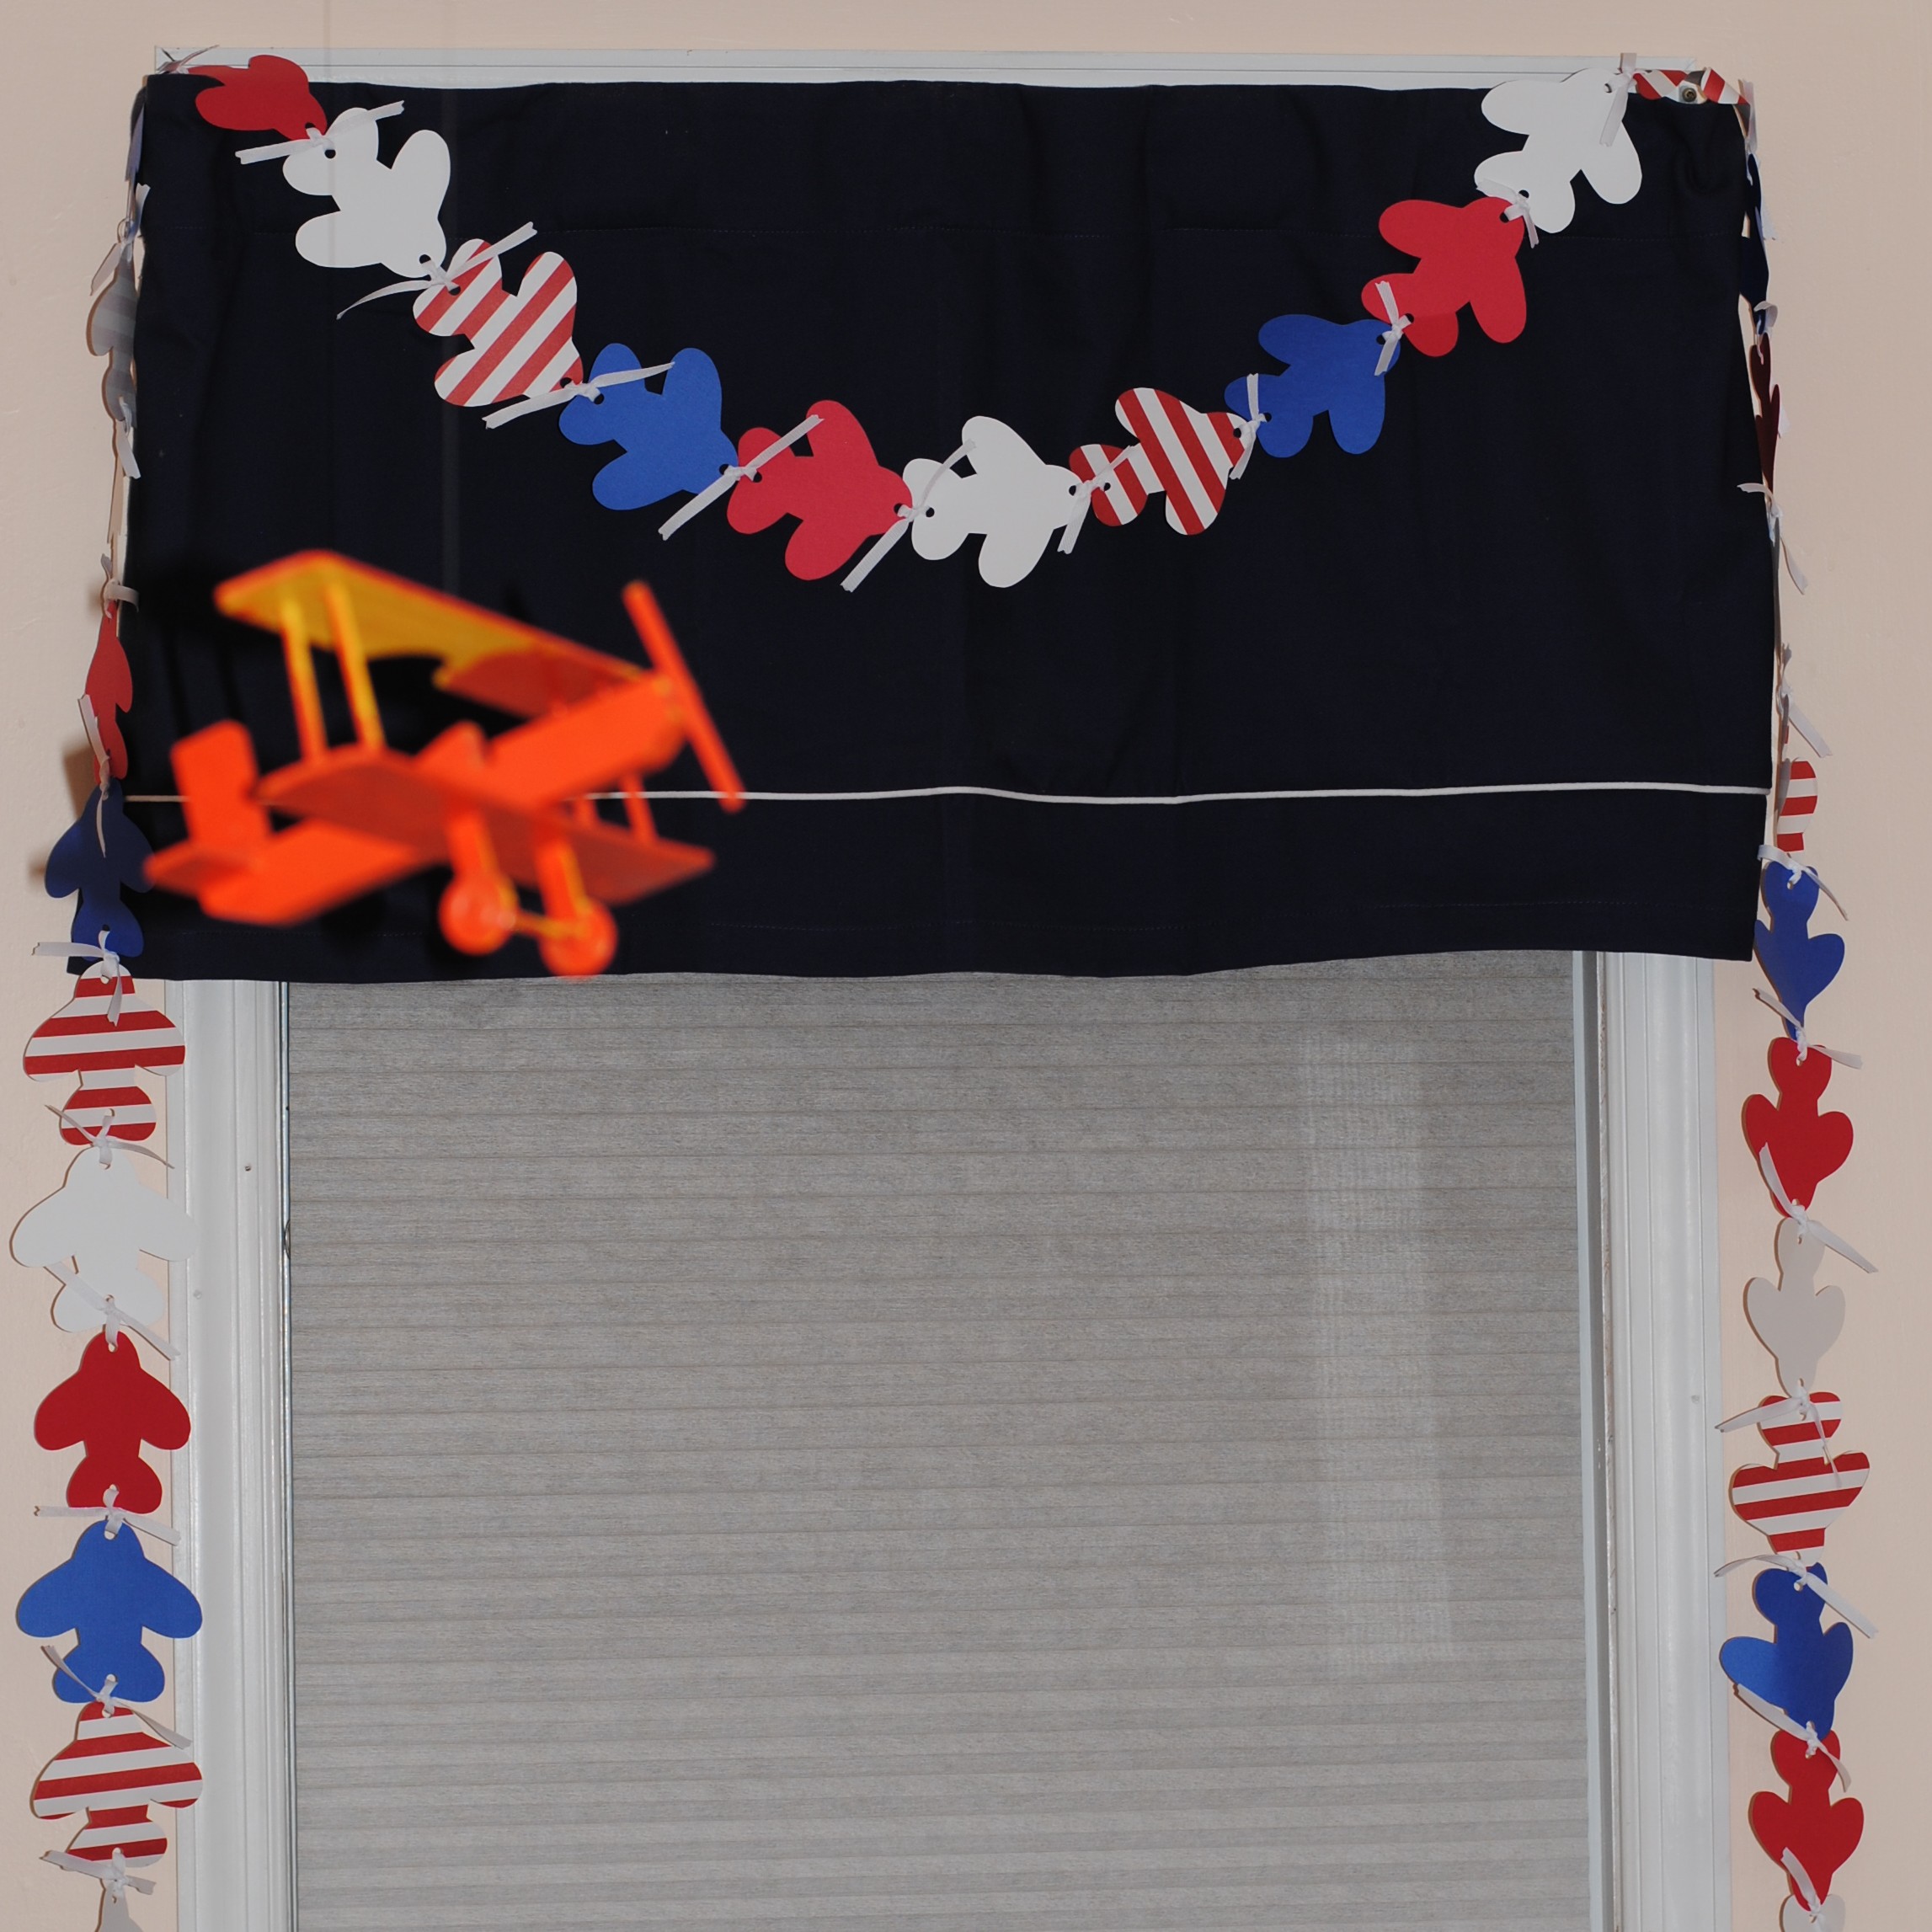
At Gavin’s 6th birthday party, I used this garland on the front of the dessert table. His window valance is a dark navy, so the garland also worked perfectly in his room.  Since then, he’s painted the orange plane you see hanging in this picture.

Now Gavin and I would like to make an Orange, White and Blue Airplane Garland for our new favorite Cropduster, Dusty!

If you’re looking for a fantastic deal on Disney’s “Planes” toys. The Disney Store is running a wonderful sale on their “Planes” toys. Here’s the link to take you straight there!
Online Exclusive. For a limited time, 40% off high-flying favorites from Disney’s Planes at Disney Store!


Mickey Mouse Printable Summer Craft

Mouse Ears Mom 012Mickey Mouse Watermelon Placemat

If you’re a Friend of Mouse Ears Mom on Facebook, then you already know that this week I’ll be talking about a few of the most delicious things to enjoy during the heat of summer and sprinkling them with a touch of pixie dust!

My children’s favorite summer fruit (and mine too) is Watermelon.  July is National Watermelon month, so I’m guessing that our family is not alone when choosing this fruit as our favorite healthy summer treat.  Despite how wonderful watermelon tastes, it’s the messiest of messy.  So, I decided to make this little preschool size Mickey Mouse Watermelon Placemat for my two-year old.  It was super easy to make and I’ve even included a printable stencil to help you.

Mouse Ears Mom 016  All you need to make this placemat is four pieces of scrap-book cardstock, black, hot pink, green, and I chose light green for the watermelon rind.  The paper pictured to the left is 12″x12″.  You’ll also need scissors, a glue stick and the trusty Mickey Mouse puncher that is pictured in the top right corner of the image.  I purchased this punch at A.C. Moore craft store.  Last but not least, you’ll need one sheet of card stock to print out the watermelon template.  Just click on the file below for the printable watermelon template.

watermelon template

OK, now after you’ve printed that out, you’re ready to get started!  Here are the quick steps to complete you’re little one’s placemat.

  1.  Cut the black scrapbook paper to 11″ top to bottom and leave the width at 12″.  The remaining one inch black strip you can use to make your Mickey seeds and place them off to the side.  If your little Mousketeer is nearby, they can help with that part.  The puncher is very easy to use.
  2. Cut out the three parts to the watermelon template.
  3. Trace each part onto the pink and green papers, cut each out and then glue them all together, including those Mickey seeds you placed to the side earlier.  Since it’s probably your Mouseketeer’s glue stick you’re using, she can help you with this part too!
  4. Glue your colorful watermelon onto the black scrapbook paper.
  5. With your left over pink paper, punch out a few Mickey Mouse seeds and add that final touch to your placemat.
  6. To complete- Laminate.  I do not own a lamination machine, so I asked Staples to help me with this part.  When asked what type of lamination I would like, I chose the heavier weight lamination, due to the depth of the final piece.

Drip Drip DropNow all those little drip, drip, drops are an easy cleanup.

Now, where’s the watermelon?


Christmas in July! Free Printable Nemo Template

Nemo Garland templateYay A Present!

In my last post, I featured my daughter’s Finding Nemo inspired birthday party.  One of the fun décor items that I created for the party was a Nemo garland that was used on the front of the cake table.  If you’re planning a little summer pool party and would like to create your own Nemo garland, click on the pink link- Nemo Inspired Template found at the end of this post.  You’ll find two pages, each showing one fish.  Print at least one of the two pages on white card stock… it’s always nice to have an extra though.  Now get out your scissors, pencil, card stock colors of your choice, hole puncher and ribbon.  You’re ready to go!

Simply cut out “Nemo” to create your template and use him to trace the image on your colored card stock.  Then cut out each colored card stock “Nemo” and hole punch around the middle of his tail, then line up a hole punch for the front of the fish.  Going forward make sure all the fish are hole punched in the same spot so the garland is uniform.  I used nine fish to complete the garland for a six-foot long table.  Once you are done with your fish, simply use your ribbon to string them.  Talk about easy!

For your treat table by the pool, an orange and white “Nemo” garland would offset an aqua table-cloth beautifully.  With the aqua color of your pool in the background, and the use of some orange paper plates, napkins, cups and straws. The look should be fabulous!  A rainbow-colored “Nemo” garland would be so much fun too!  I’d love to see how you use the template.  Please share your photos featuring your “Nemo” inspired garland and I’ll post them to Mouse Ears Mom Facebook page for everyone to enjoy!

Nemo Inspired Template

Merry Christmas in July and “Just Keep Swimming.”