Category: Disney-Inspired Crafts

Mickey Mouse Topiary

Topiary
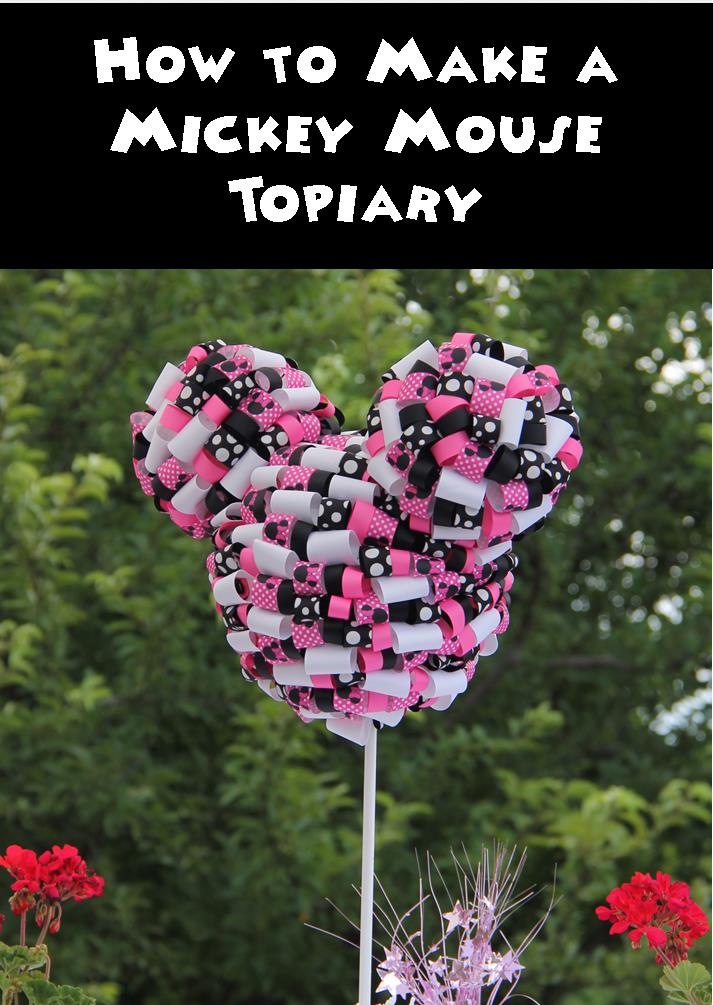
There are Five Simple Steps to Make a Mickey Ribbon Topiary

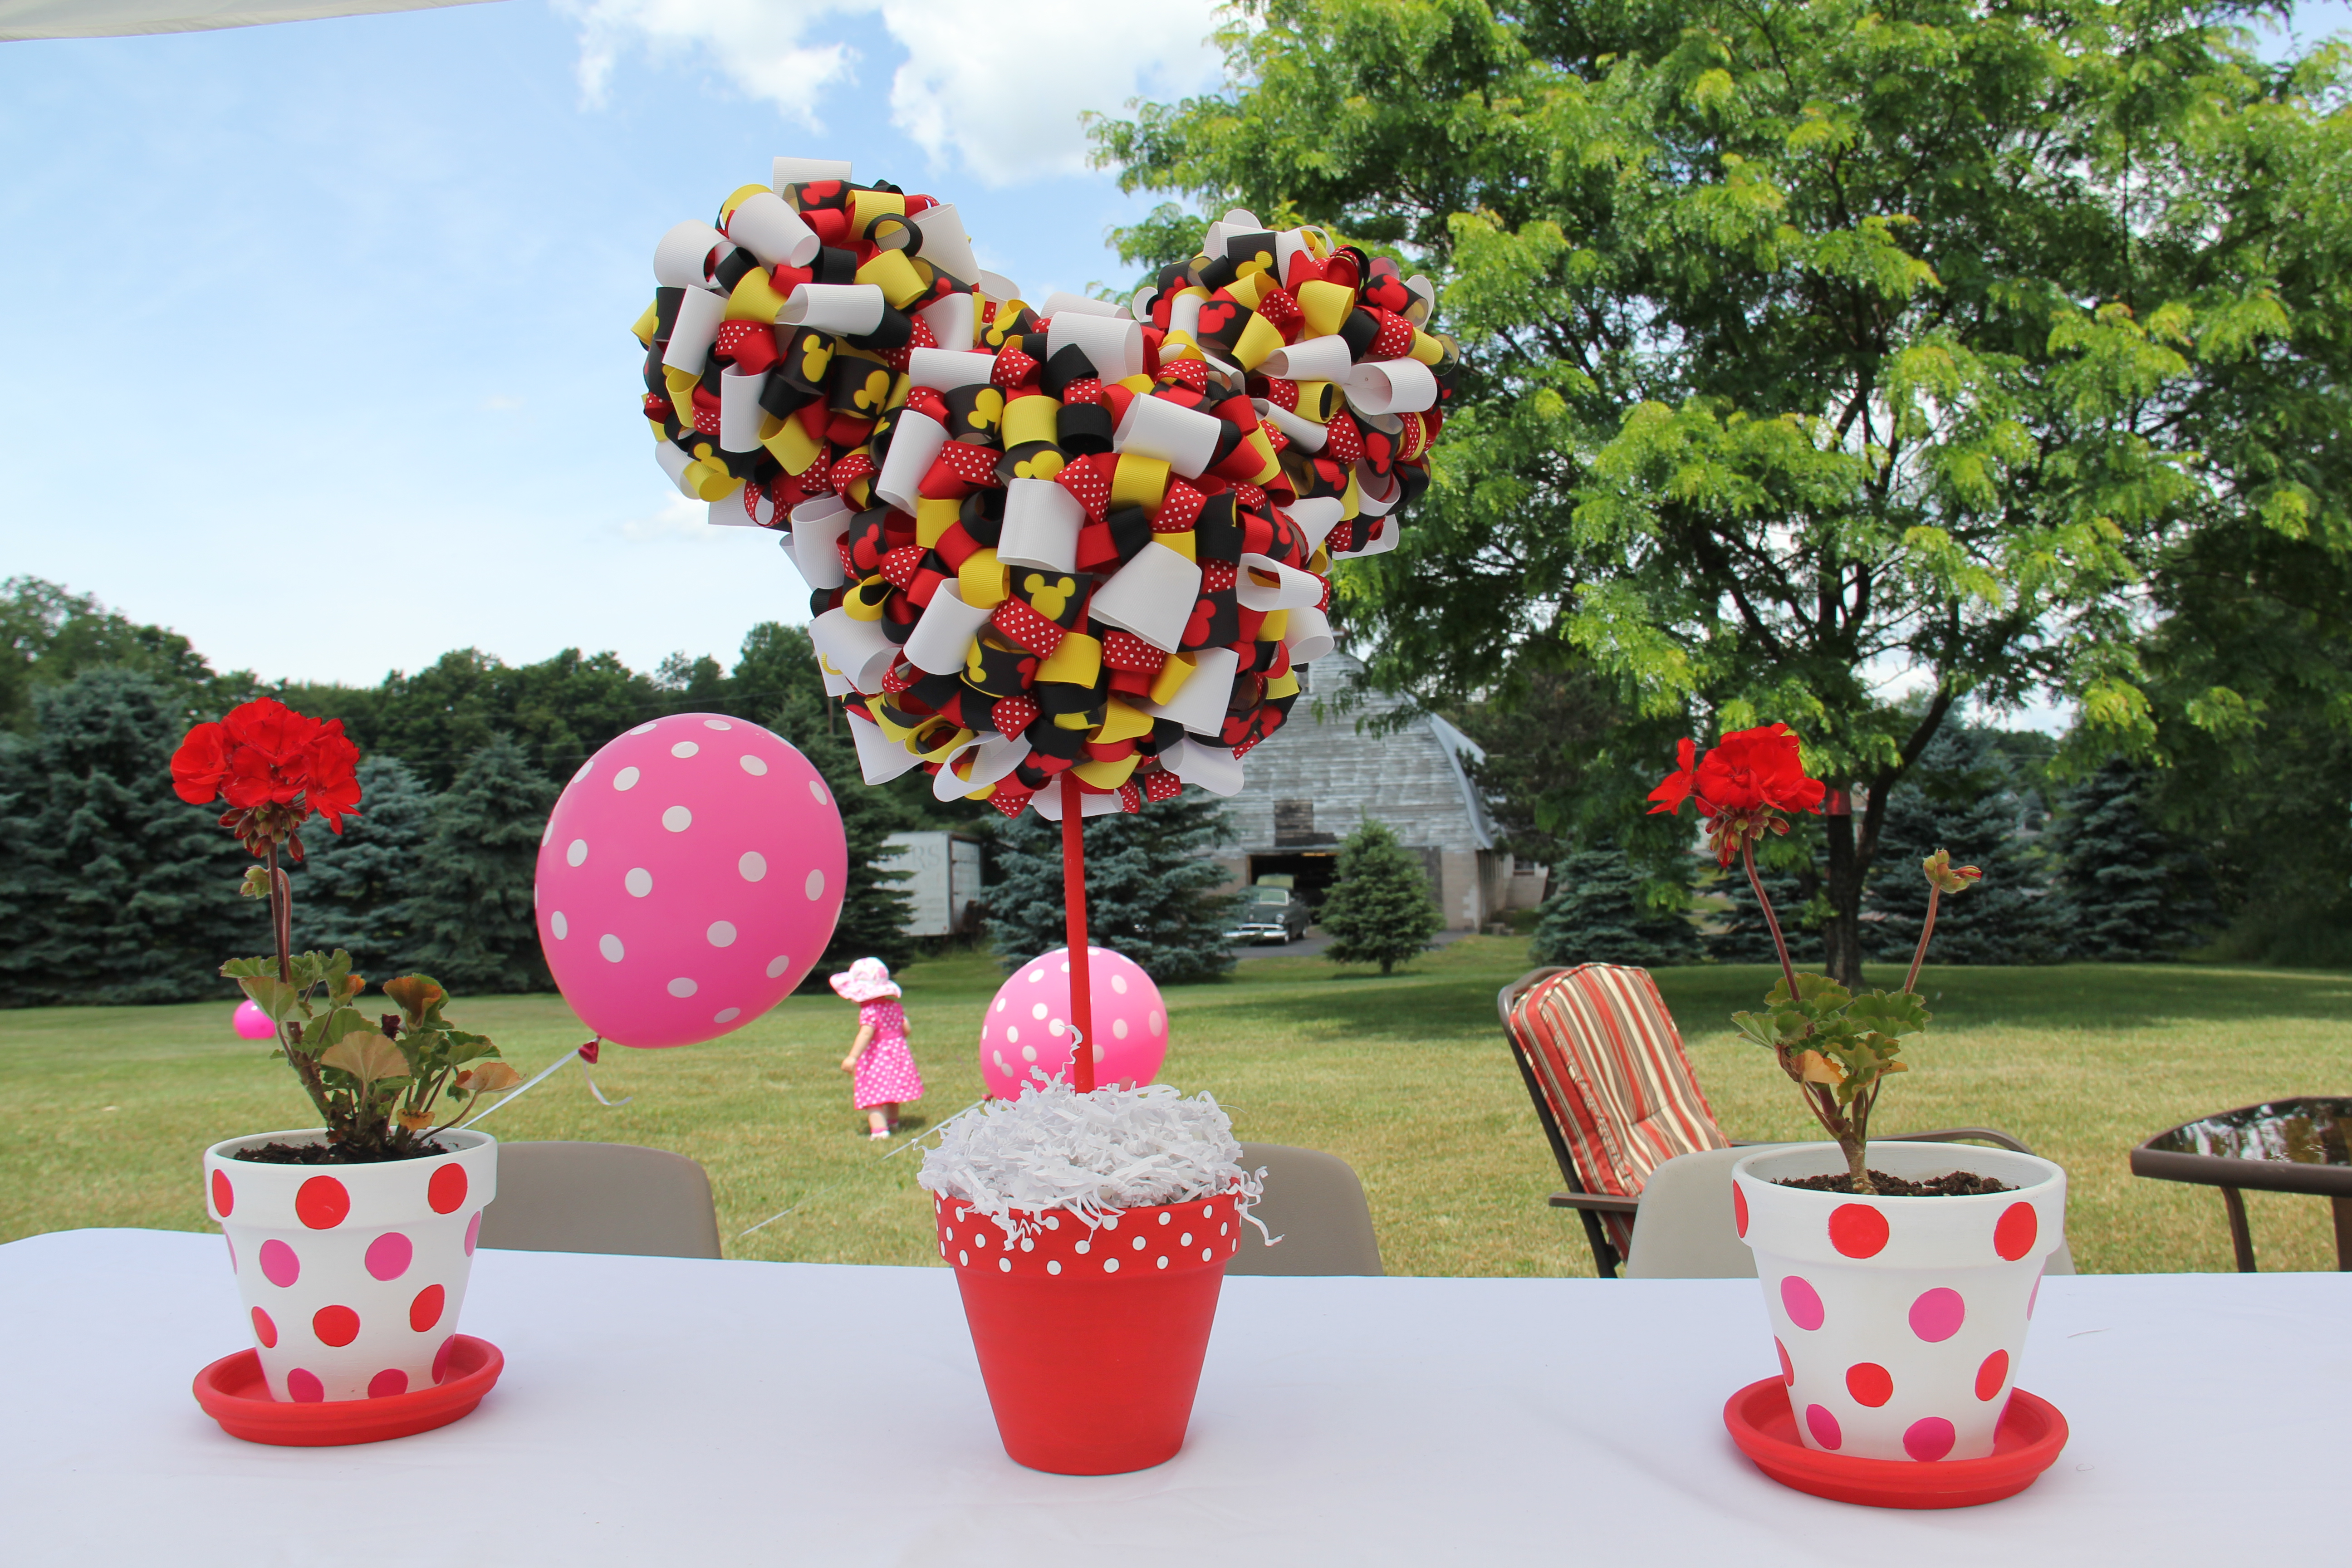
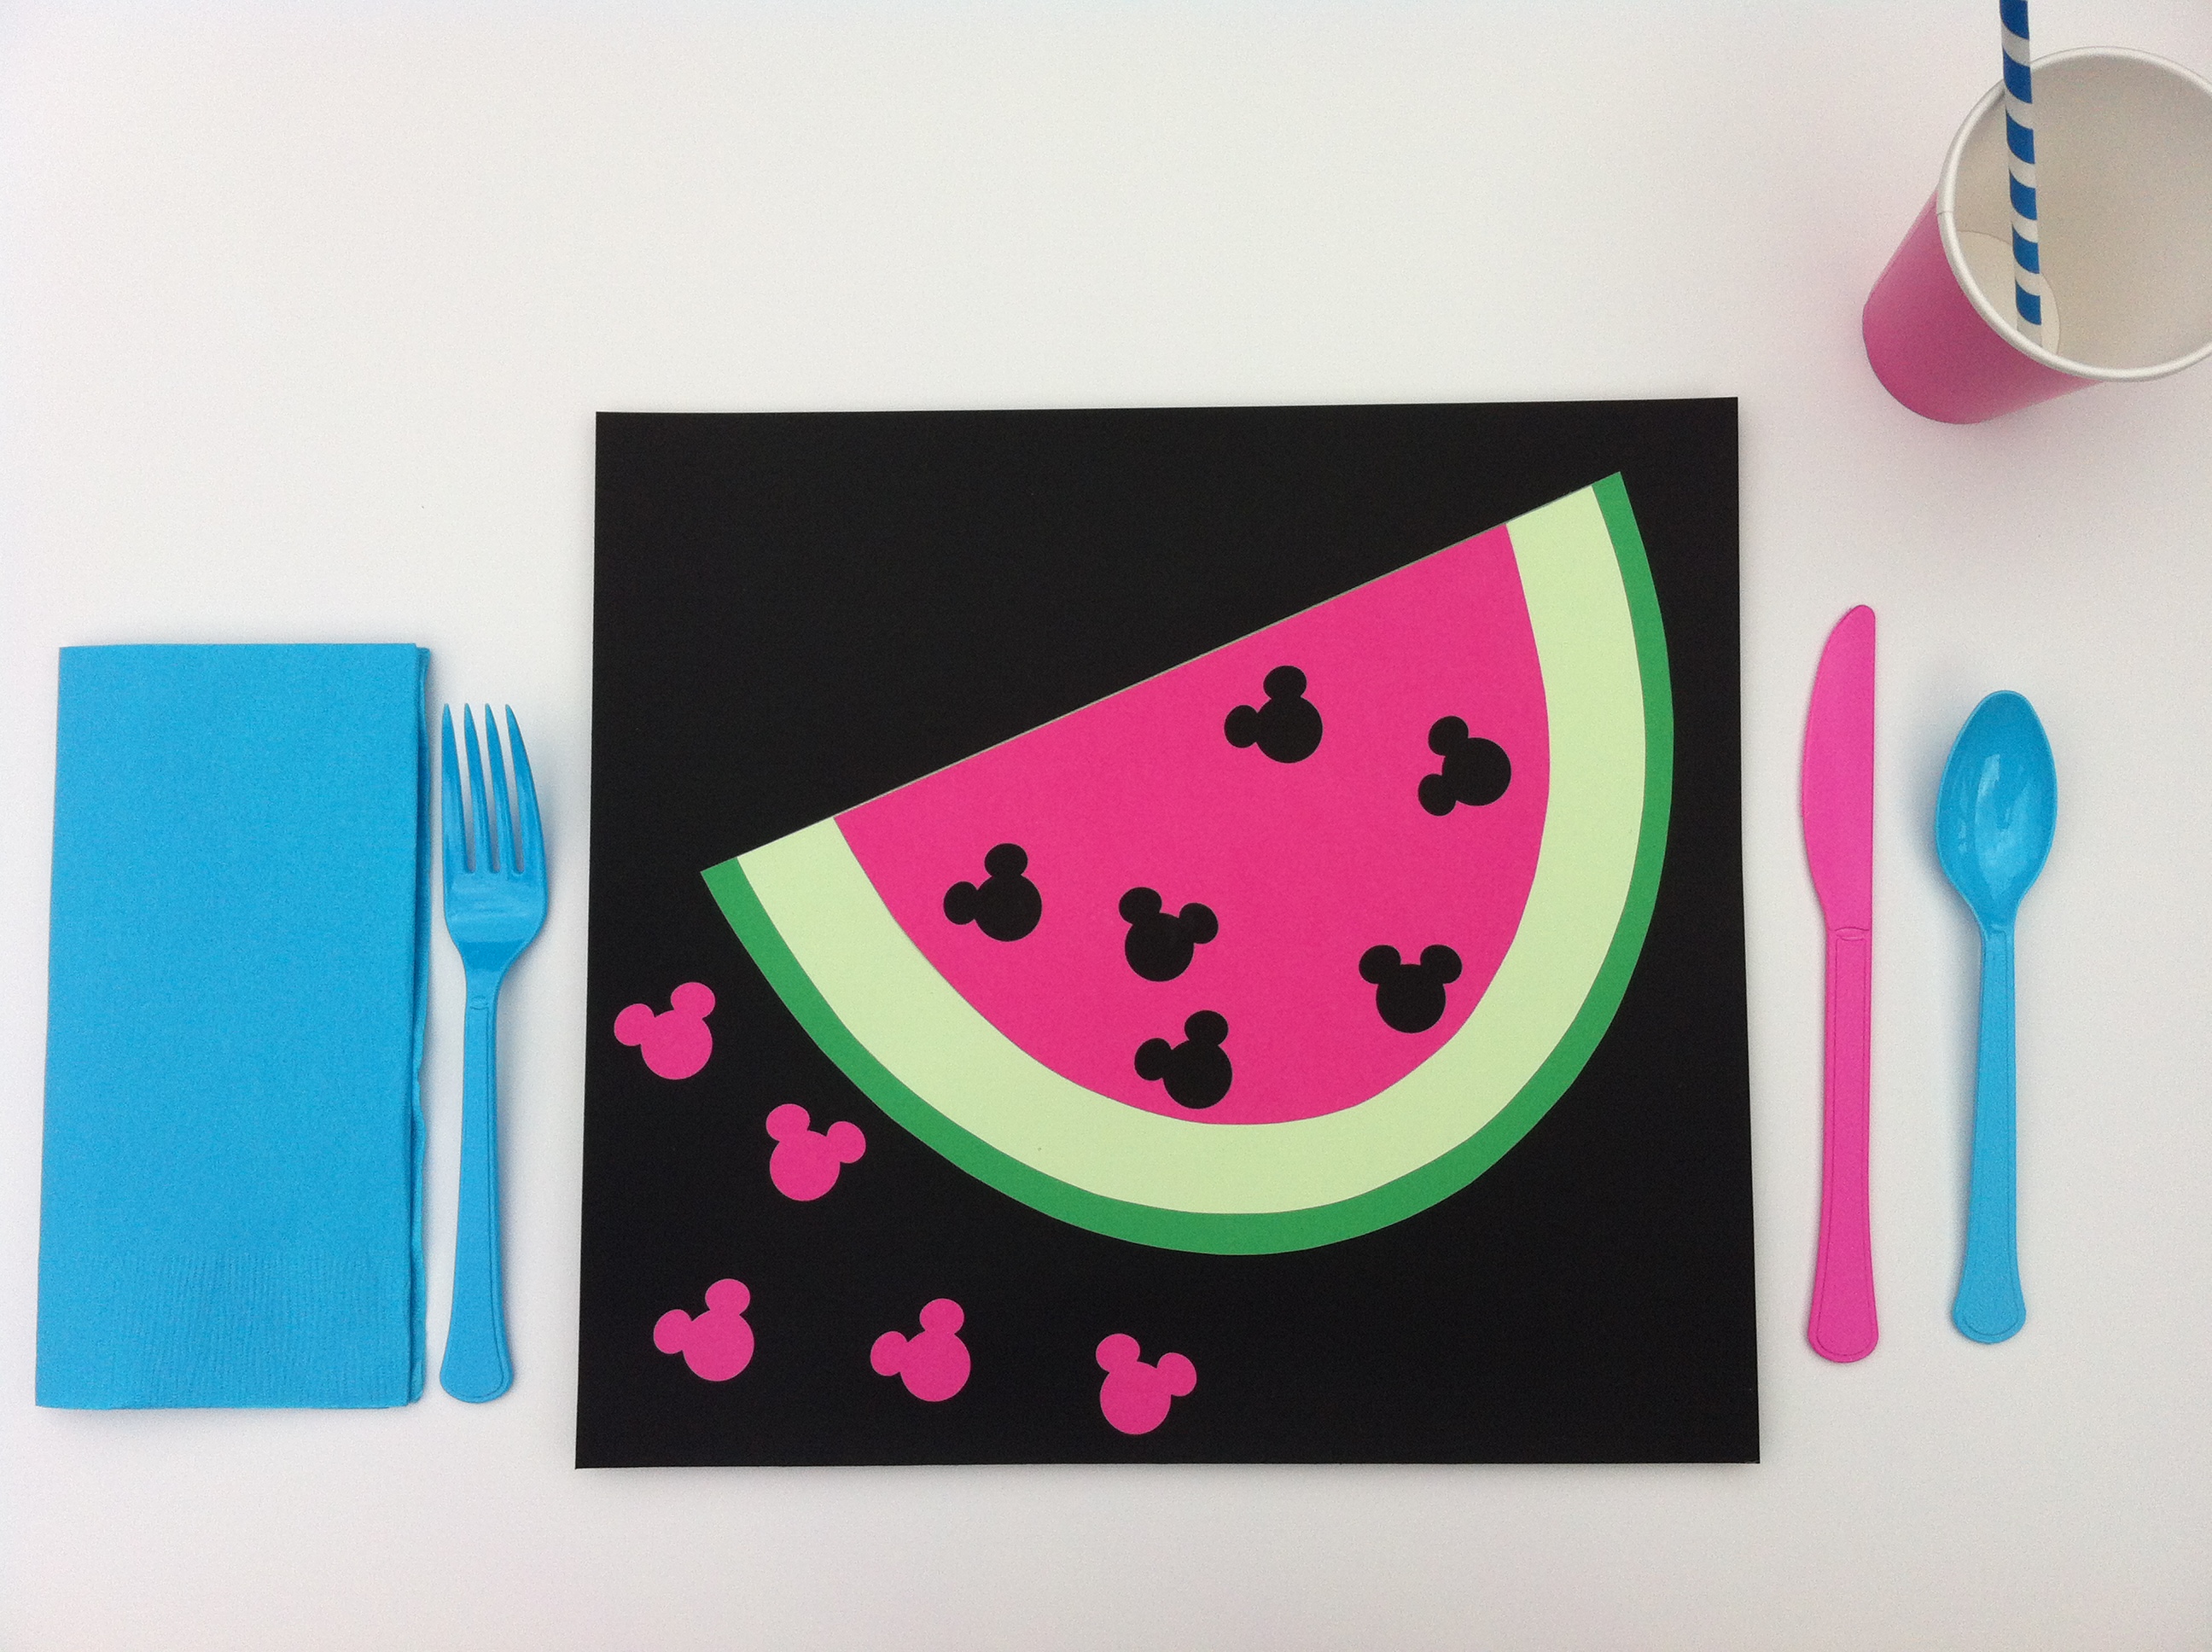
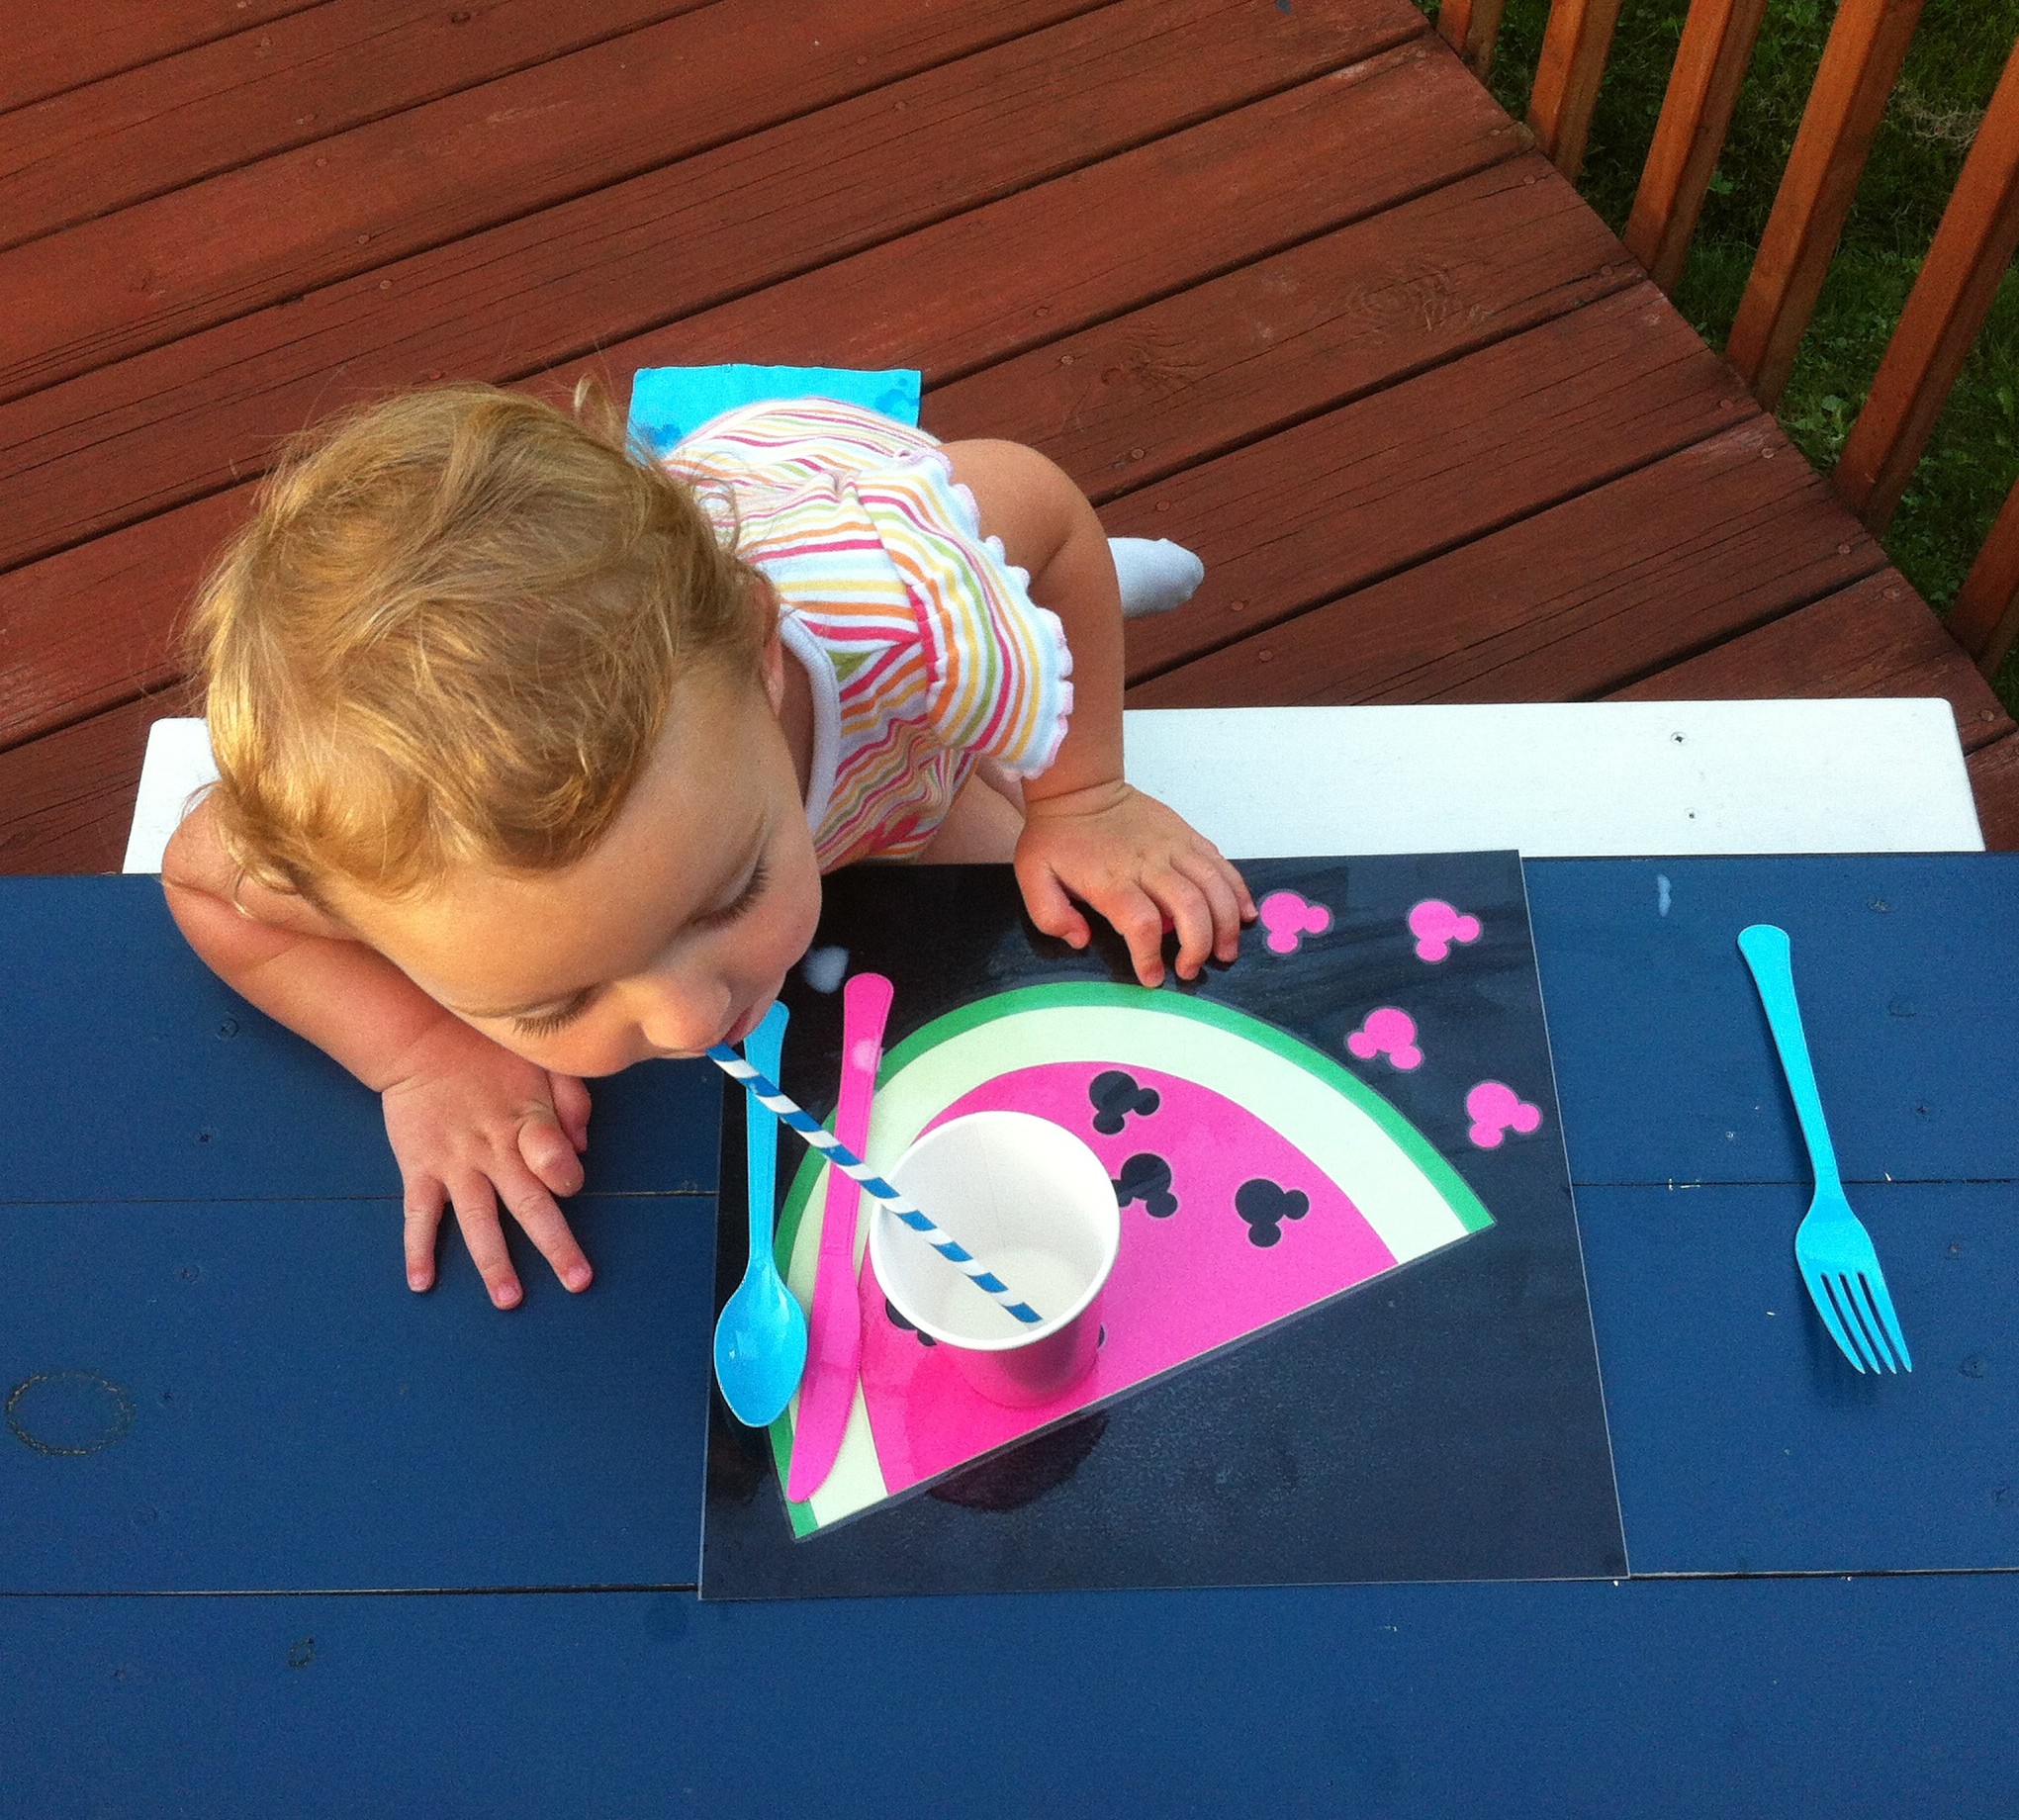
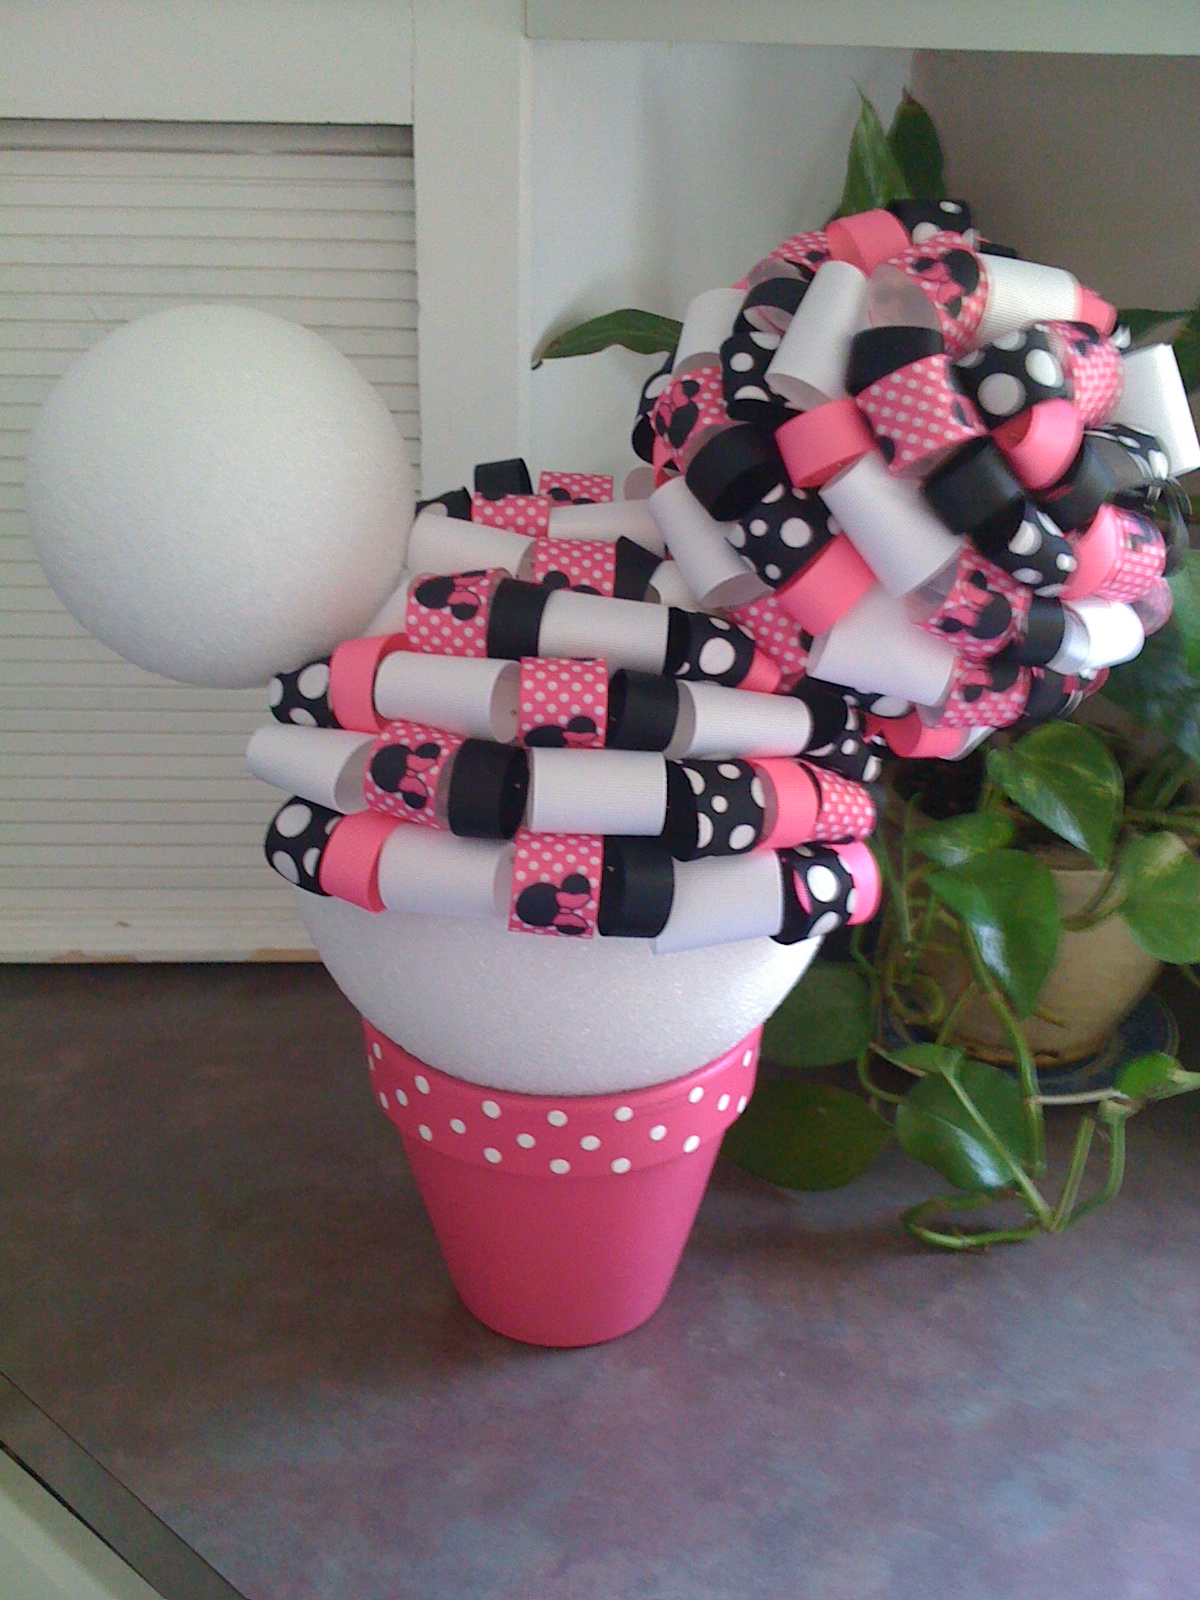
On Monday, I shared with you my daughter and nephew’s Mickey and Minnie Mouse Flower and Garden Birthday Party.  One of the décor items that I made for the party was the topiary that is pictured above.  I didn’t invent the concept of a Mickey Mouse Topiary, nor did I make the World’s Greatest Version of a Mickey Mouse Topiary.  However, I did make a lot of mistakes when making this craft and I’d like to share them with you, so your topiary will be simply perfect.

Before I share my “earned knowledge”, here are the basic five steps for making the Mickey Mouse Inspired Ribbon Topiary:

  1. Purchase supplies: You will need three Styrofoam spheres (your choice in size, as long as there are two small spheres and one large sphere), ribbon of your choice, sewing pins, a wooden dowel for the topiary to attach to the base, white paint to use on the dowel, one cookie pop stick cut in half, a terra-cotta pot for the base and Styrofoam for the interior of the base where the dowel will anchor.
  2. Cover the spheres with ribbon and attach the ears: Cut your ribbon into 2″ strips.  Loop the ribbon and pin it into one of the smaller spheres. Continue to do this until you’ve filled almost all of the sphere, except for the bottom.  This is where you will anchor it into the larger sphere by using half of your cookie pop stick. Continue to fill the second small sphere and then anchor it with the other half of the cookie pop stick.  Now fill the large sphere the same way, except fill the entire sphere including the bottom.
  3. Decide the height of your topiary and prepare the dowel:   Keep in mind it will need to be inserted into the base of the pot and also through the largest sphere.  Then cut the dowel and paint it accordingly.
  4. Secure the dowel:  Insert the painted wooden dowel into the base filled with a Styrofoam insert.
  5. Secure the Mickey Mouse Head:  Gently, push the completed Mickey Mouse shaped topiary down as far as you can onto the dowel without it coming out the top of the Mickey Mouse head.

Now for the bits of knowledge you should know before you start each step:

minnie mouse inspired topiarySupplies: When choosing your Styrofoam spheres and terra-cotta pot realize that once you put your ribbon and pins on the sphere two things happen.  The spheres become significantly larger and heavier. Notice in the photo the differences between the two ears.  The terra-cotta pot that you chose for the base should be heavy enough to support your topiary; otherwise your topiary is going to tip over.

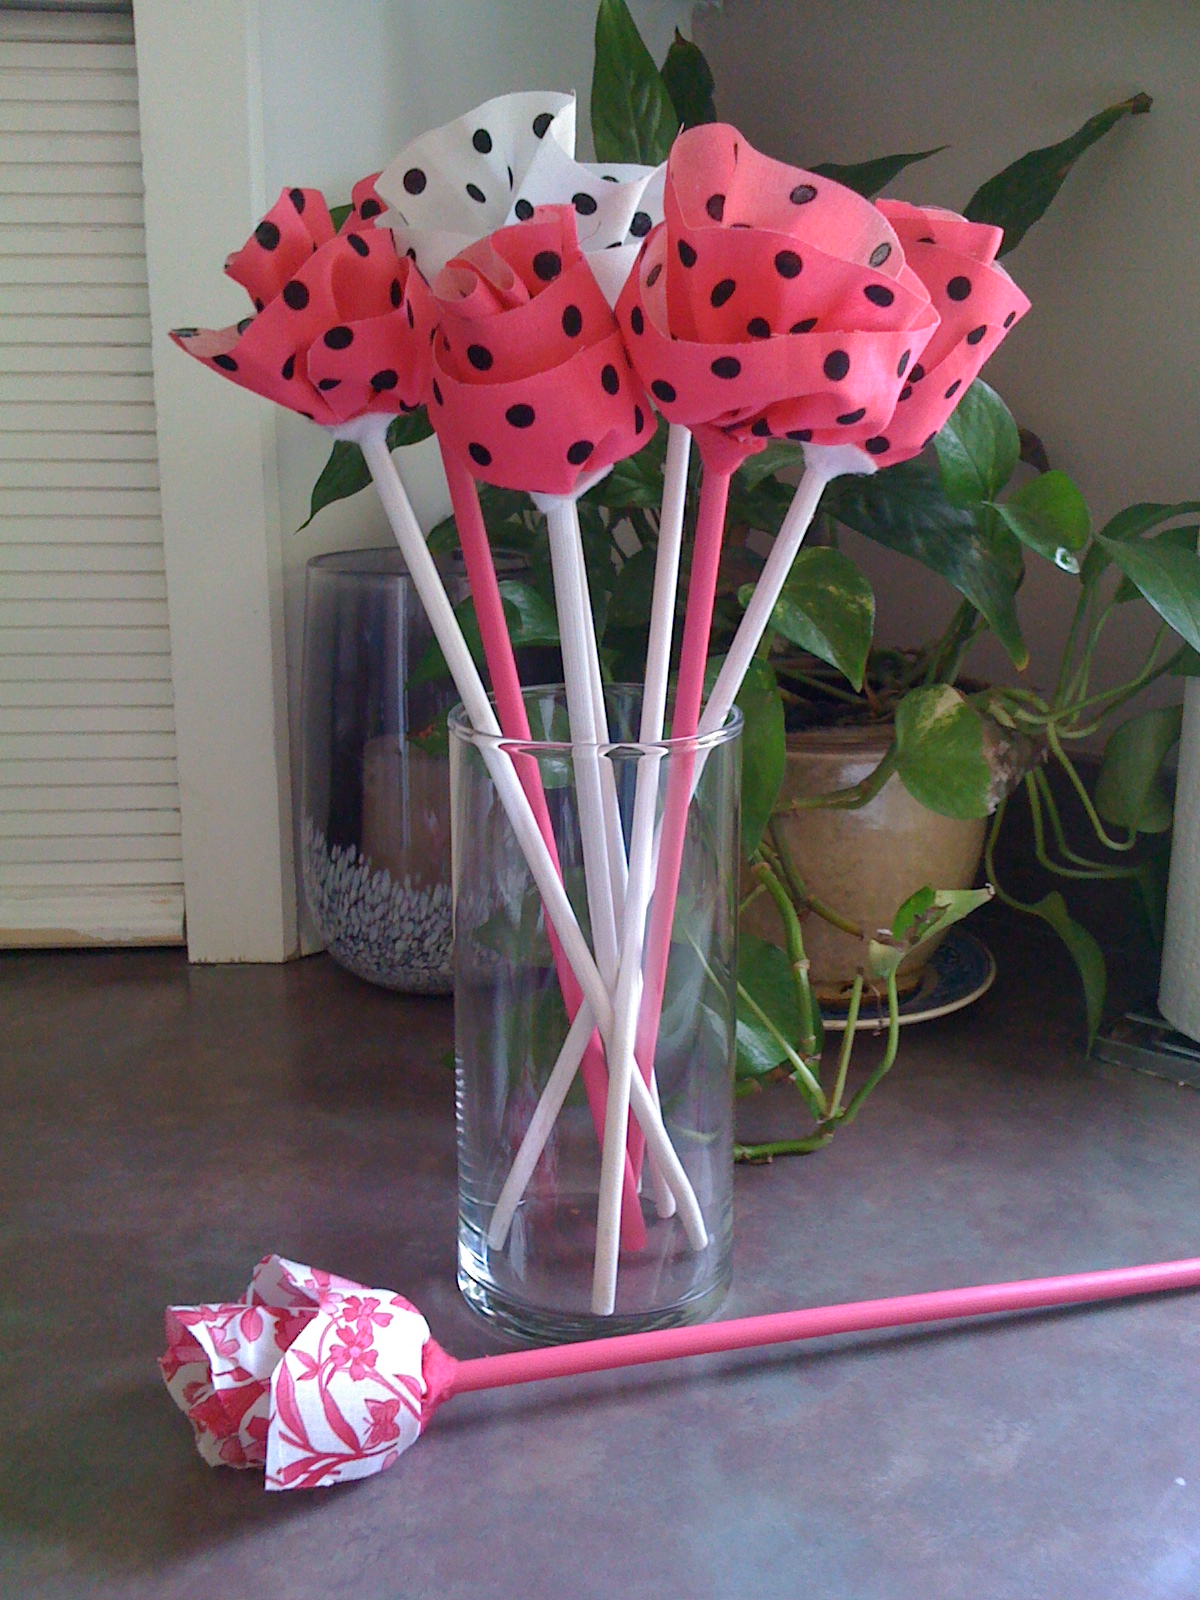
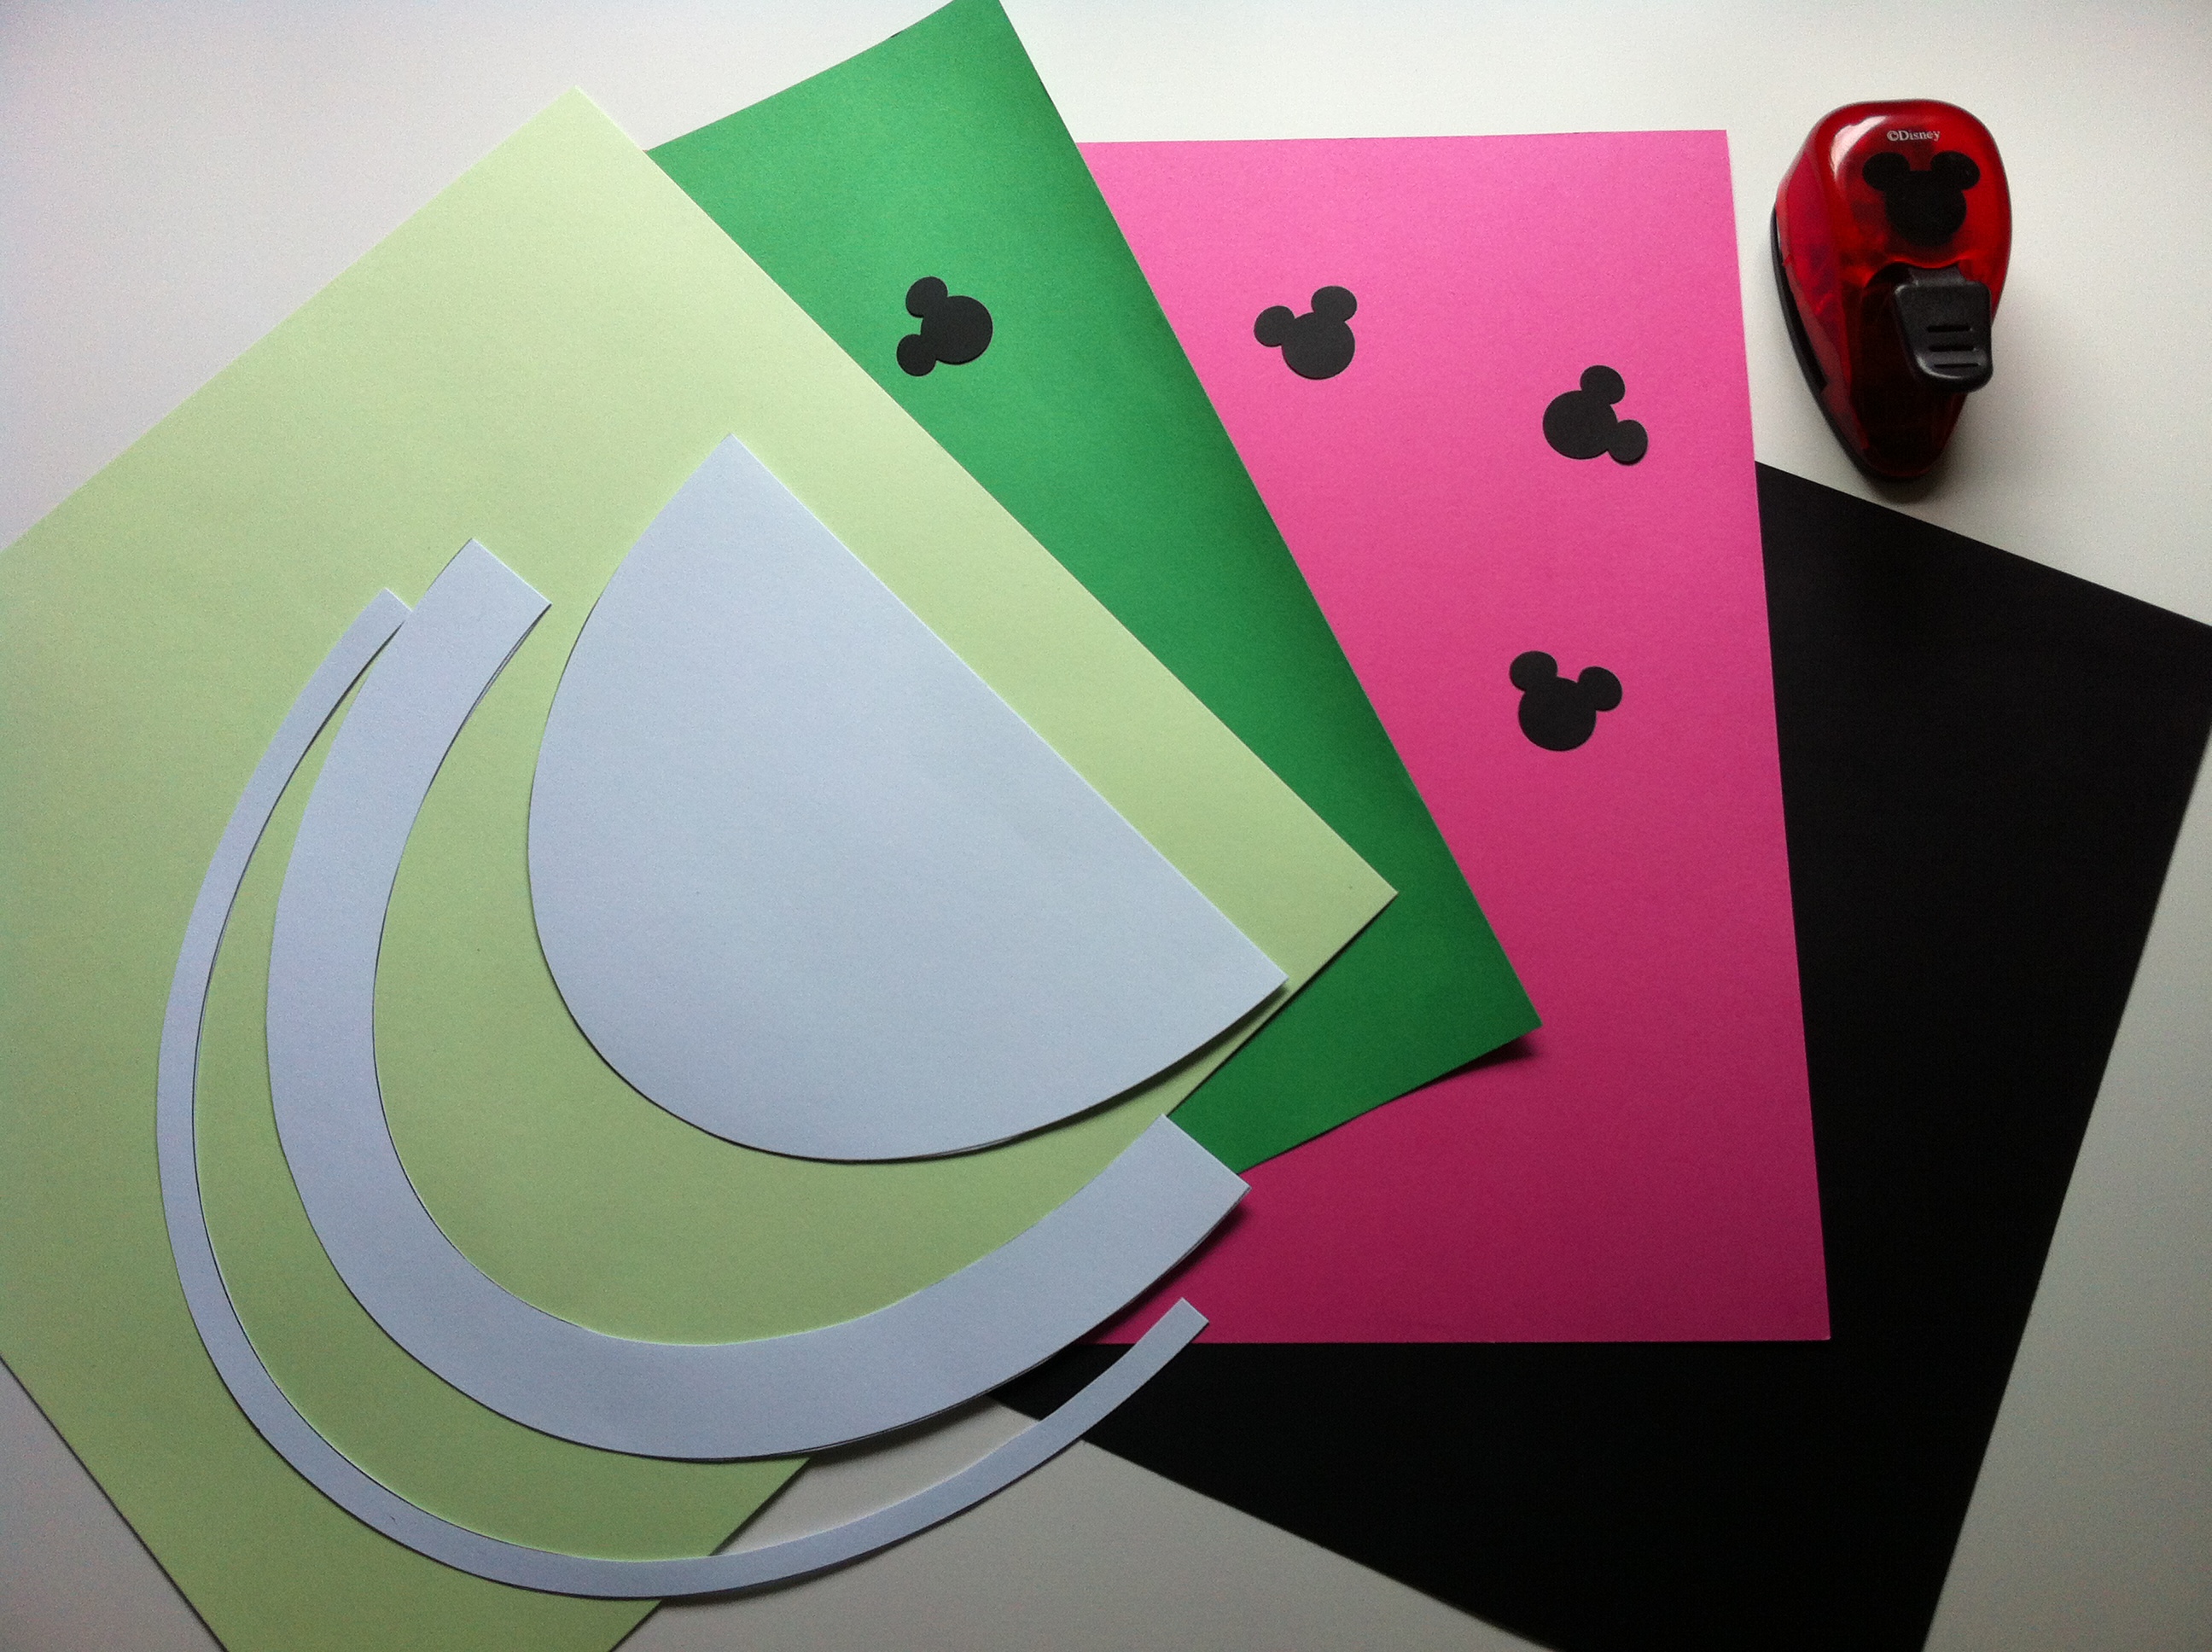
Ribbon: When you’re choosing your topiary’s color scheme keep it simple if you’re planning on using printed ribbons.  I found that five different ribbons made the topiary eye-catching, yet keeping the same color scheme of black, white and pink made the look uniform.  I would suggest Grosgrain ribbon since it won’t fray as much when you’re pinning it.  What’s really important is that you purchase enough ribbon.  Half way through this project I ran out of the Minnie Mouse ribbon and had to go out of the area to purchase more.  Also keep in mind that wider ribbon will cover more space than a narrow ribbon and plan accordingly.DSC_2165

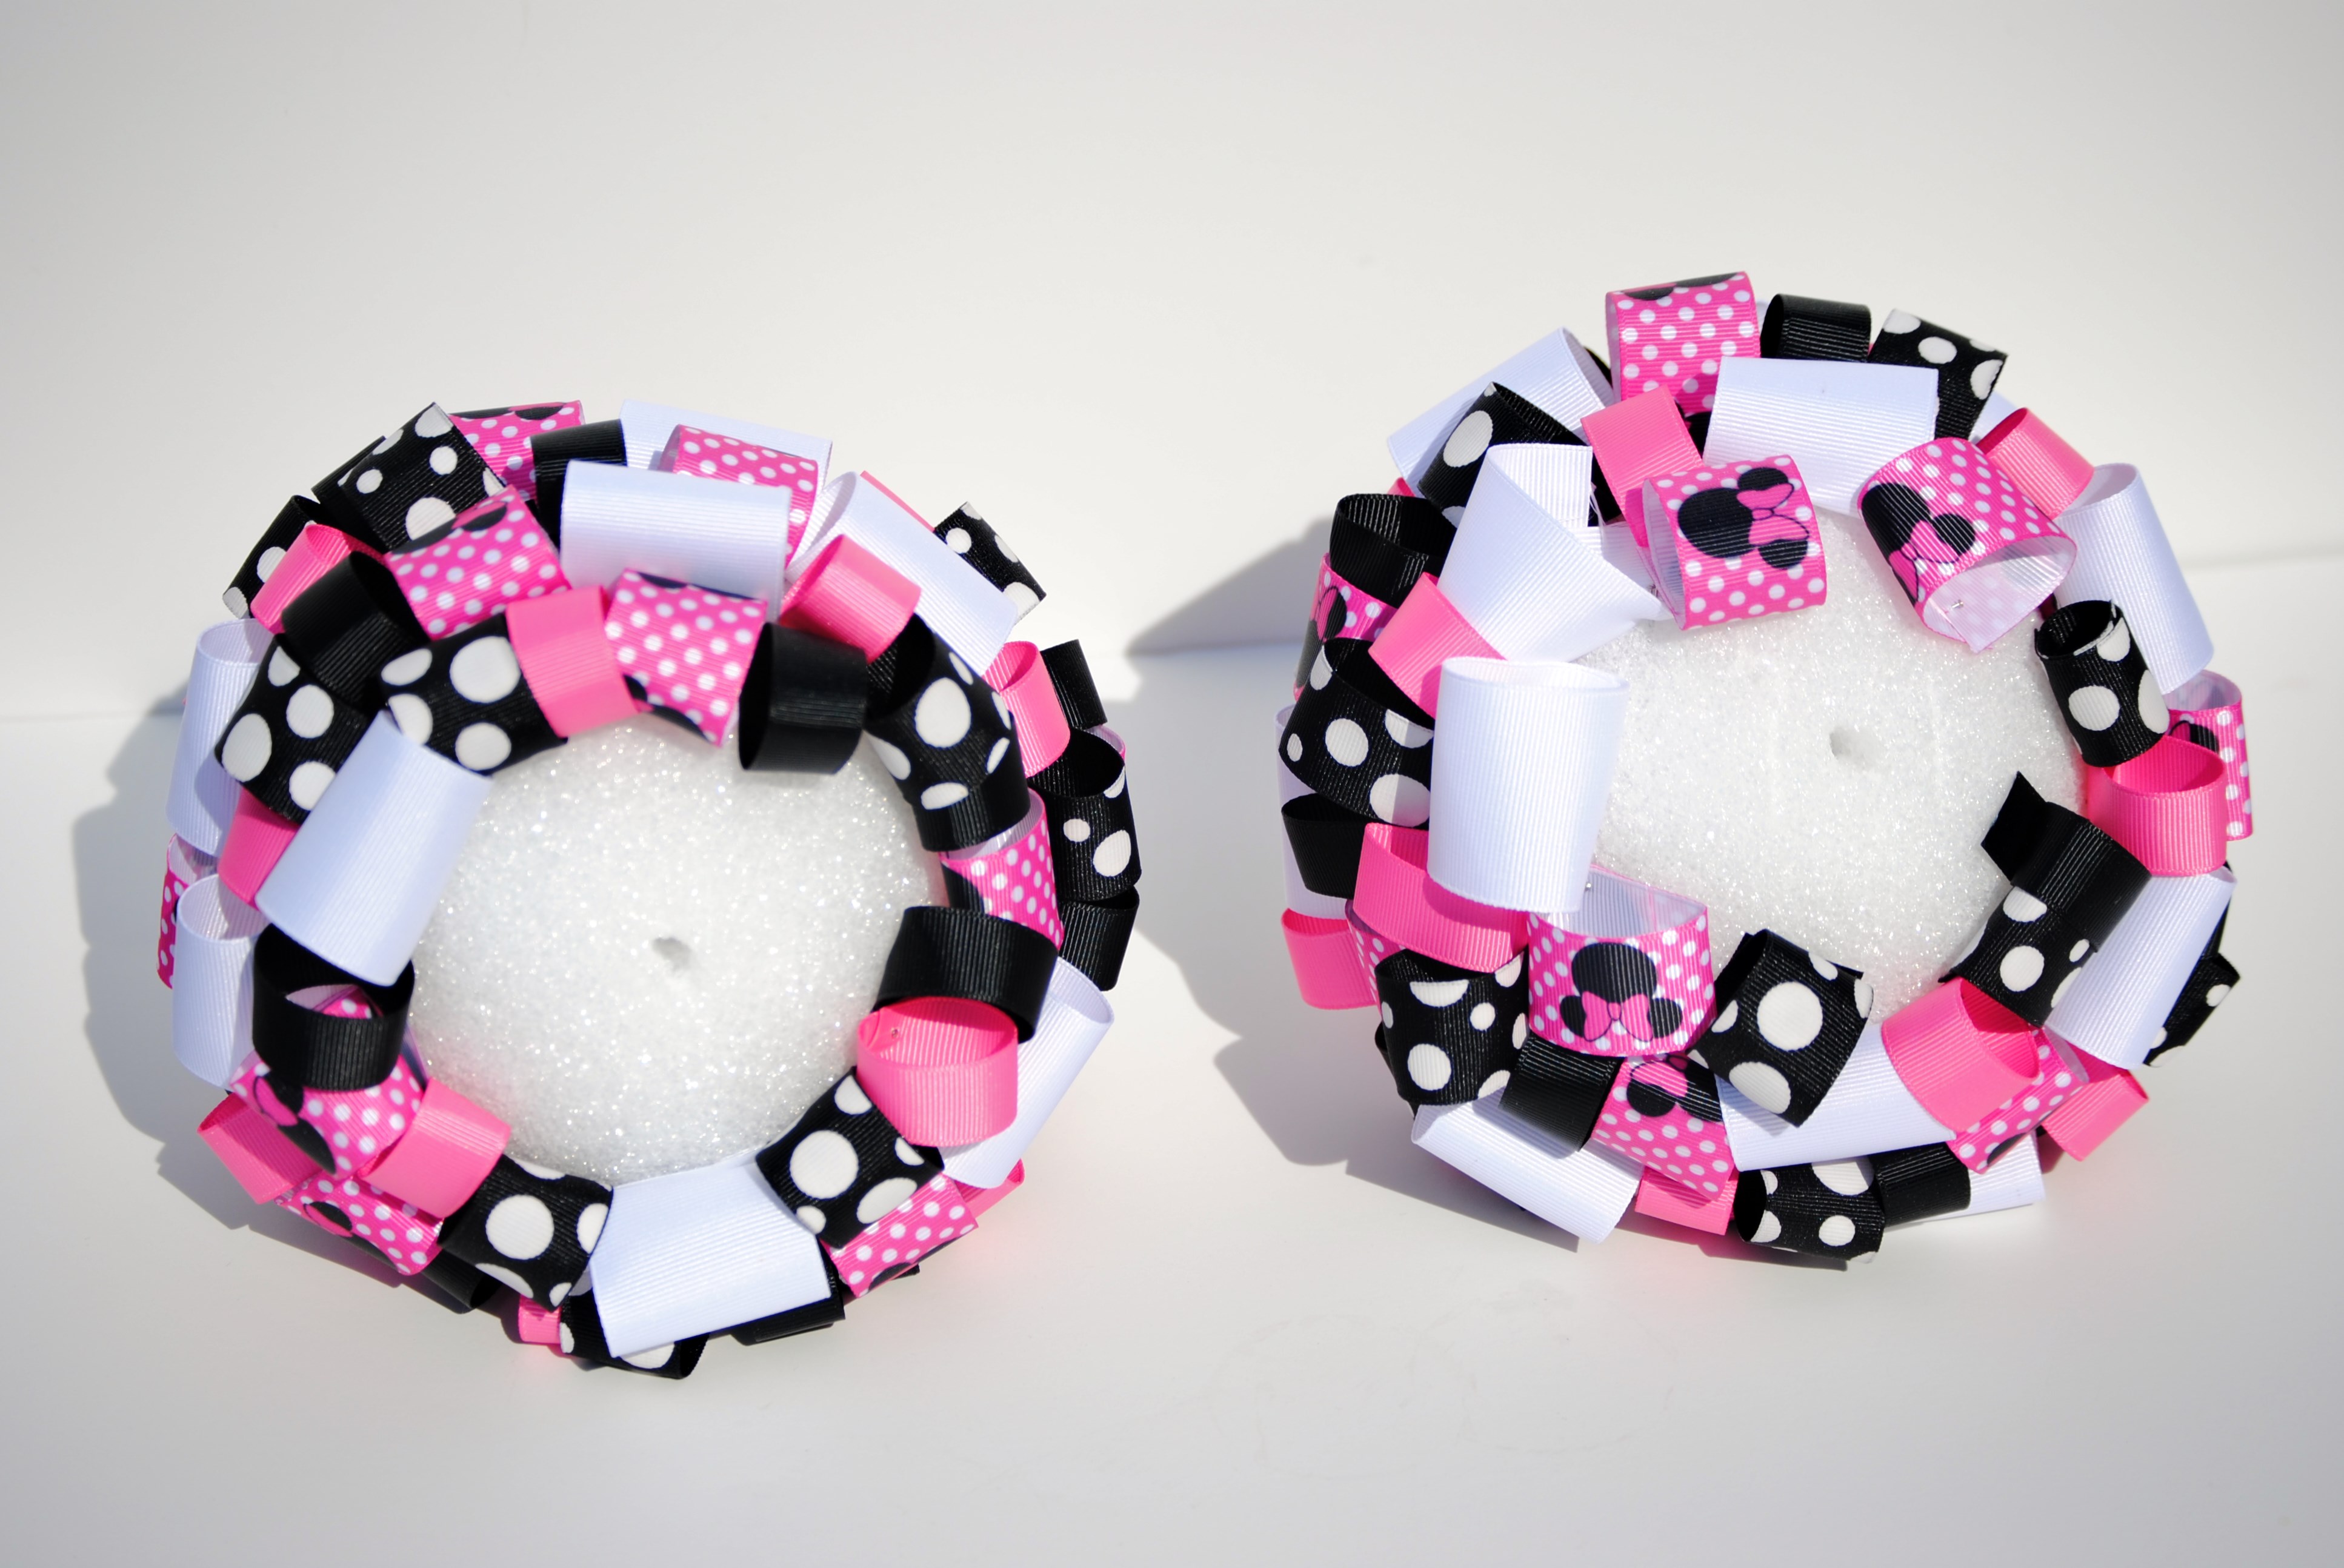
Applying Ribbon: I found putting the three spheres together before starting the ribbon made it easier to keep his ears looking symmetrical.  Once that was done, I took each ear off to apply the ribbon.  Make sure you leave room for the ears to rest on the large Styrofoam sphere.  See the photo above for my example of how the base of the finished ears looked before putting them on the larger sphere.

Height:  Depending on the size of the base, wooden dowel and finished Mickey Mouse head, you might have to keep the topiary rather low.  Several of my initial attempts to secure the topiary to the base failed because it would tip over.

Inserting the Dowel:  Keep the amount of times you take the spheres off of the dowels to a minimum.  The more times you take the topiary off of the dowel the less secure the finished product will be.

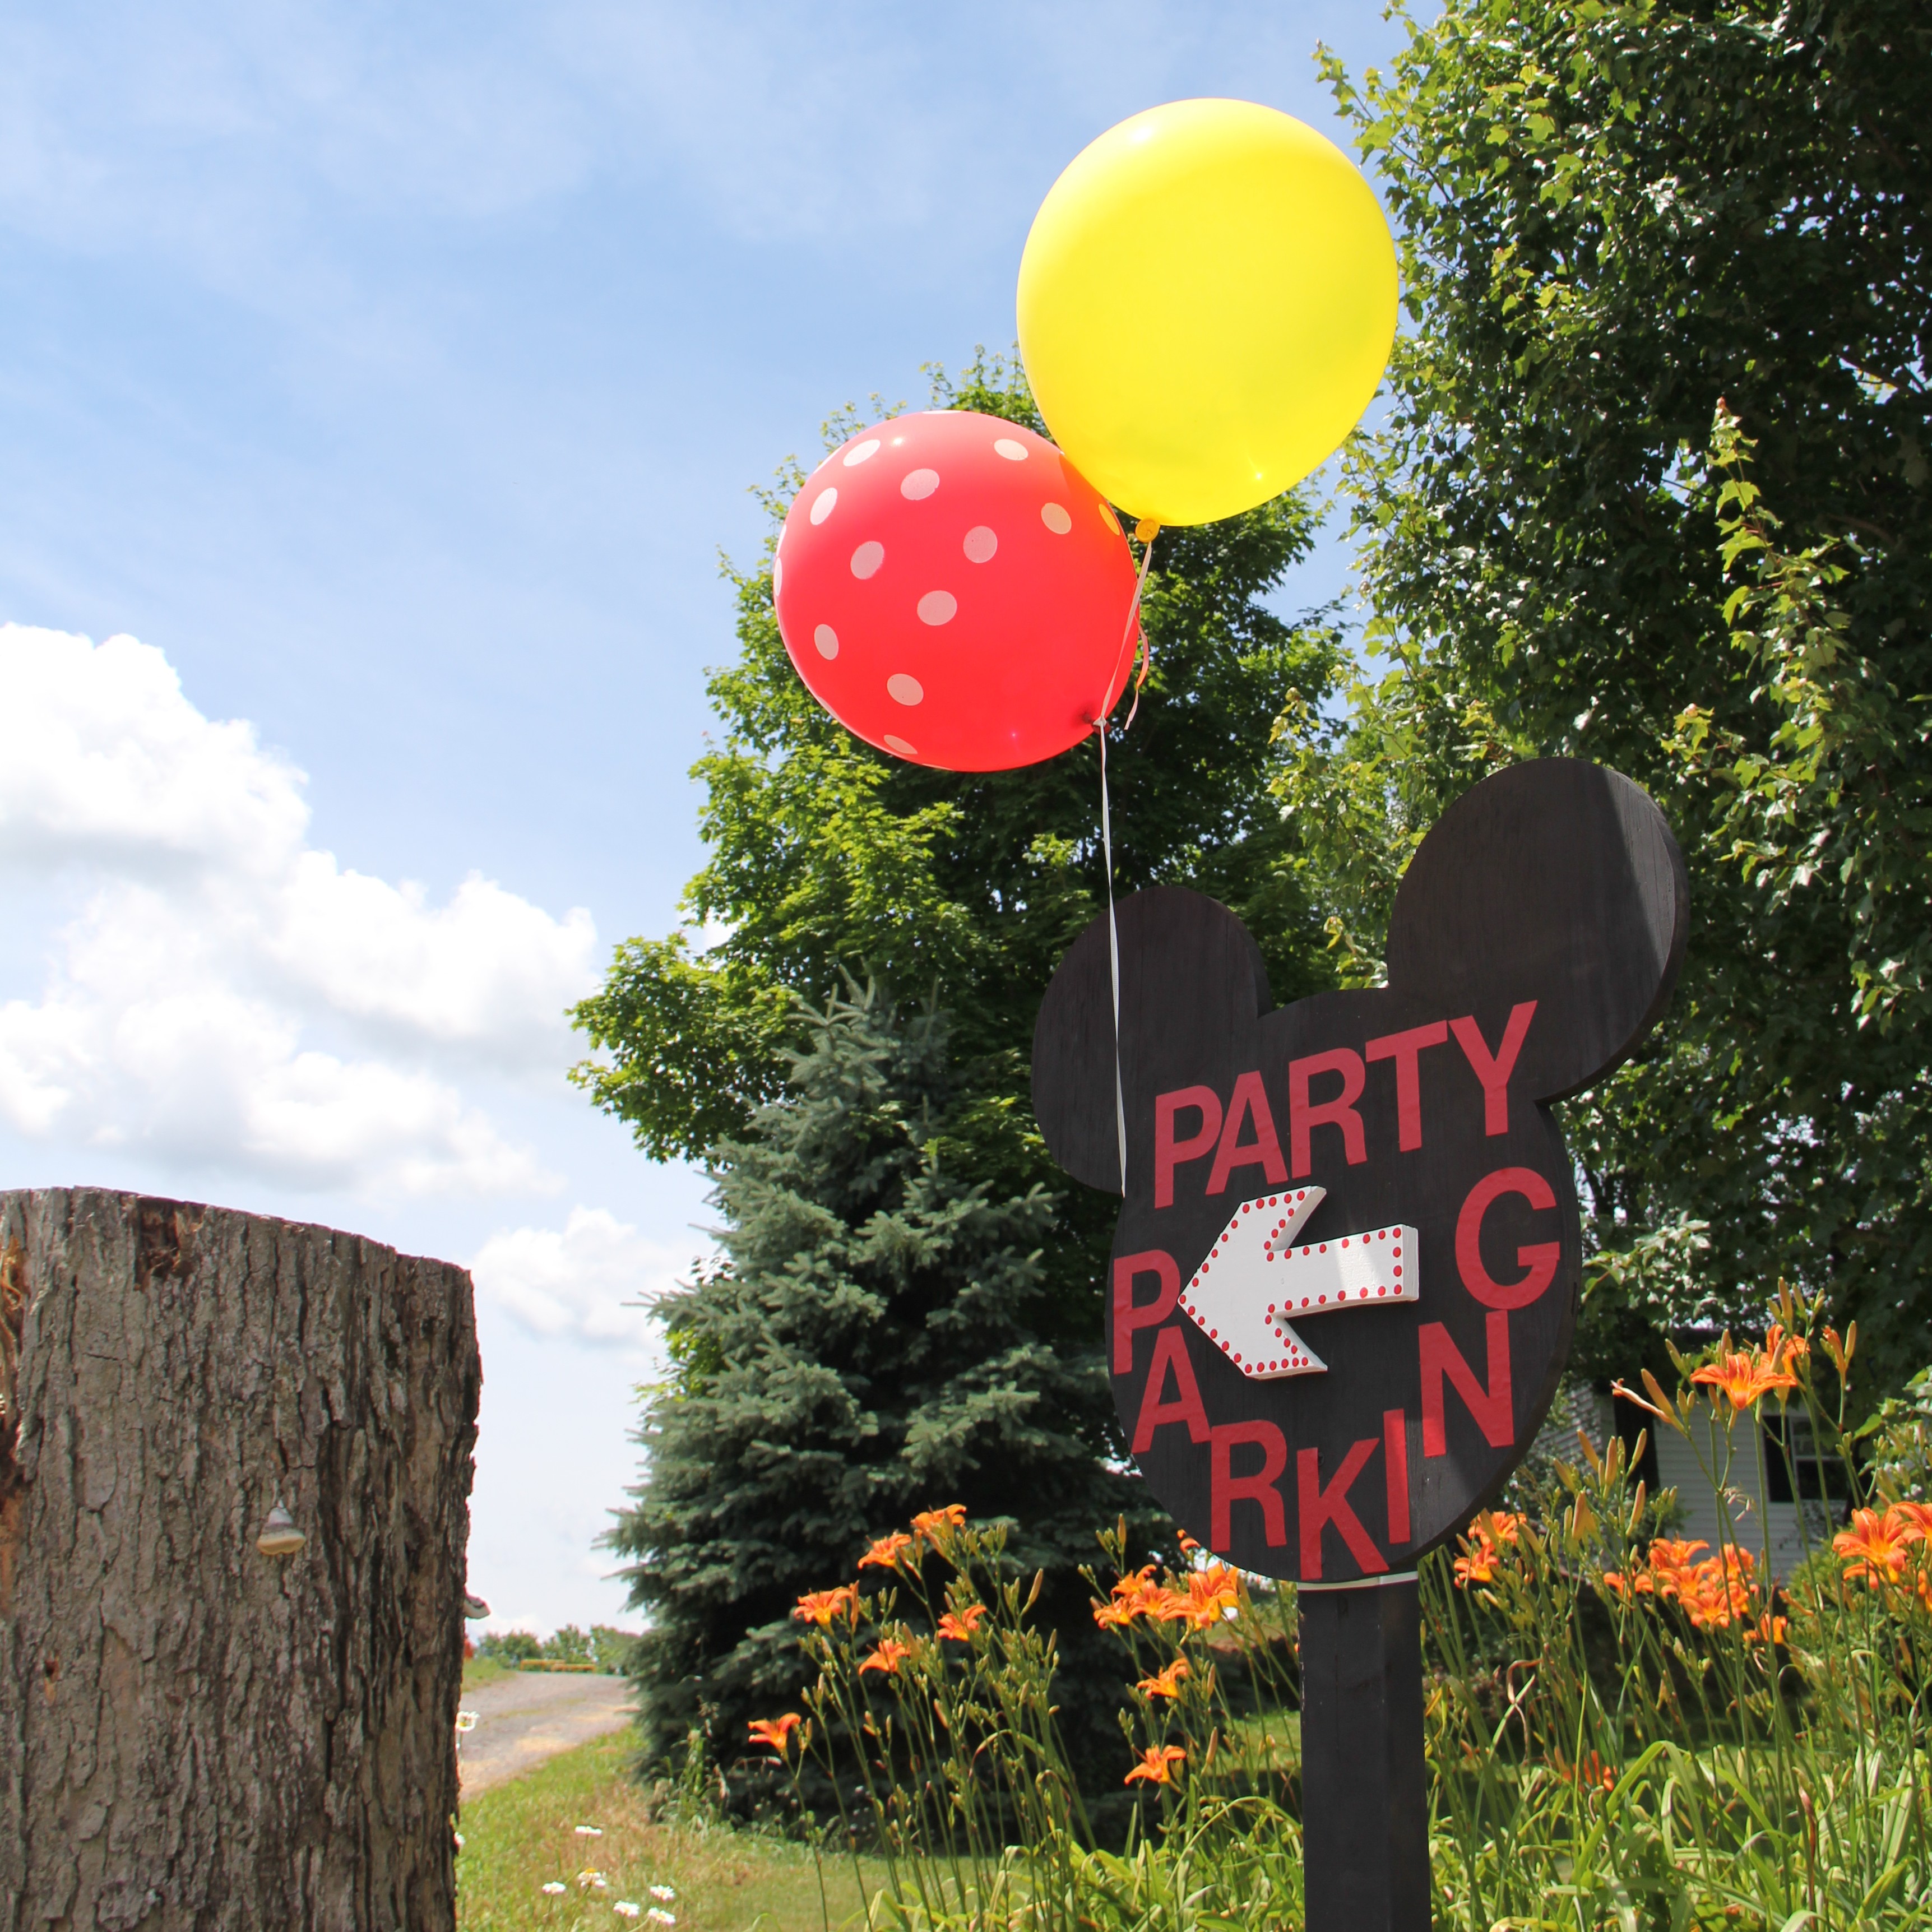
Environment:  Most importantly, always plan for weather.  Wind will knock this centerpiece over.  If you’re having an outdoor event that is exposed to the wind, I would suggest a small topiary.

With these added pieces of knowledge you’re on your way to making a perfect Mickey Mouse Topiary that will wow your guests at your next Disney Party!

Mickey and Minnie Mouse Flower and Garden Birthday Party

Table DecorYou Might Be Wondering How This Theme Came To Be.

My nephew and my daughter’s birthdays are only two days apart.  So when my sister-in-law, Karen Enke Wheeler suggested we throw a dual birthday party for my daughter’s 1st birthday and her son’s 2nd birthday, we instantly knew it had to be a Minnie and Mickey themed party.  Mickey and Minnie birthday parties are super popular, so we thought we’d give it a twist.  Both of our children love the outdoors and we knew from visiting Mickey’s home in Magic Kingdom that Mickey loves to garden and Minnie loves flowers.  That’s how our idea of a Mickey and Minnie’s Flower and Garden Party was born.  Today I’d love to share with you some of the unique items that we created for the party and some of the themed food that we served.

IMG_2324Since this was a party for both of our immediate and extended friends and families, we knew that we were going to have guests attending the party that didn’t know where to park.  I created this Party Parking sign out of wood, spray painted it and then used vinyl lettering to complete it.

Birthday MouseketeersThese two signs, featuring the birthday girl and boy’s names, were also made from wood.  I wanted to make sure that even if it rained the signs would withstand the weather.  The Minnie sign has a separate bow, which I glued on.  To do the lettering, I found the font style on-line, printed out how Walt Disney might have written their names and used it as a guide to paint their names on the signs.

Guest SeatingHere is a photo of our guests’ seating area.  The day was a bit windy, so the balloons were a challenge.  Unfortunately, all of the polka-dotted red and white balloons blew away during party set up.  With my daughter walking through the area the tables looks like Minnie Mouse put on the finishing touches.  Each pail, used to hold the balloons down, has a name of a little party guest painted on it.  They were filled part way with dirt for the children to use later during the children’s flower-pot activity.

Kids Table

The kids table featured tons of polka dots.  All the boys’ place settings were red and white for our pal, Mickey and pink and white for the little girls’ spots representing Miss Minnie Mouse.  Karen and I purchased the terra-cotta pots at a local craft store and painted them.  Inside of the pots we gave each child a Minnie or Mickey magic towel that they could use to clean up their hands after they were done planting their flower.  The garden markers that they used to write their names on, I found in Target’s dollar section.  The small gift, a Mickey Mouse vinylmation, was a surprise for them to take home.

No Sew Flowers as Favors for the Ladies

When hosting a birthday party I like to have thank you favors for the adults who attend the party too.  I made these “No Sew” Minnie Mouse Inspired Flowers which were from Victoria and given to her guests.

Rice Crispie MickeyKaren made these adorable Mickey Mouse chocolate dipped Rice Krispie treats for my nephew to give his guests.

  gift tagsHere is a close up of the gift tags that I made for the Rice Krispie Treats.  Once again I used my trusty Mickey Mouse punch.  LOVE that thing!

Serving Table The following photos will show you some of the food offerings that we had for the party guests.  We kept it really simple, as most of our little guests preferred to play in the yard with the oversized balls, that polka dotted the lawn, than eat food. In addition to the items that are featured here, we had Pluto’s Hot Diggity Dogs, Pete’s Pizza and Daisy’s Drink Station, to name a few.

Minnie's Flower Pot SurpriseMinnie’s Flower Pot Surprise was yummy Dirt Cake!

IMG_2350IMG_2331    Toodles Noodles   IMG_2362

Last But Not Least The Birthday Cakes and Cupcakes!

Thank you Fairy Godmother Kerri for such a beautiful birthday cake!


My nephew's adorable Mickey Mouse birthday cake with Mickey inspired cupcakes made by Karen.
My nephew’s adorable Mickey Mouse birthday cake with Mickey inspired cupcakes made by Karen.

Karen and I had a wonderful time creating this party for our little Mouseketeers.  I’d like to thank Tia Maiolatesi Welsh for taking the beautiful photos that I shared with you today!


Pirate Picnic Party Supplies

Golden Cookies

Gold Doubloon Cookies, Check.  Captain Hook Cupcakes, Check….

I’m just about ready for tomorrow’s Pirate Picnic!  It’s going to be a big surprise for Gavin and Victoria when they wake to find their special Pirate Picnic Invite.  I can hardly wait!  I thought I’d share some of the items that I’ve prepared for the day.  They are really simple things that you could do to theme your children’s picnic lunch too.

The Treasure MapPicnic treasure map

Above is the portion of the picnic treasure map that I very easily and quickly made using Publisher.  I simply searched Publisher’s clip art file for images of the main features of  my parent’s back yard.  Obviously these images are not exact replicas of what my six-year-old sees at his Grandparents house, but he will understand the map very easily as the clip art images are recognizable.  Then I printed the map on regular printer paper and glued the 8.5″ x 11″ map to a piece of oversized construction paper.  I used two Pirate stampers to create a fun border around the map.  Rolled it up, put some red ribbon around it and it’s ready to go.  I’ll be using the same clip art images as the “clues” that Gavin and Victoria will find as they complete the steps listed on their invitation.  After finding six images, Gavin will have to guess as to where the Treasure Map is located.  Once he sees the garden or the pool image, I’m certain he will know that the map is at Grandma and Papa’s house.

Pirate Party SuppliesThe Treasure Map and Pirate Flag Straws are packed and ready for the picnic, now on to the Feast!

The Pirates’ Feast will include:

  • Fish Sandwiches (Peanut Butter sandwiches cut into the shape of a fish using a cookie cutter)
  • Canon Balls ( Red Grapes)
  • Pirate Swords (carrot sticks)
  • Gold Doubloons (sugar cookies sprinkled with bright yellow sugar)
  • Captain Hook’s Cupcakes (Check out Monday’s post to find out how to make these cupcakes.)
  • White Skim Milk with Pirate Flag straws

Can’t wait to share tomorrow’s photos with you all!


Captain Hook Cupcakes

pirate picnicAhoy Mate!  Ye invited to a Pirate Picnic!

I’m so excited to start this week!  At the beginning of summer break, the kids and I sat down with the summer calendar and a sheet of paper.  On that paper we wrote everything we wanted to do before summer was over.  One item that was a weekly “must do” was a picnic.  Amazingly enough due to schedule changes, summer vacation is more than half way over and we haven’t had a single picnic yet!  I decided this week we’d check off this summer wish list item with a bit of pixie dust.  We shall have a Pirate Picnic!

Both of my children, ages 2 and 6 years of age, are HUGE Pirates fans.  Gavin, the six-year-old, likes Peter Pan and the Pirates of the Caribbean franchise and Victoria, the two-year old, loves Jake and the Neverland Pirates from Disney Junior. This should be a boat load of fun planning and I’m happy to share the stops along the way with you.

Here’s the Pirate Picnic Day Plan:

  • Gavin and Victoria will wake in the morning to find their official Pirate Picnic Invite.
  • Gavin, assisted by his little sister, will have to check off a list of tasks to located the  clues as to where to find the Pirate Picnic Map’s location.  The kids will collect Gold Doubloons along the way as they complete the tasks, which will be items that Gavin usually does to get his weekly allowance.
  • After finding all the “clues”, the kids will be able to guess the location of the map, which will be at his Grandparents house.
  • Once we arrive at their Grandparent’s house, Grandma and Papa will give them the map to the picnic’s location.
  • The Pirate Picnic will be set up in the yard, where Gavin and his sister will find a pirate themed feast of yummy treasures.  One of the treasure treats will be the Captain Hook cupcakes that are pictured above.

Throughout the week I’ll share with you other items that I have prepared for this Pirating day, in hopes that you might be able to use them to create your own Pirate Picnic!    To get you started, check out Disney Junior’s site for Pirate Party printable items, like Gold Doubloons.  They have a bunch of ready to print items that I plan to use for the picnic.  Here’s the link: http://disney.go.com/disneyjunior/parties/birthday-party-ideas/jake-and-the-never-land-pirates-birthday-1825356

Hook To make my Captain Hook inspired cupcakes that are pictured above, you’ll need the following items, which are pictured: white chocolate melts, black food coloring, toothpicks, wax paper, and a cookie sheet to make Captain Hook’s hook.  Simply draw your hook on a piece of white paper and slide it between a layer of wax paper and your cookie sheet.  Then take your melted white chocolate and add a small amount of black food coloring to turn it silver.  Once the chocolate is ready, use your paper drawing as a template to make the hook, slide a tooth pick in the bottom of the hook and if need be, add a dab of chocolate on top of the toothpick to secure.  Chill in the refrigerator while you make Hook’s cuff.

hook cupcake sleeveTo make Hook’s cuff you will need red card stock, glue gun and a doily.  Wilton makes a baking cup kit called Black Doily that I found really easy to use for this project.  The kit comes with the black and white baking cups shown in the supply photo above.  I used the black cup to bake the cupcakes in and the white doily I used as the trim to his red cuff.  I took a picture of them close up so you can see that I cut the base of cup out and cut slits into the doily every inch. This made it easier to glue the doily to the card stock.  I used a little over one doily cup per cupcake.

Last but not least, ice your cupcake with black icing, place the cupcake in Captain Hook’s cuff and gently push the toothpick hook in the center of the cupcake.  Now we are both well on our way to a feast fit for a Pirate!

Have you partied with Pirates before?  I’d love for you to share any Pirate Party photos with Mouse Ears Mom and I’ll share as many as possible on our Facebook page.

Mickey Mouse Printable Summer Craft

Mouse Ears Mom 012Mickey Mouse Watermelon Placemat

If you’re a Friend of Mouse Ears Mom on Facebook, then you already know that this week I’ll be talking about a few of the most delicious things to enjoy during the heat of summer and sprinkling them with a touch of pixie dust!

My children’s favorite summer fruit (and mine too) is Watermelon.  July is National Watermelon month, so I’m guessing that our family is not alone when choosing this fruit as our favorite healthy summer treat.  Despite how wonderful watermelon tastes, it’s the messiest of messy.  So, I decided to make this little preschool size Mickey Mouse Watermelon Placemat for my two-year old.  It was super easy to make and I’ve even included a printable stencil to help you.

Mouse Ears Mom 016  All you need to make this placemat is four pieces of scrap-book cardstock, black, hot pink, green, and I chose light green for the watermelon rind.  The paper pictured to the left is 12″x12″.  You’ll also need scissors, a glue stick and the trusty Mickey Mouse puncher that is pictured in the top right corner of the image.  I purchased this punch at A.C. Moore craft store.  Last but not least, you’ll need one sheet of card stock to print out the watermelon template.  Just click on the file below for the printable watermelon template.

watermelon template

OK, now after you’ve printed that out, you’re ready to get started!  Here are the quick steps to complete you’re little one’s placemat.

  1.  Cut the black scrapbook paper to 11″ top to bottom and leave the width at 12″.  The remaining one inch black strip you can use to make your Mickey seeds and place them off to the side.  If your little Mousketeer is nearby, they can help with that part.  The puncher is very easy to use.
  2. Cut out the three parts to the watermelon template.
  3. Trace each part onto the pink and green papers, cut each out and then glue them all together, including those Mickey seeds you placed to the side earlier.  Since it’s probably your Mouseketeer’s glue stick you’re using, she can help you with this part too!
  4. Glue your colorful watermelon onto the black scrapbook paper.
  5. With your left over pink paper, punch out a few Mickey Mouse seeds and add that final touch to your placemat.
  6. To complete- Laminate.  I do not own a lamination machine, so I asked Staples to help me with this part.  When asked what type of lamination I would like, I chose the heavier weight lamination, due to the depth of the final piece.

Drip Drip DropNow all those little drip, drip, drops are an easy cleanup.

Now, where’s the watermelon?