Category: Disney-Inspired Party Planning

Mickey Mouse “Premium” Healthy Bar

Mickey's Watermelon BarMouse Ears Mom’s Healthy Twist on a Walt Disney World Treat Favorite

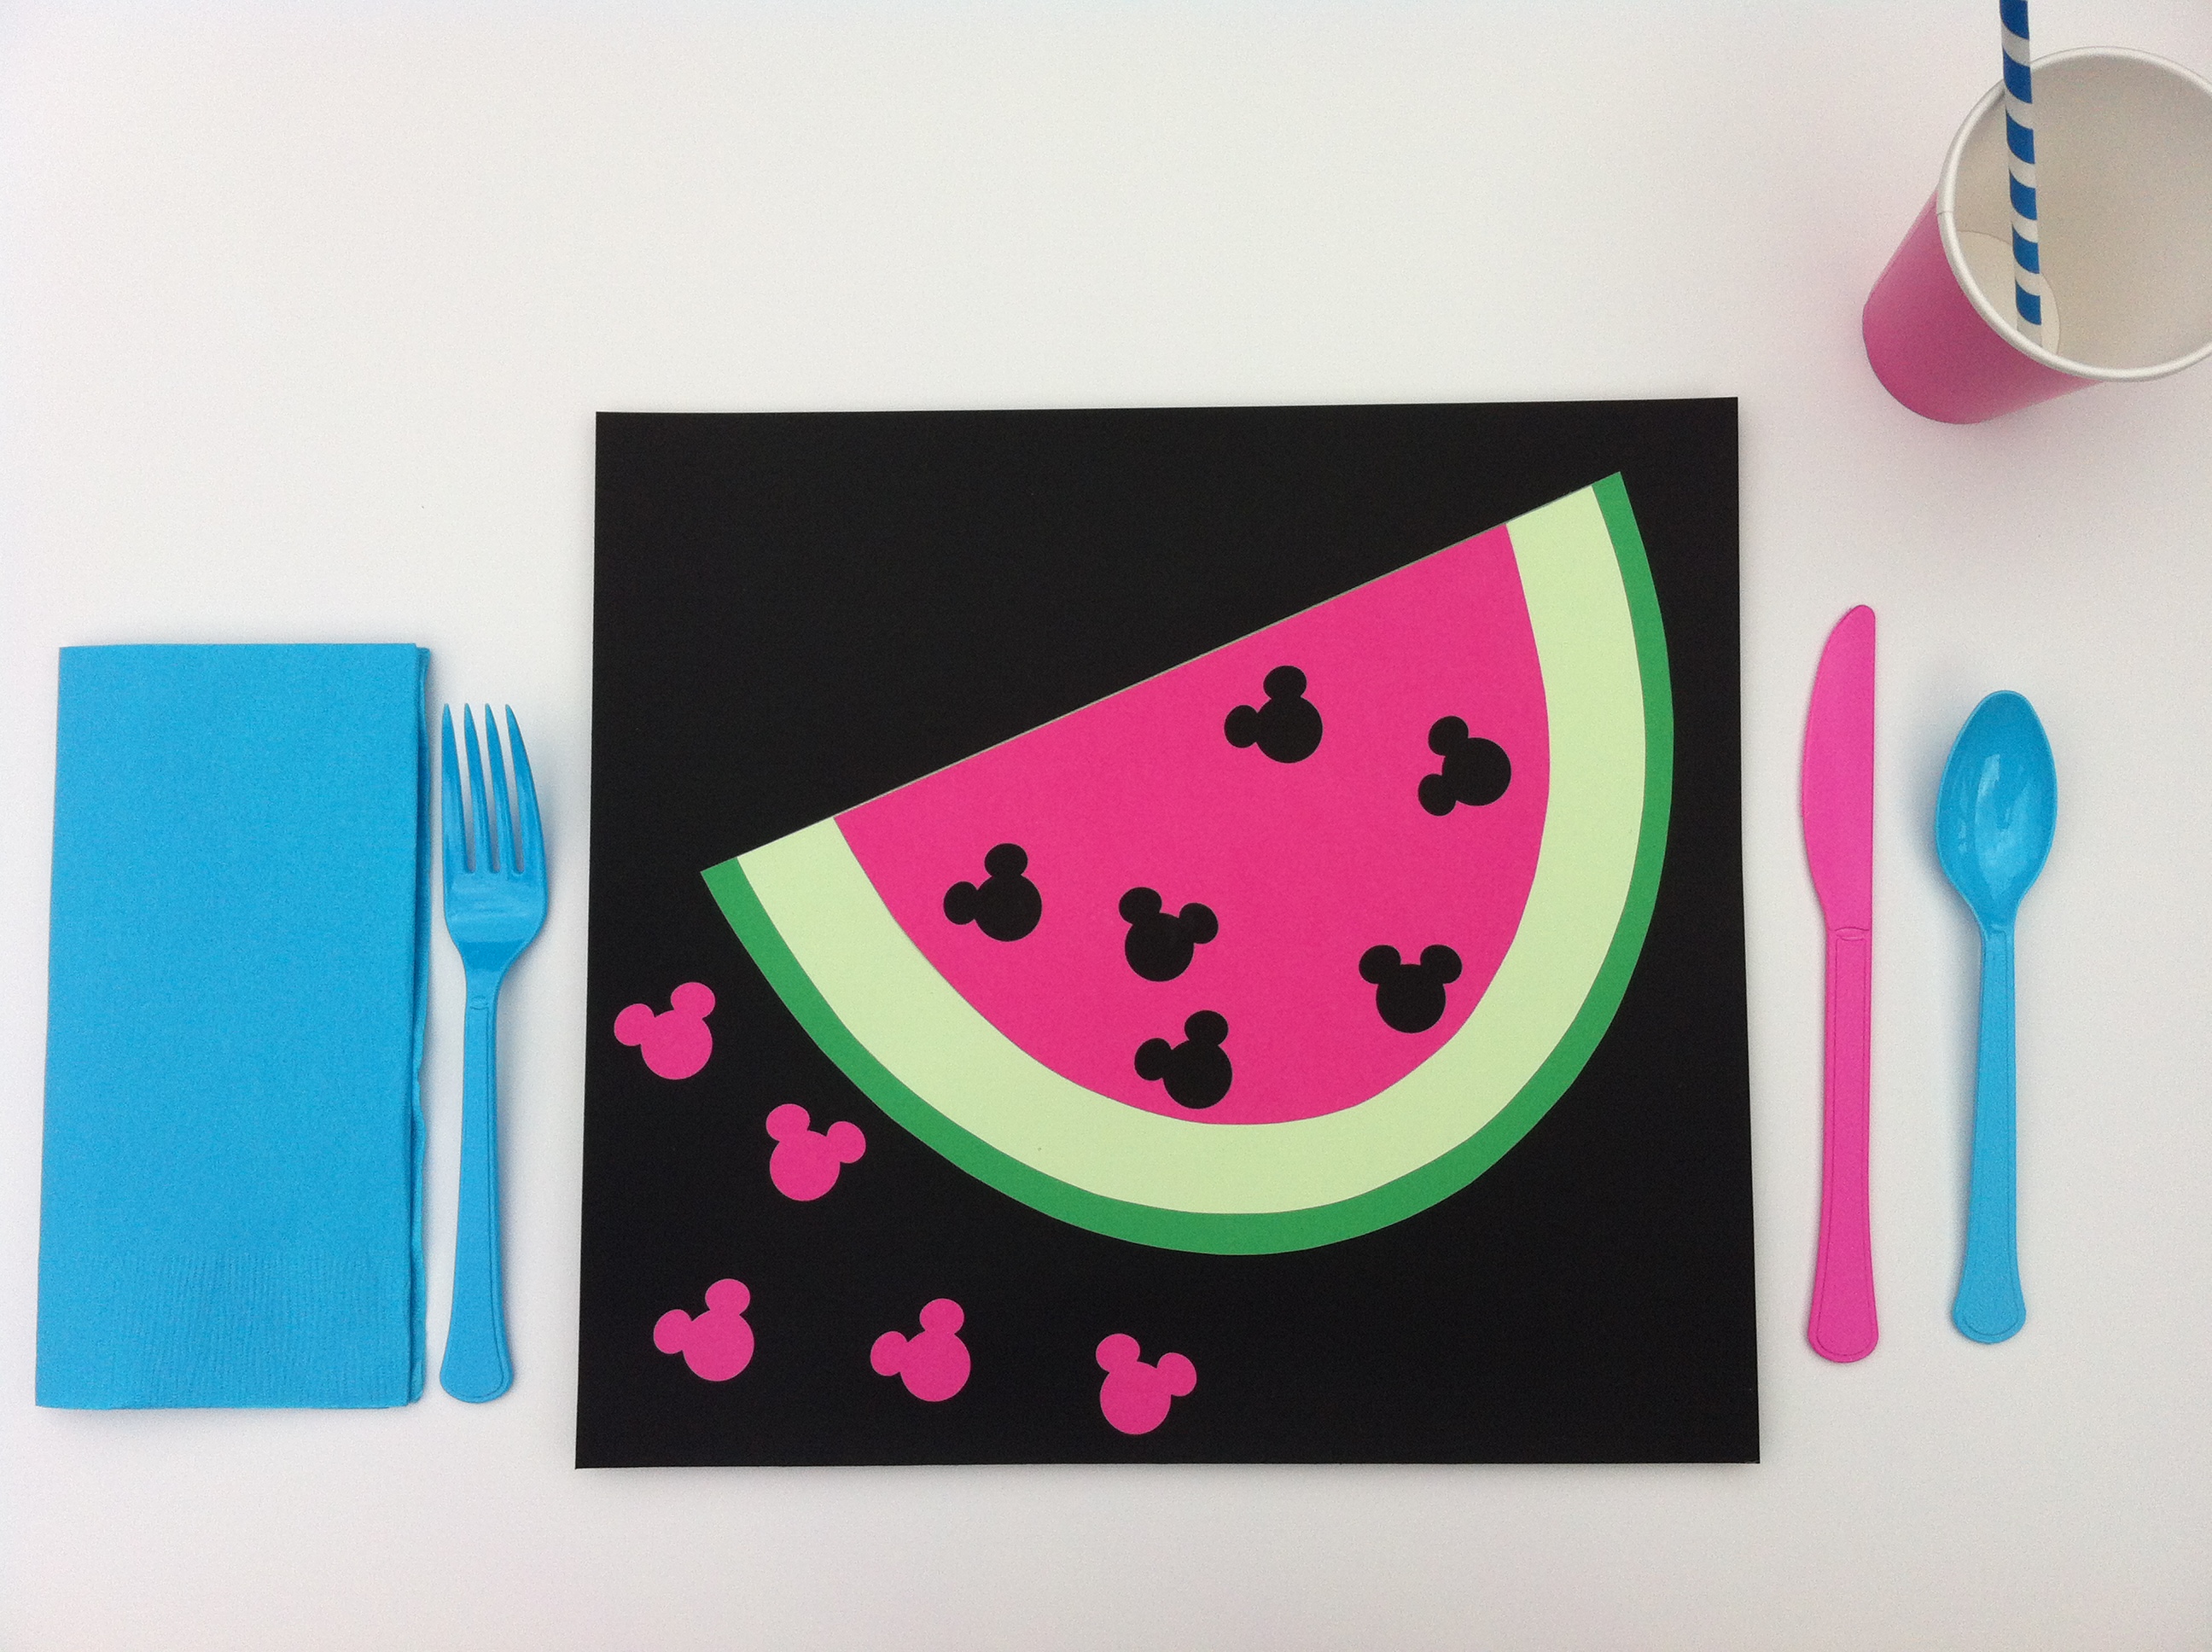
If you’ve ever traveled to The Walt Disney World Resort then you know that the “Mickey Premium Ice Cream Bar” is a classic treat.  Within moments of the stepping foot on property, I am quickly discarding the evil nutritional fact wrapper and chopping off one of those precious chocolate covered ice cream ears!  At that wonderful moment the family vacation has officially begun.    But unfortunately, vacations end and once you leave Walt Disney World, the magical bars stay behind.  This is probably a good thing for my waistline.

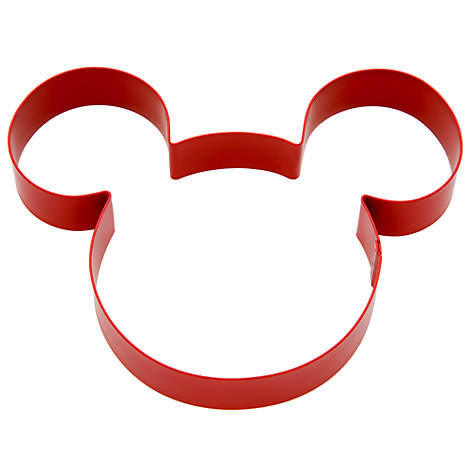
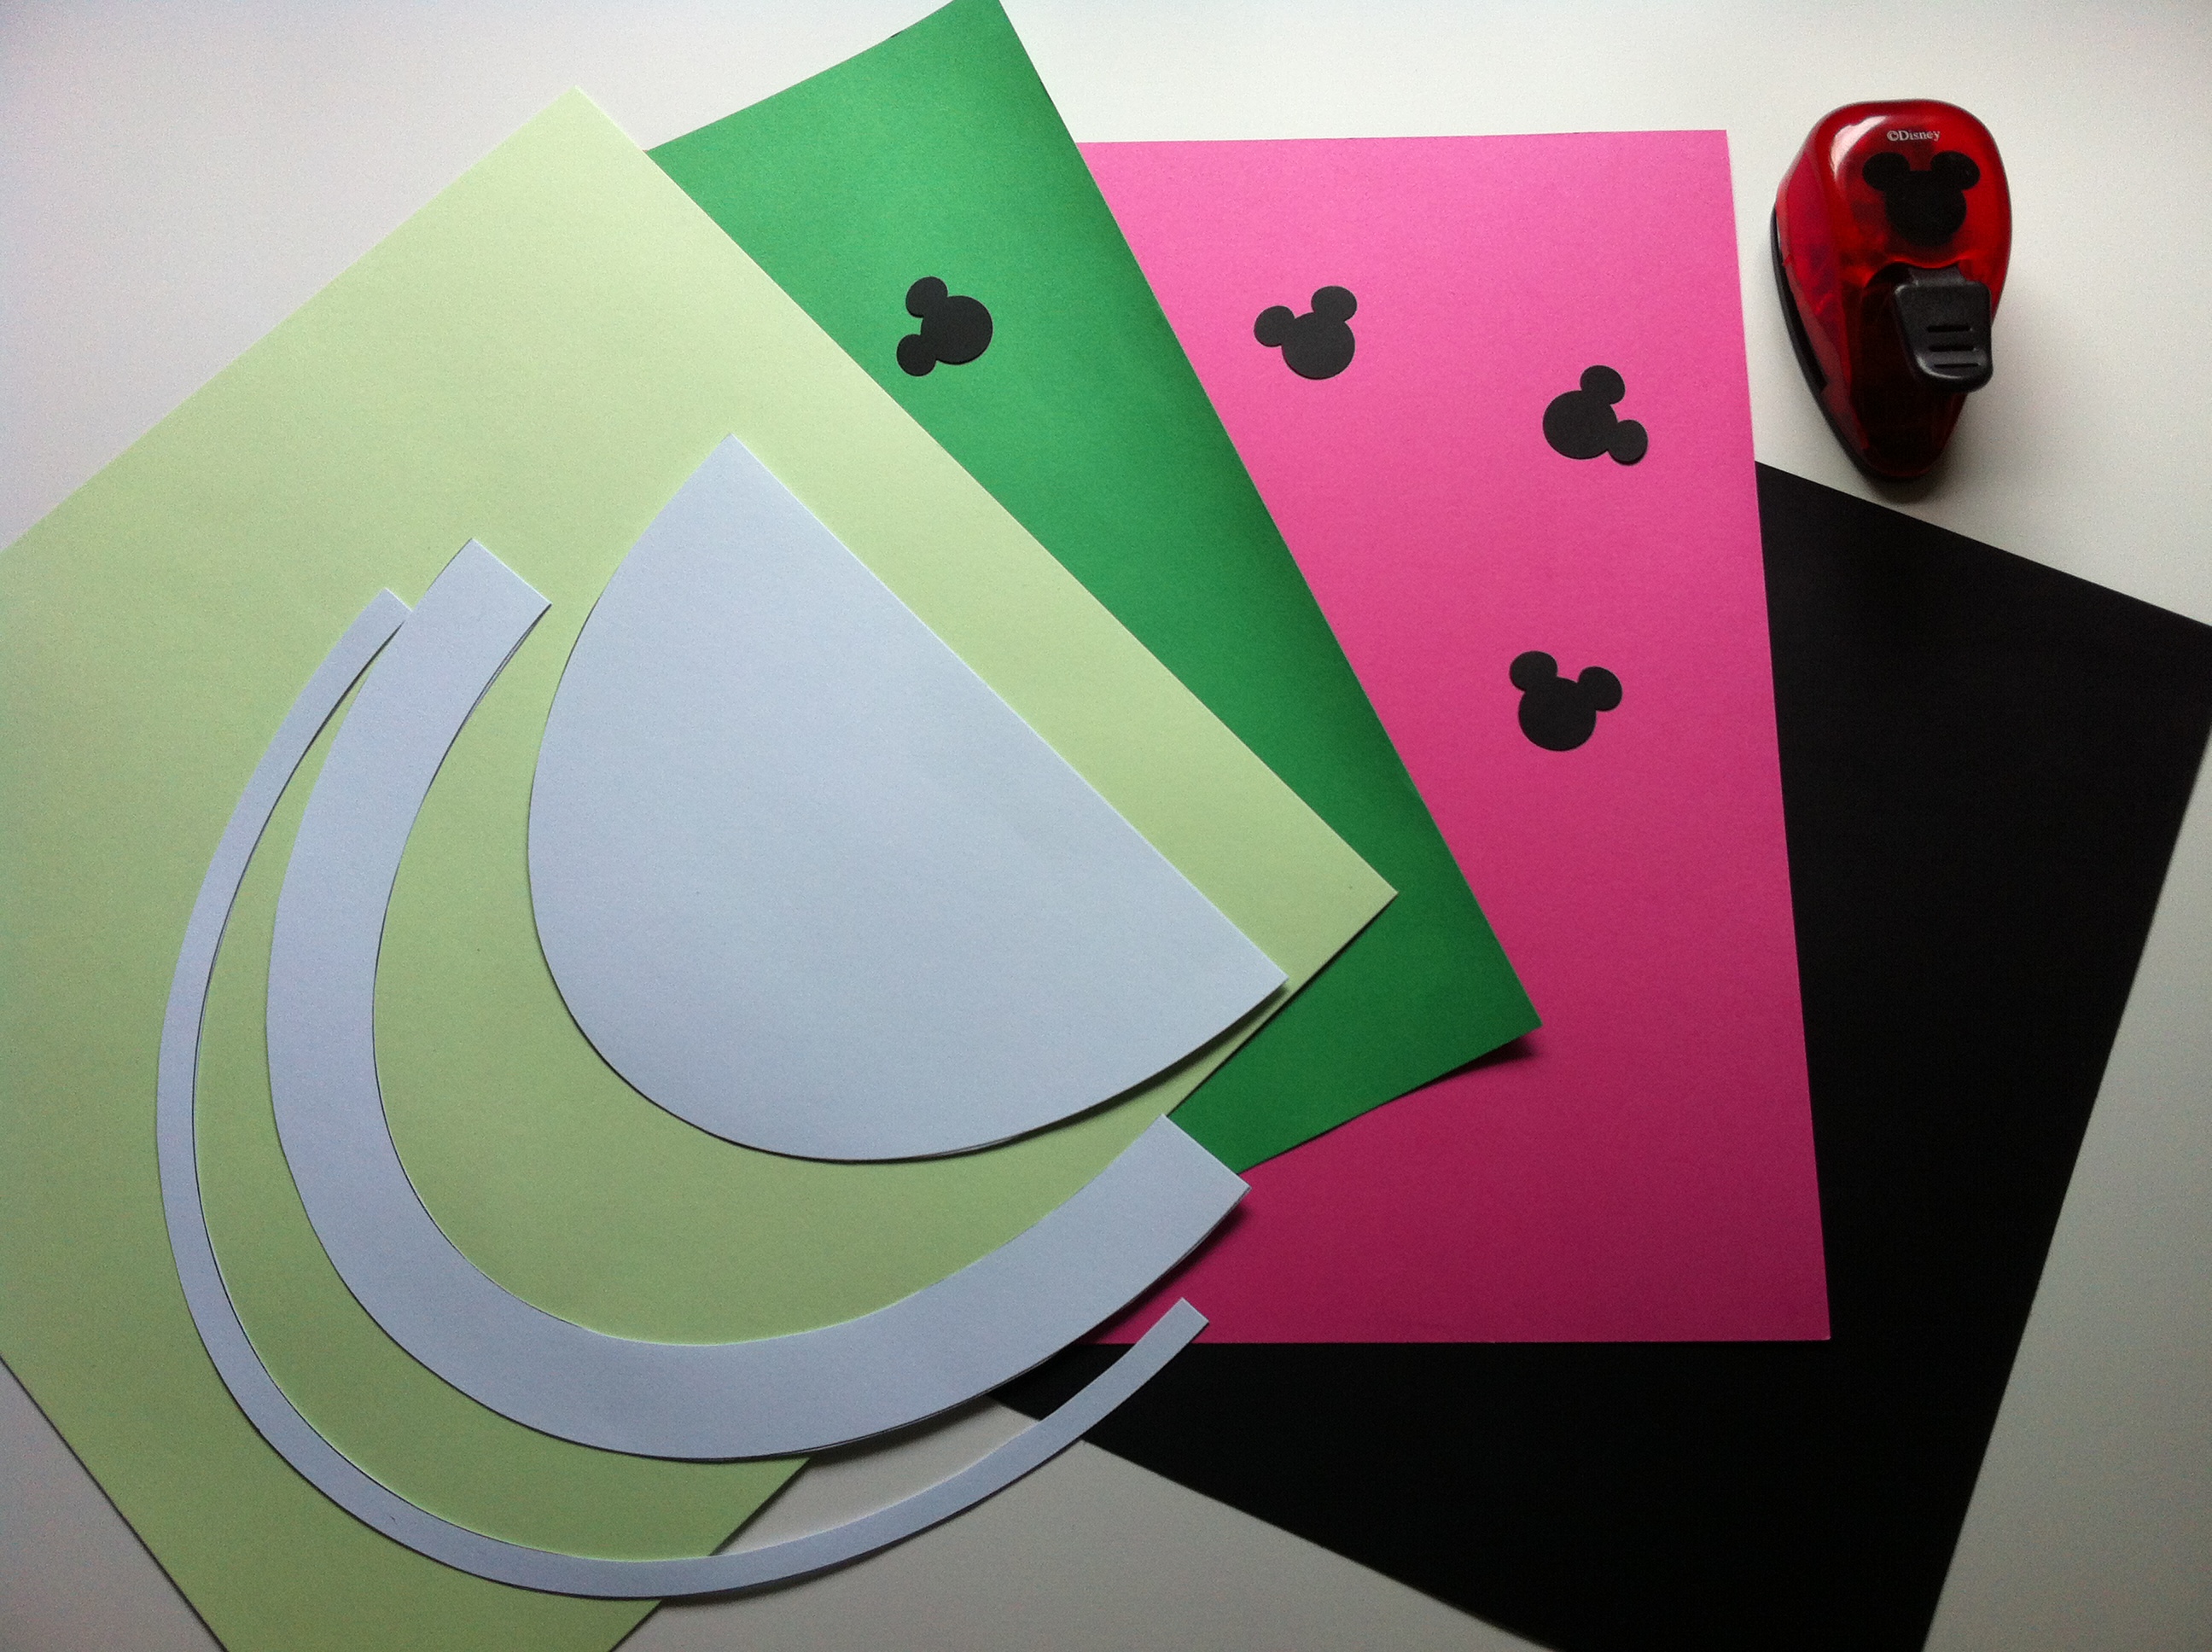
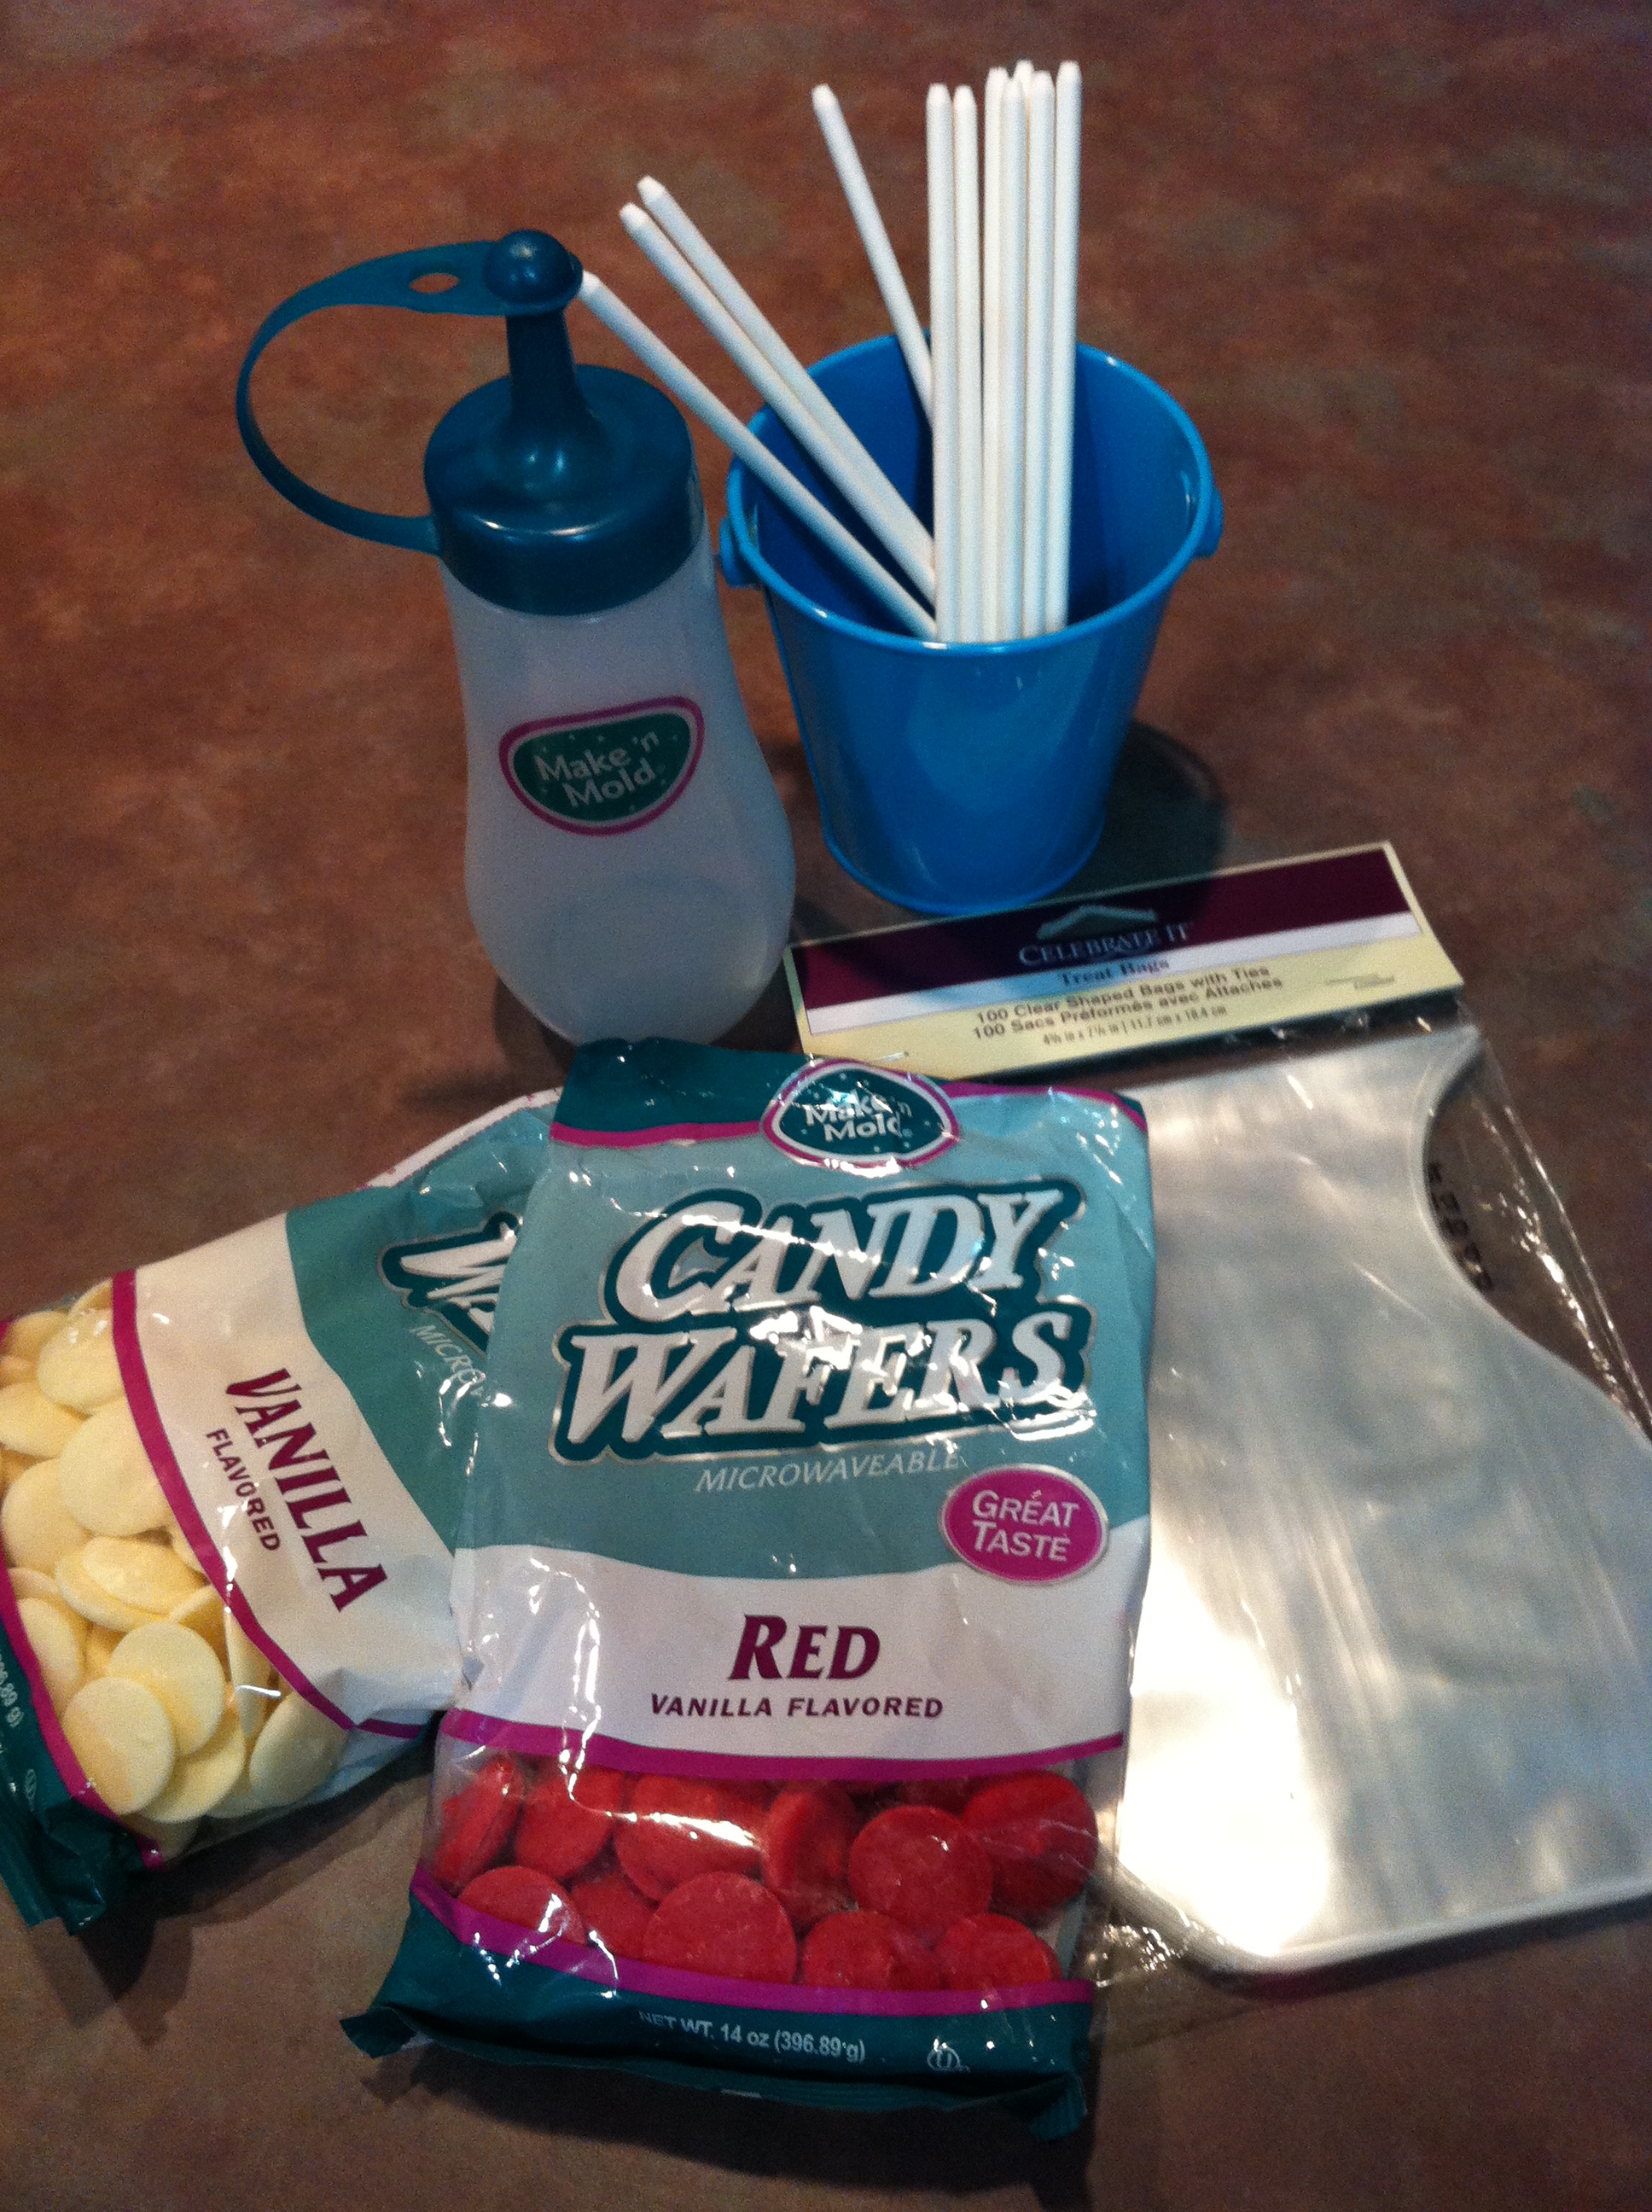
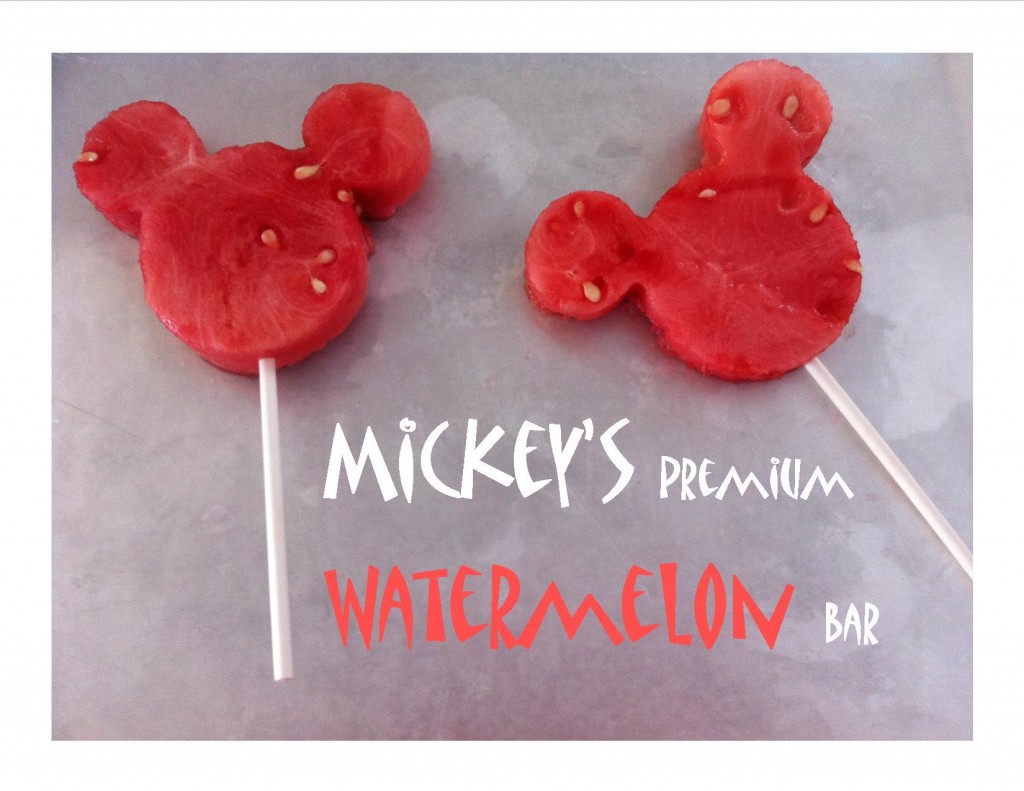
Using my family’s favorite summer fruit, I decided to pay homage to the “Worlds” most classic ice cream ears by recreating them with a healthy twist.  Super easy to make, you and your kids could be enjoying Watermelon ears this evening!  All you need is a watermelon, a Mickey Mouse cookie cutter, and some cookie pop sticks.  After cutting the watermelon, place it on a cookie sheet lined with wax paper, then insert a cookie pop stick, and freeze on the cookie sheet.  I also chose to place each pop in a freezer bag.  I used the cookie cutter that is pictured to the right.  It can be purchased on Disney Store’s website or at Disney’s Parks.

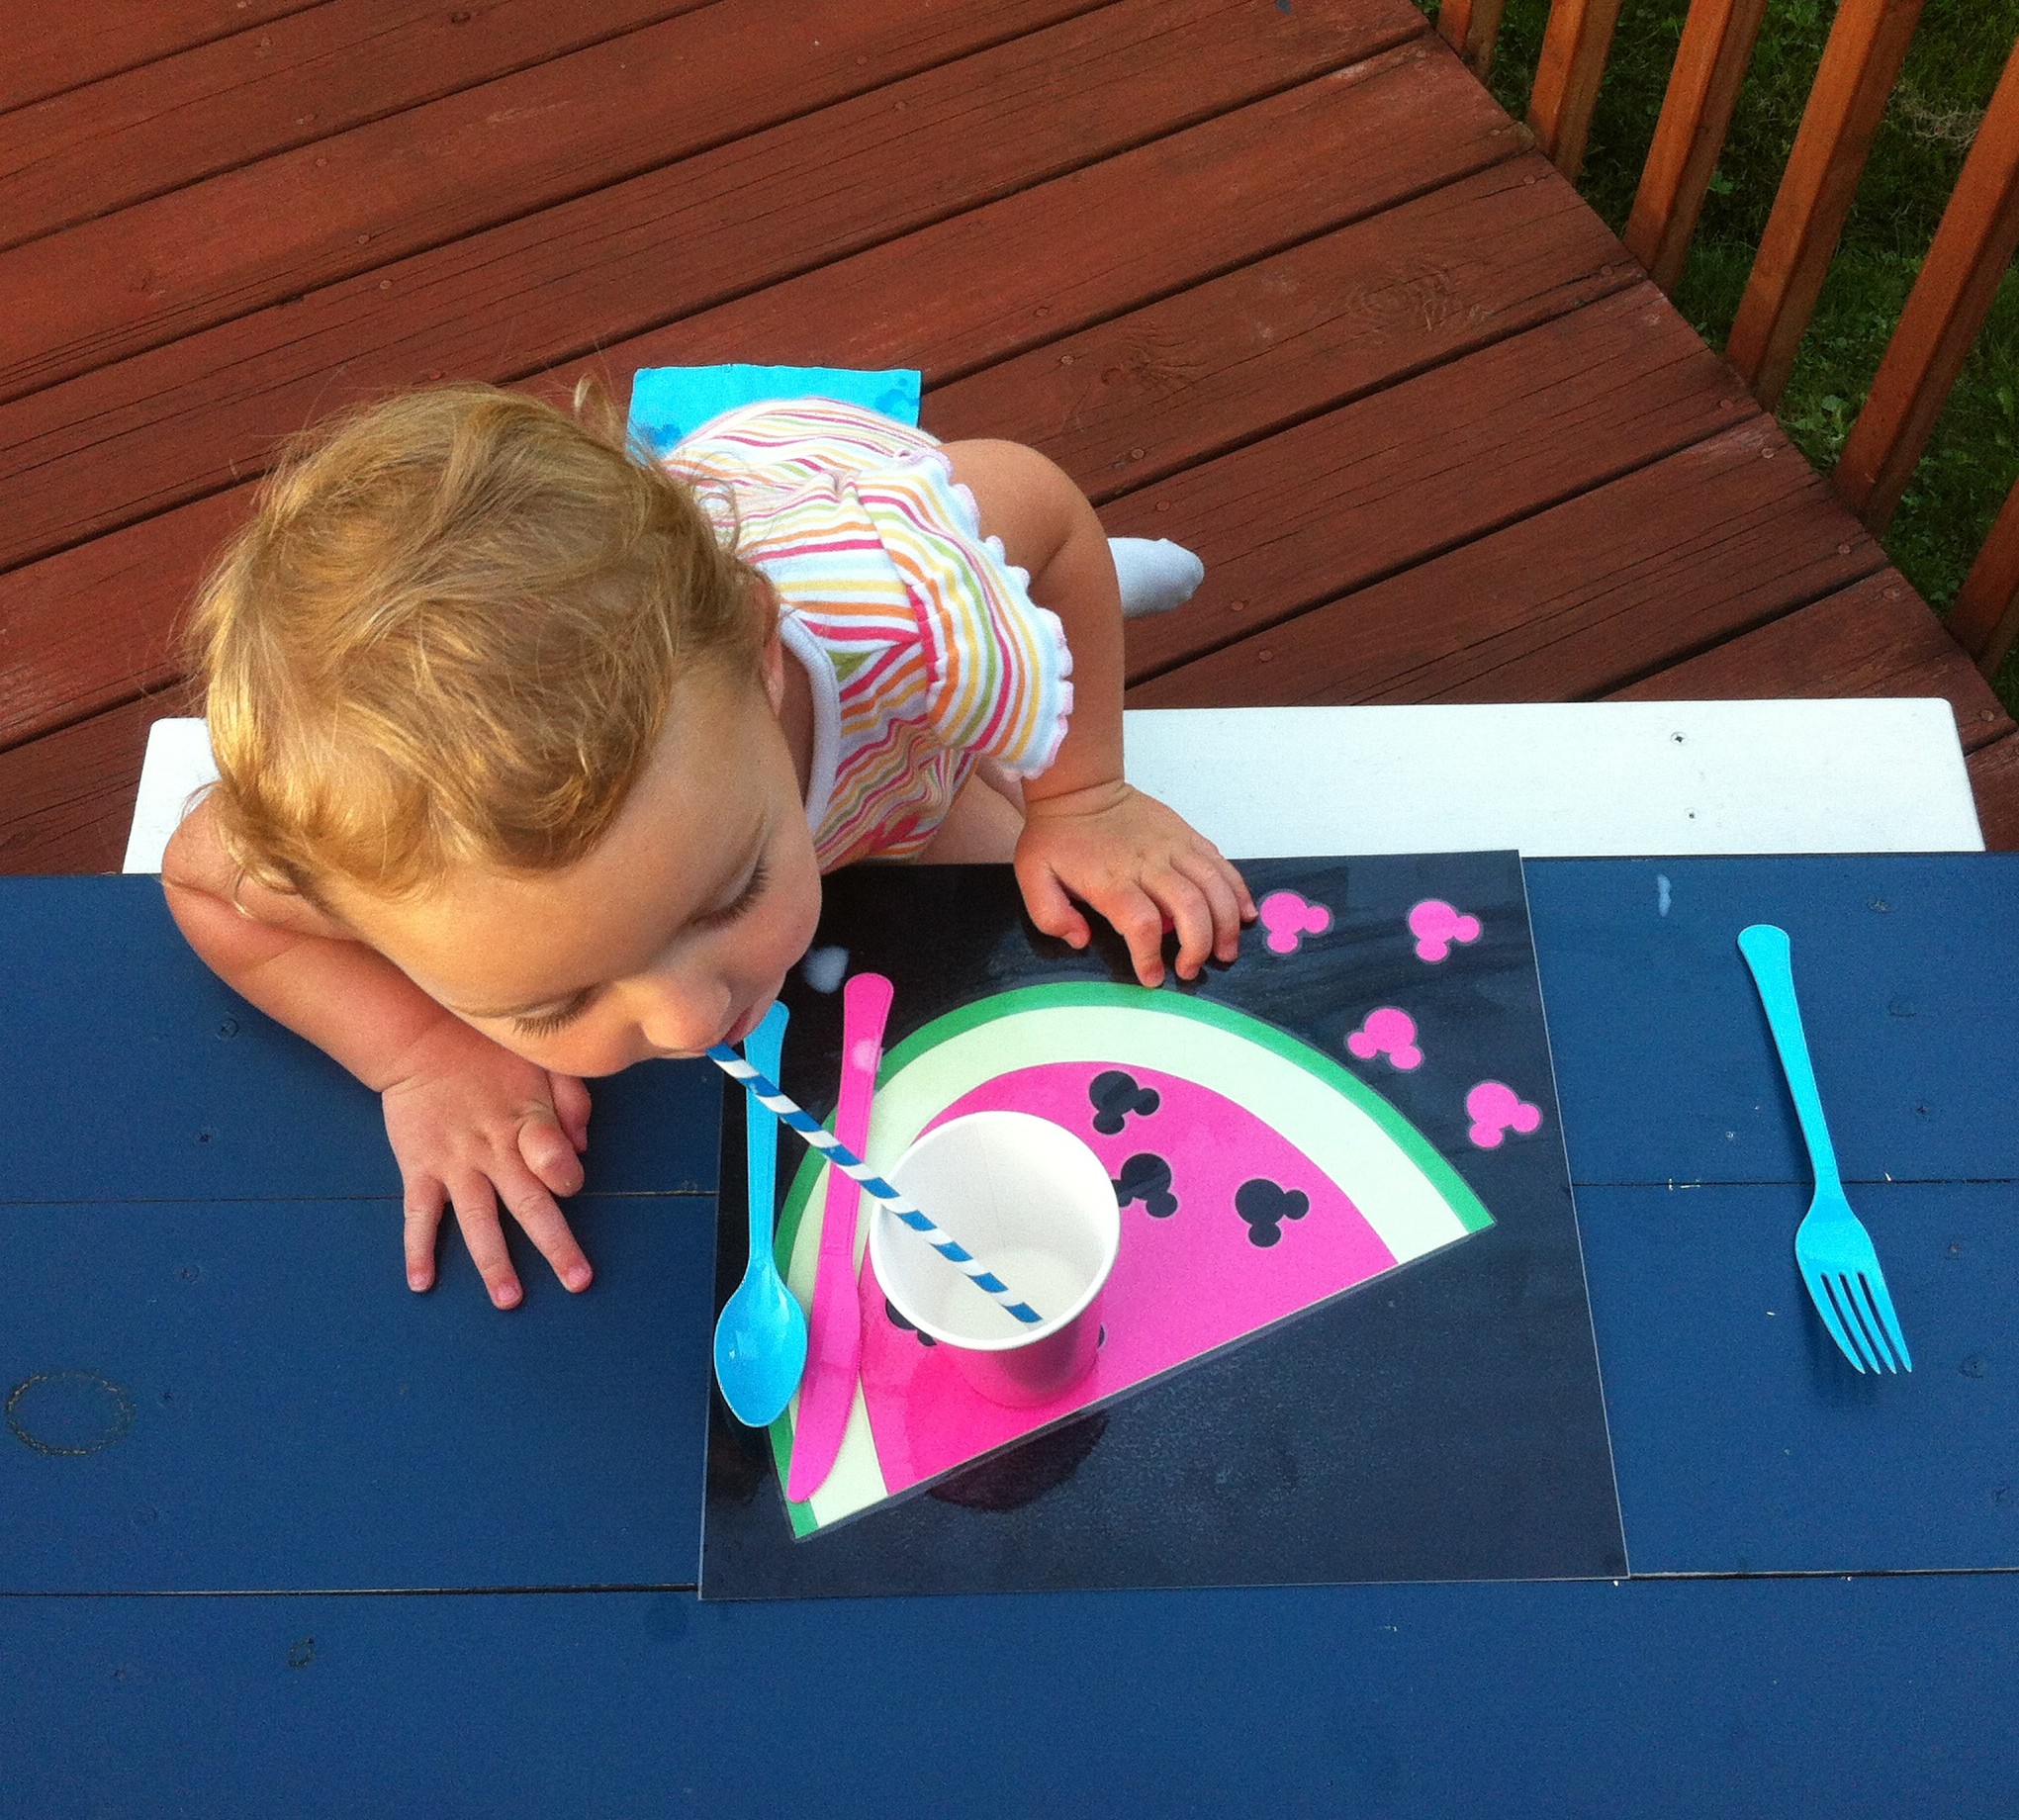
My two-year old, Victoria, LOVES popsicles.  The juicier the pop, the better is her motto.  Since the watermelon was frozen, she spent some time sucking the juice out of this pop!

Victoria enjoying her Mickey pop

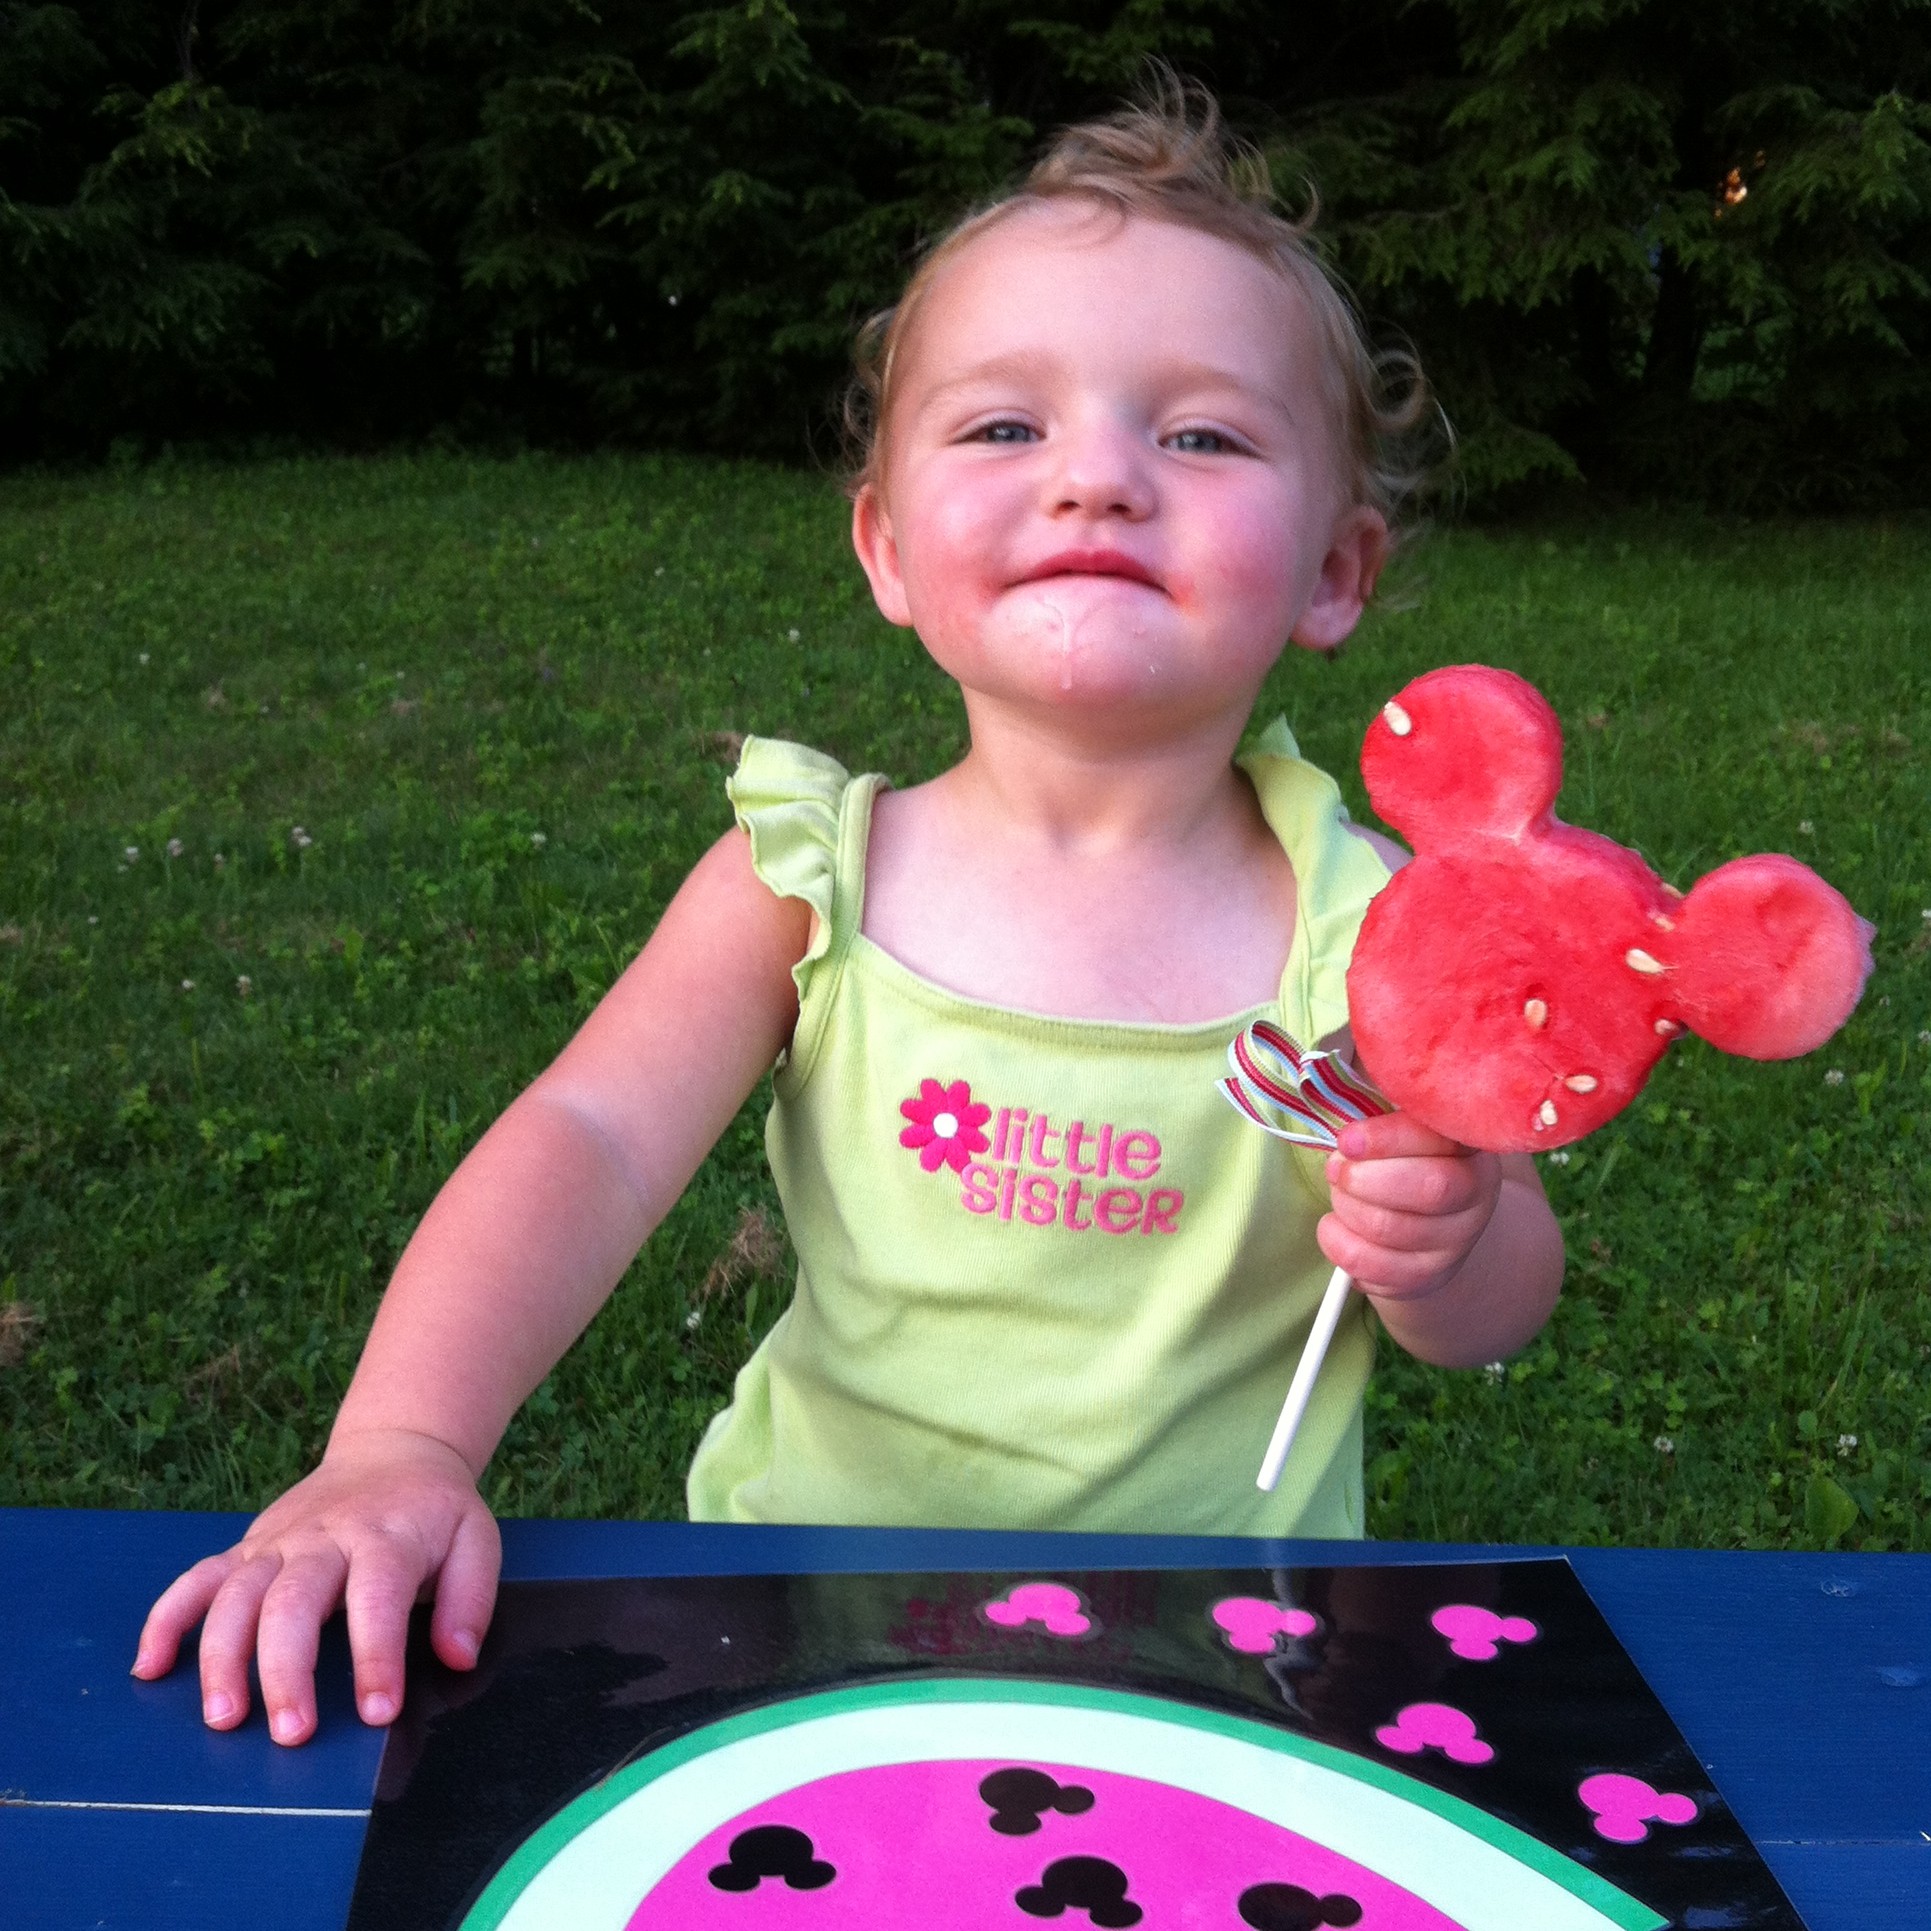
As you can see by the photo, Victoria absolutely enjoyed this fruit version of Mickey’s ears!


Mickey Mouse Printable Summer Craft

Mouse Ears Mom 012Mickey Mouse Watermelon Placemat

If you’re a Friend of Mouse Ears Mom on Facebook, then you already know that this week I’ll be talking about a few of the most delicious things to enjoy during the heat of summer and sprinkling them with a touch of pixie dust!

My children’s favorite summer fruit (and mine too) is Watermelon.  July is National Watermelon month, so I’m guessing that our family is not alone when choosing this fruit as our favorite healthy summer treat.  Despite how wonderful watermelon tastes, it’s the messiest of messy.  So, I decided to make this little preschool size Mickey Mouse Watermelon Placemat for my two-year old.  It was super easy to make and I’ve even included a printable stencil to help you.

Mouse Ears Mom 016  All you need to make this placemat is four pieces of scrap-book cardstock, black, hot pink, green, and I chose light green for the watermelon rind.  The paper pictured to the left is 12″x12″.  You’ll also need scissors, a glue stick and the trusty Mickey Mouse puncher that is pictured in the top right corner of the image.  I purchased this punch at A.C. Moore craft store.  Last but not least, you’ll need one sheet of card stock to print out the watermelon template.  Just click on the file below for the printable watermelon template.

watermelon template

OK, now after you’ve printed that out, you’re ready to get started!  Here are the quick steps to complete you’re little one’s placemat.

  1.  Cut the black scrapbook paper to 11″ top to bottom and leave the width at 12″.  The remaining one inch black strip you can use to make your Mickey seeds and place them off to the side.  If your little Mousketeer is nearby, they can help with that part.  The puncher is very easy to use.
  2. Cut out the three parts to the watermelon template.
  3. Trace each part onto the pink and green papers, cut each out and then glue them all together, including those Mickey seeds you placed to the side earlier.  Since it’s probably your Mouseketeer’s glue stick you’re using, she can help you with this part too!
  4. Glue your colorful watermelon onto the black scrapbook paper.
  5. With your left over pink paper, punch out a few Mickey Mouse seeds and add that final touch to your placemat.
  6. To complete- Laminate.  I do not own a lamination machine, so I asked Staples to help me with this part.  When asked what type of lamination I would like, I chose the heavier weight lamination, due to the depth of the final piece.

Drip Drip DropNow all those little drip, drip, drops are an easy cleanup.

Now, where’s the watermelon?


Christmas in July! Free Printable Nemo Template

Nemo Garland templateYay A Present!

In my last post, I featured my daughter’s Finding Nemo inspired birthday party.  One of the fun décor items that I created for the party was a Nemo garland that was used on the front of the cake table.  If you’re planning a little summer pool party and would like to create your own Nemo garland, click on the pink link- Nemo Inspired Template found at the end of this post.  You’ll find two pages, each showing one fish.  Print at least one of the two pages on white card stock… it’s always nice to have an extra though.  Now get out your scissors, pencil, card stock colors of your choice, hole puncher and ribbon.  You’re ready to go!

Simply cut out “Nemo” to create your template and use him to trace the image on your colored card stock.  Then cut out each colored card stock “Nemo” and hole punch around the middle of his tail, then line up a hole punch for the front of the fish.  Going forward make sure all the fish are hole punched in the same spot so the garland is uniform.  I used nine fish to complete the garland for a six-foot long table.  Once you are done with your fish, simply use your ribbon to string them.  Talk about easy!

For your treat table by the pool, an orange and white “Nemo” garland would offset an aqua table-cloth beautifully.  With the aqua color of your pool in the background, and the use of some orange paper plates, napkins, cups and straws. The look should be fabulous!  A rainbow-colored “Nemo” garland would be so much fun too!  I’d love to see how you use the template.  Please share your photos featuring your “Nemo” inspired garland and I’ll post them to Mouse Ears Mom Facebook page for everyone to enjoy!

Nemo Inspired Template

Merry Christmas in July and “Just Keep Swimming.”

Finding Nemo Party

Nemo Cake Table“MAMO!”

This is the word that comes out of my now 2-year-old little girl’s mouth every time she is near a TV.  Mamo is her name for Pixar’s tiny clown fish, Nemo, the star of “Finding Nemo”.  She absolutely adores Nemo and so, “Finding Nemo” was the theme for her second birthday party.

Finding ourselves in the peak of summer, I think a Nemo themed party would be a fun theme for not only a birthday party, but also a neighborhood pool party.  Today, I’d like to share some of the birthday party’s styling highlights with you, so you and your family could splash up some Nemo fun too.

Table centerpiece signageMy daughter loves the outdoors, so we decided to rent out a pavilion at a local state park.  The pavilion had picnic tables for us to use, so the table top space was limited.  I chose to use a few of these small signs for centerpieces on about half of the tables. The sign holders are from Ikea and the signs are scaled down movie posters.

Nemo and spoonsThe other tables had orange, blue, white and pink (had to have pink for my little girl) balloons and various Circuit cutouts of Nemo, and his friends.  The Nemo cut out is pictured to the right with the plastic ware.  To spruce up your party plastic ware, purchase the spoons, forks and knives in the party’s themed colors.  Place each type of utensil in a separate glass container with coordinating ribbon bows.  The polka-dotted orange and white ribbon shown in the photo to the right was used throughout the party.

Nemo BannerThe Nemo inspired garland pictured on the left was used to decorate the front of the cake table although it’s not pictured in the photo.  Later I repurposed the garland to decorate this spot. I made the garland by drawing a stylized version of Nemo on heavy cardstock.  Then I used the template to make more fish on orange and white card stock and connected them with the polka-dotted orange and white ribbon.

Nemo in a bagSince my daughter is only two, I kept the activities really simple.  I believe the kids had the most fun by running around chasing bubbles.  At the end of the day each big kid (2 years old and up) took home their own fish.  The bag was actually clear glycerin soap with a plastic fish in the center. If you would like to make one with your children, you can find a “How To” video on Martha Stewart’s website.  The infants at the party took home a plush fish character from “Finding Nemo” instead.

Adult party giftAll the moms, dads and big people in general took home a container of fish food (Swedish Fish).  I’m not too sure how many actually made it home, since I was asked for refills!  I even heard a little seagull talk…

“Mine.  Mine.  Mine.”

Happy Splashing Everyone!

Patriotic Mickey Pops

Patriotic Mickey Pops

Showing American Pride Couldn’t Be Sweeter!

My sister-in-law’s birthday is on July 4th.  She’s a big Mickey fan and her FAVORITE cookie is Double Stuffed Oreos. I think that these patriotic Mickey pops will be a perfect birthday treat for her…so shhh, don’t tell her that I made these for her!

If you’d like to make these yummy treats, below is a short tutorial for you to use:

  1. Gather susome suppliespplies: red, white and blue candy melts, cookie lollipop sticks, regular size Oreos as well as mini Oreos, melting cups to use for dipping (I use a 4 cup Pyrex glass measuring cup), squeeze bottles for drizzling, wax paper,  cookie sheets and candy wrapper bags.  I used the large size candy bags that are pictured to the right.  When Mickey’s ears are attached, it’s very hard to fit the pop in a smaller bag.
  2. Separate the top from the bottom of the regular size Oreos. Place the cookie, with the filling still attached, on a waxed covered cookie sheet with the filling side facing up.
  3. Melt the white chocolate in a squeeze bottle.  Once melted, pipe a circle of white chocolate on top of the white Oreo filling.  In that circle of chocolate, place your lollipop stick and then place the top of the cookie back on the cookie, pushing very gently (as to not snap the top of the cookie in two…guess who did that like ten times!).  Continue to do this for all of the cookies you’ve placed on your cookie sheet.
  4. Place the cookies with the lollipop sticks in the refrigerator for five minutes.  This will harden the chocolate, acting like glue and secure the sticks for dipping.
  5. While you Mini Oreoswait for the chocolate to harden, lets move on to Mickey’s Ears. Line another cookie sheet with wax paper.  Then melt the red and blue chocolate in microwave safe cups that are suitable for dipping your cookies. Depending on your preference, dip the mini Oreo in either the red or blue chocolate.  I chose to do both and dipped half of my container of cookies in red and the other in blue.  To dip, I tossed the entire mini cookie in the melted chocolate and used a spoon to take it out, letting the extra chocolate slowly drip off of the cookie’s side, then placed on the cookie sheet.  When finished with them all, place them in the refrigerator and take out your regular size Oreos with the sticks.
  6. A bit less chocolate for the little Mouseketeers.
    A bit less chocolate for the little Mouseketeers.

    Dip the full size Oreos in the remaining red and blue chocolate, and place back on the cookie sheet. Once you’ve completed them all, take the mini Oreos out of the refrigerator, dip the edge of them one more time in their coordinating color and attach them to the full size cookie.  To help everything set, place them back in the refrigerator for another five minutes.  SPECIAL NOTE: To the left I have a picture of what it looks like if you chose to only dip half way.  I did this for my little Mouseketeers, that of course want to try them too!  It’s a touch less chocolate than the full dip and therefore not as heavy on little tummy’s.

  7. Once the ears are set, the drizzling starts!  A quick back and forth motion works well.  You could use a spoon to drizzle your remaining red and blue chocolate or as I did, drizzle white first with my squeeze bottle; let them set for a few minutes, then reused my bottle for the remaining color.
  8. Last but not least, wrap each pop in a candy bag and tie it shut.  Place all of your Patriotic Mickey pops in an air tight container and keep the container in a cool location.

Happy 4th of July Everyone!