Category: Disney-Inspired Party Planning

Our Disney Wedding

img019Look close in this photo and you’ll see a Disney Prince and Princess.

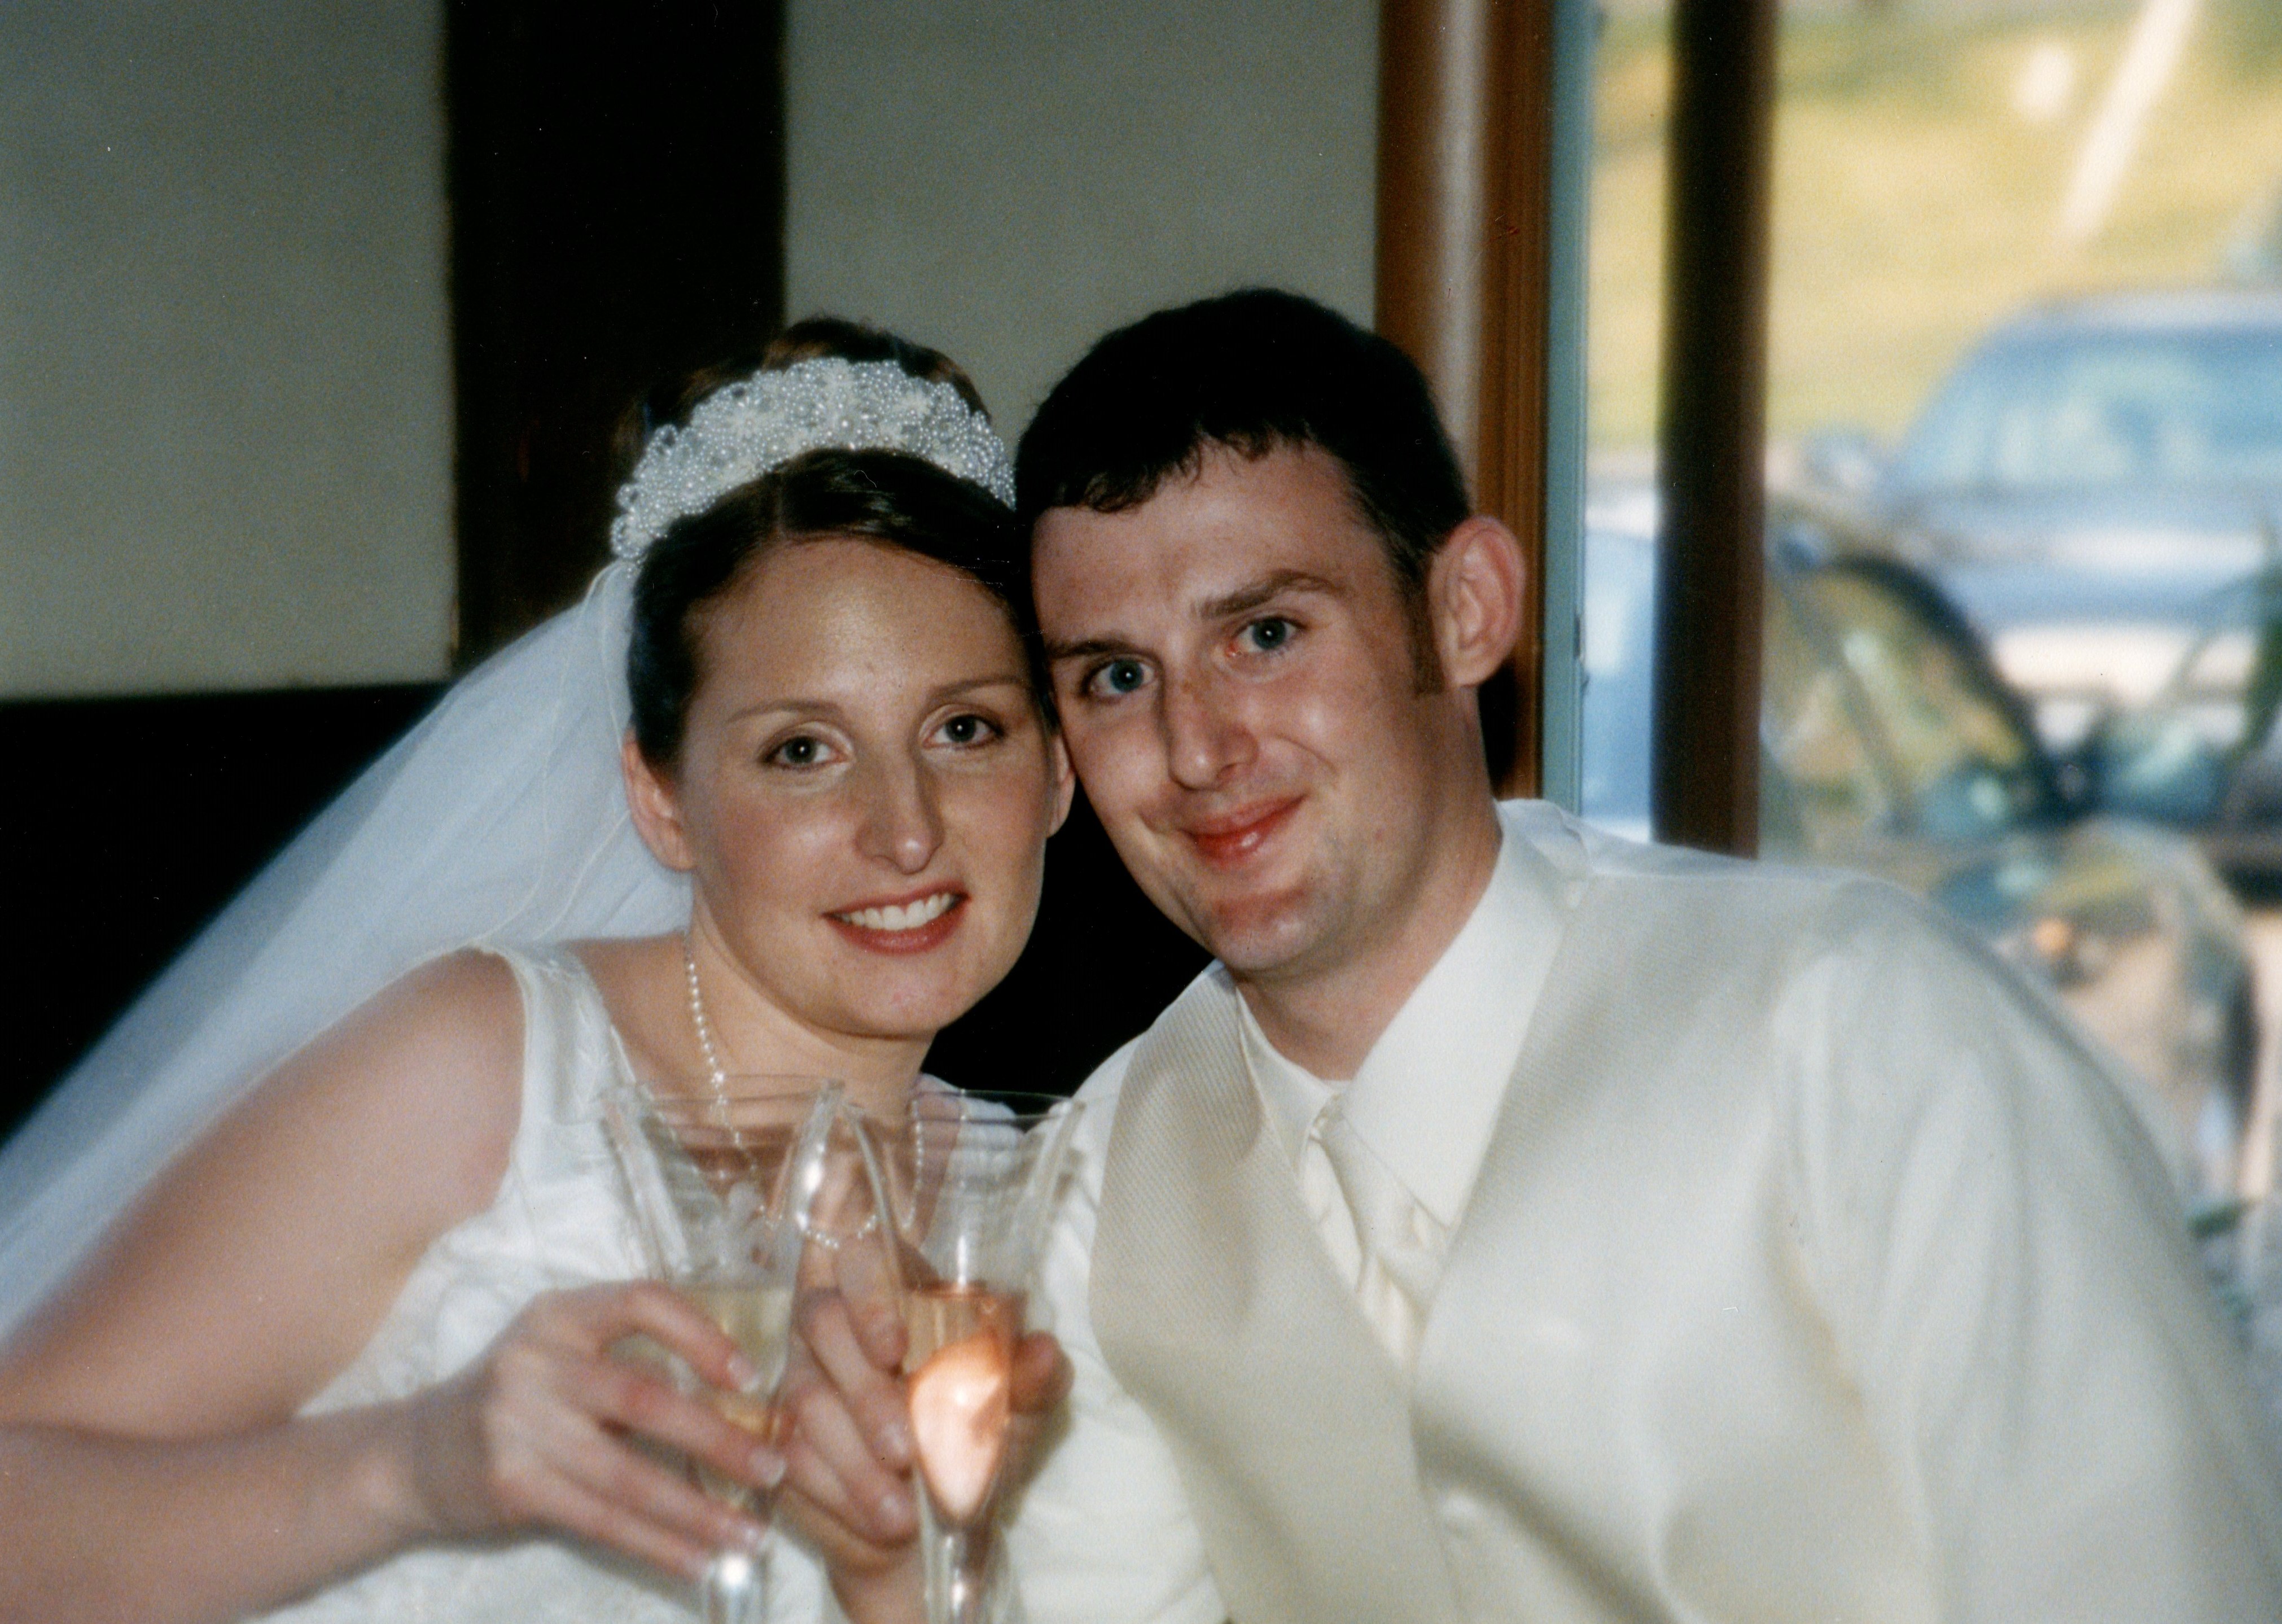
(Hint:  They’re on the glasses!)

The number one day of the year that couples get engaged is Valentine’s Day.  With Valentine’s Day behind us, now is the time when “brides and grooms-to-be” start thinking about planning their weddings.  This May, my husband and I will celebrate our ten year anniversary.  I can’t believe how time flies!  Looking back on our planning process I remember how important it was to me to have Disney touches sprinkled throughout our day.  Gary and I met while working at Walt Disney World.  I often tell people that I met my Prince Charming at Disney and took him back to Pennsylvania!  So of course, when deciding on a theme for our wedding, I looked no further than the movie Cinderella.  Like most little girls, I spent many of my childhood days dreaming of being Cinderella and marrying my Prince Charming.  Since my fiancé didn’t have the same childhood connection to Cindy, I kept the Disney references understated.  I wanted to accent the day with Disney, not make the day into a spectacle of Disney pageantry.  Today I thought I’d share with you the simple Disney-Inspired wedding touches from our wedding day.

Disney-Inspired Ceremony Touch

img021
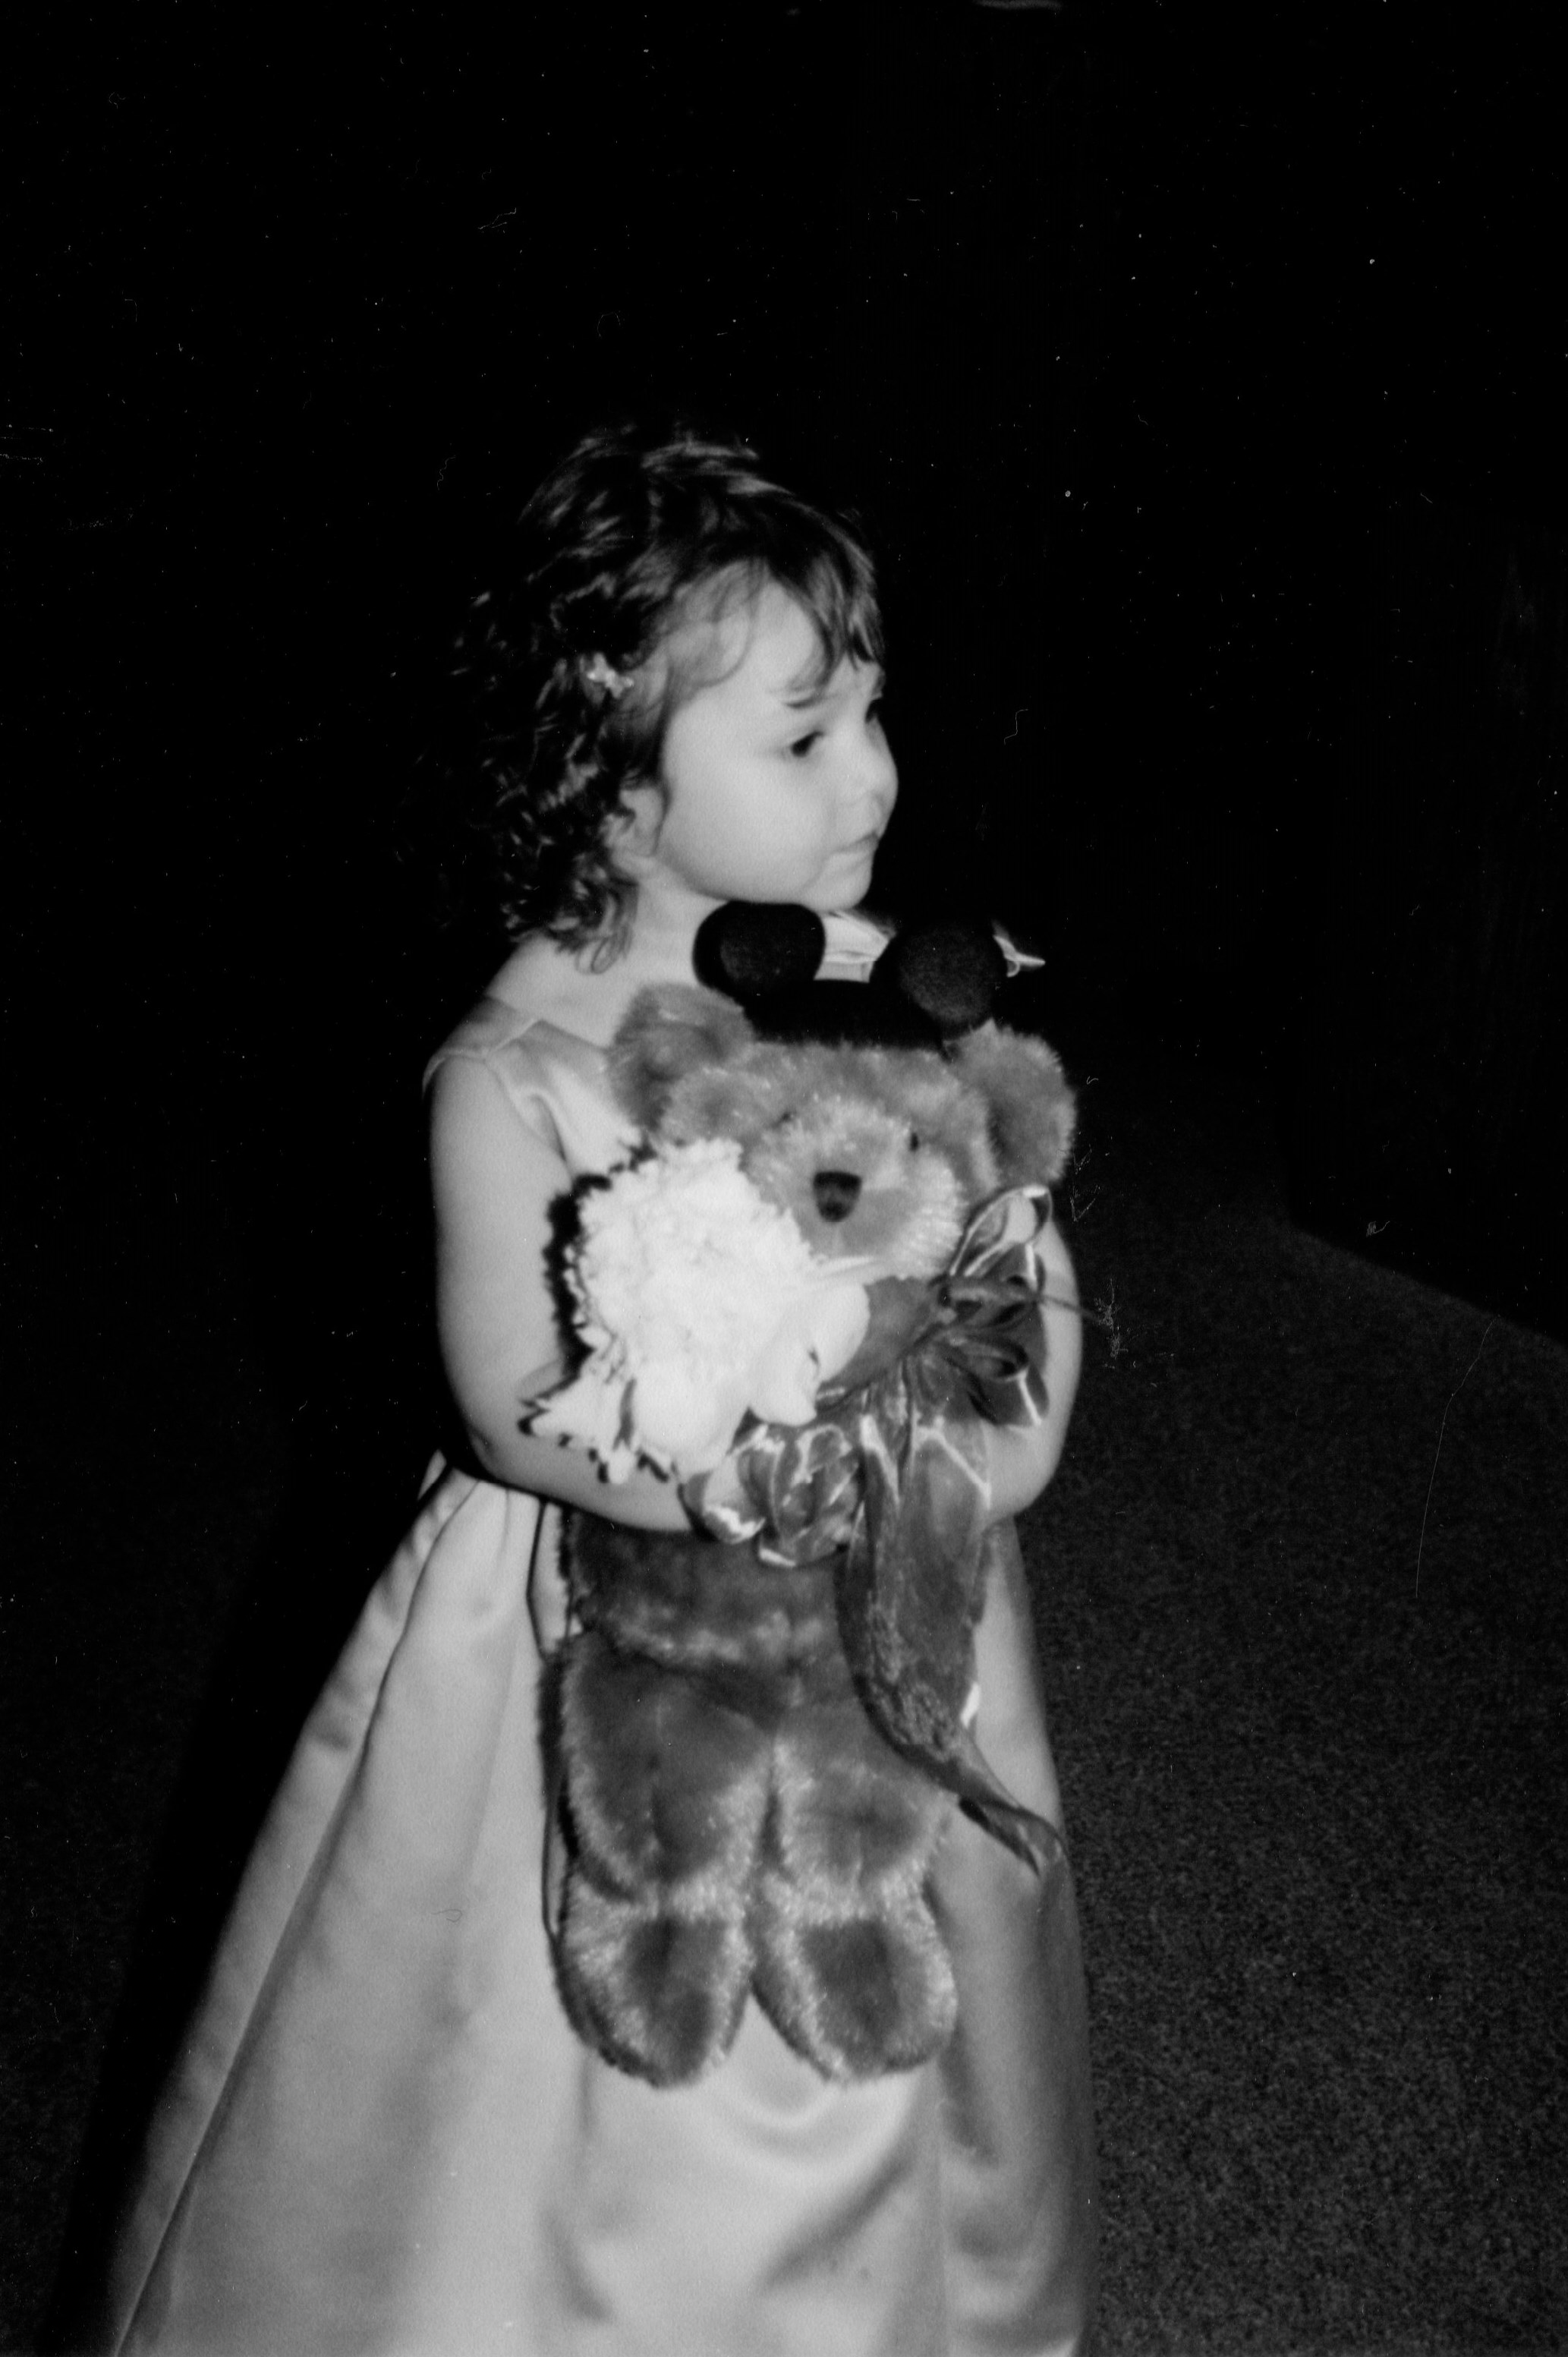
Our adorable Flower Girl, Vanessa, carried a soft brown bear that was sporting a miniature set of Mickey Ears.  What’s truly wonderful is that Vanessa is turning 13 years old this year and she still has this bear!

Disney-Inspired Reception Touches

img023Our wedding song was a remake of “So This is Love” from Disney’s Cinderella.  I love the simple lyrics of this song and since most, if not all the guests had no idea it was taken from the movie, it made the song personal to Gary and I.

Disney-Inspired Dancing

img022
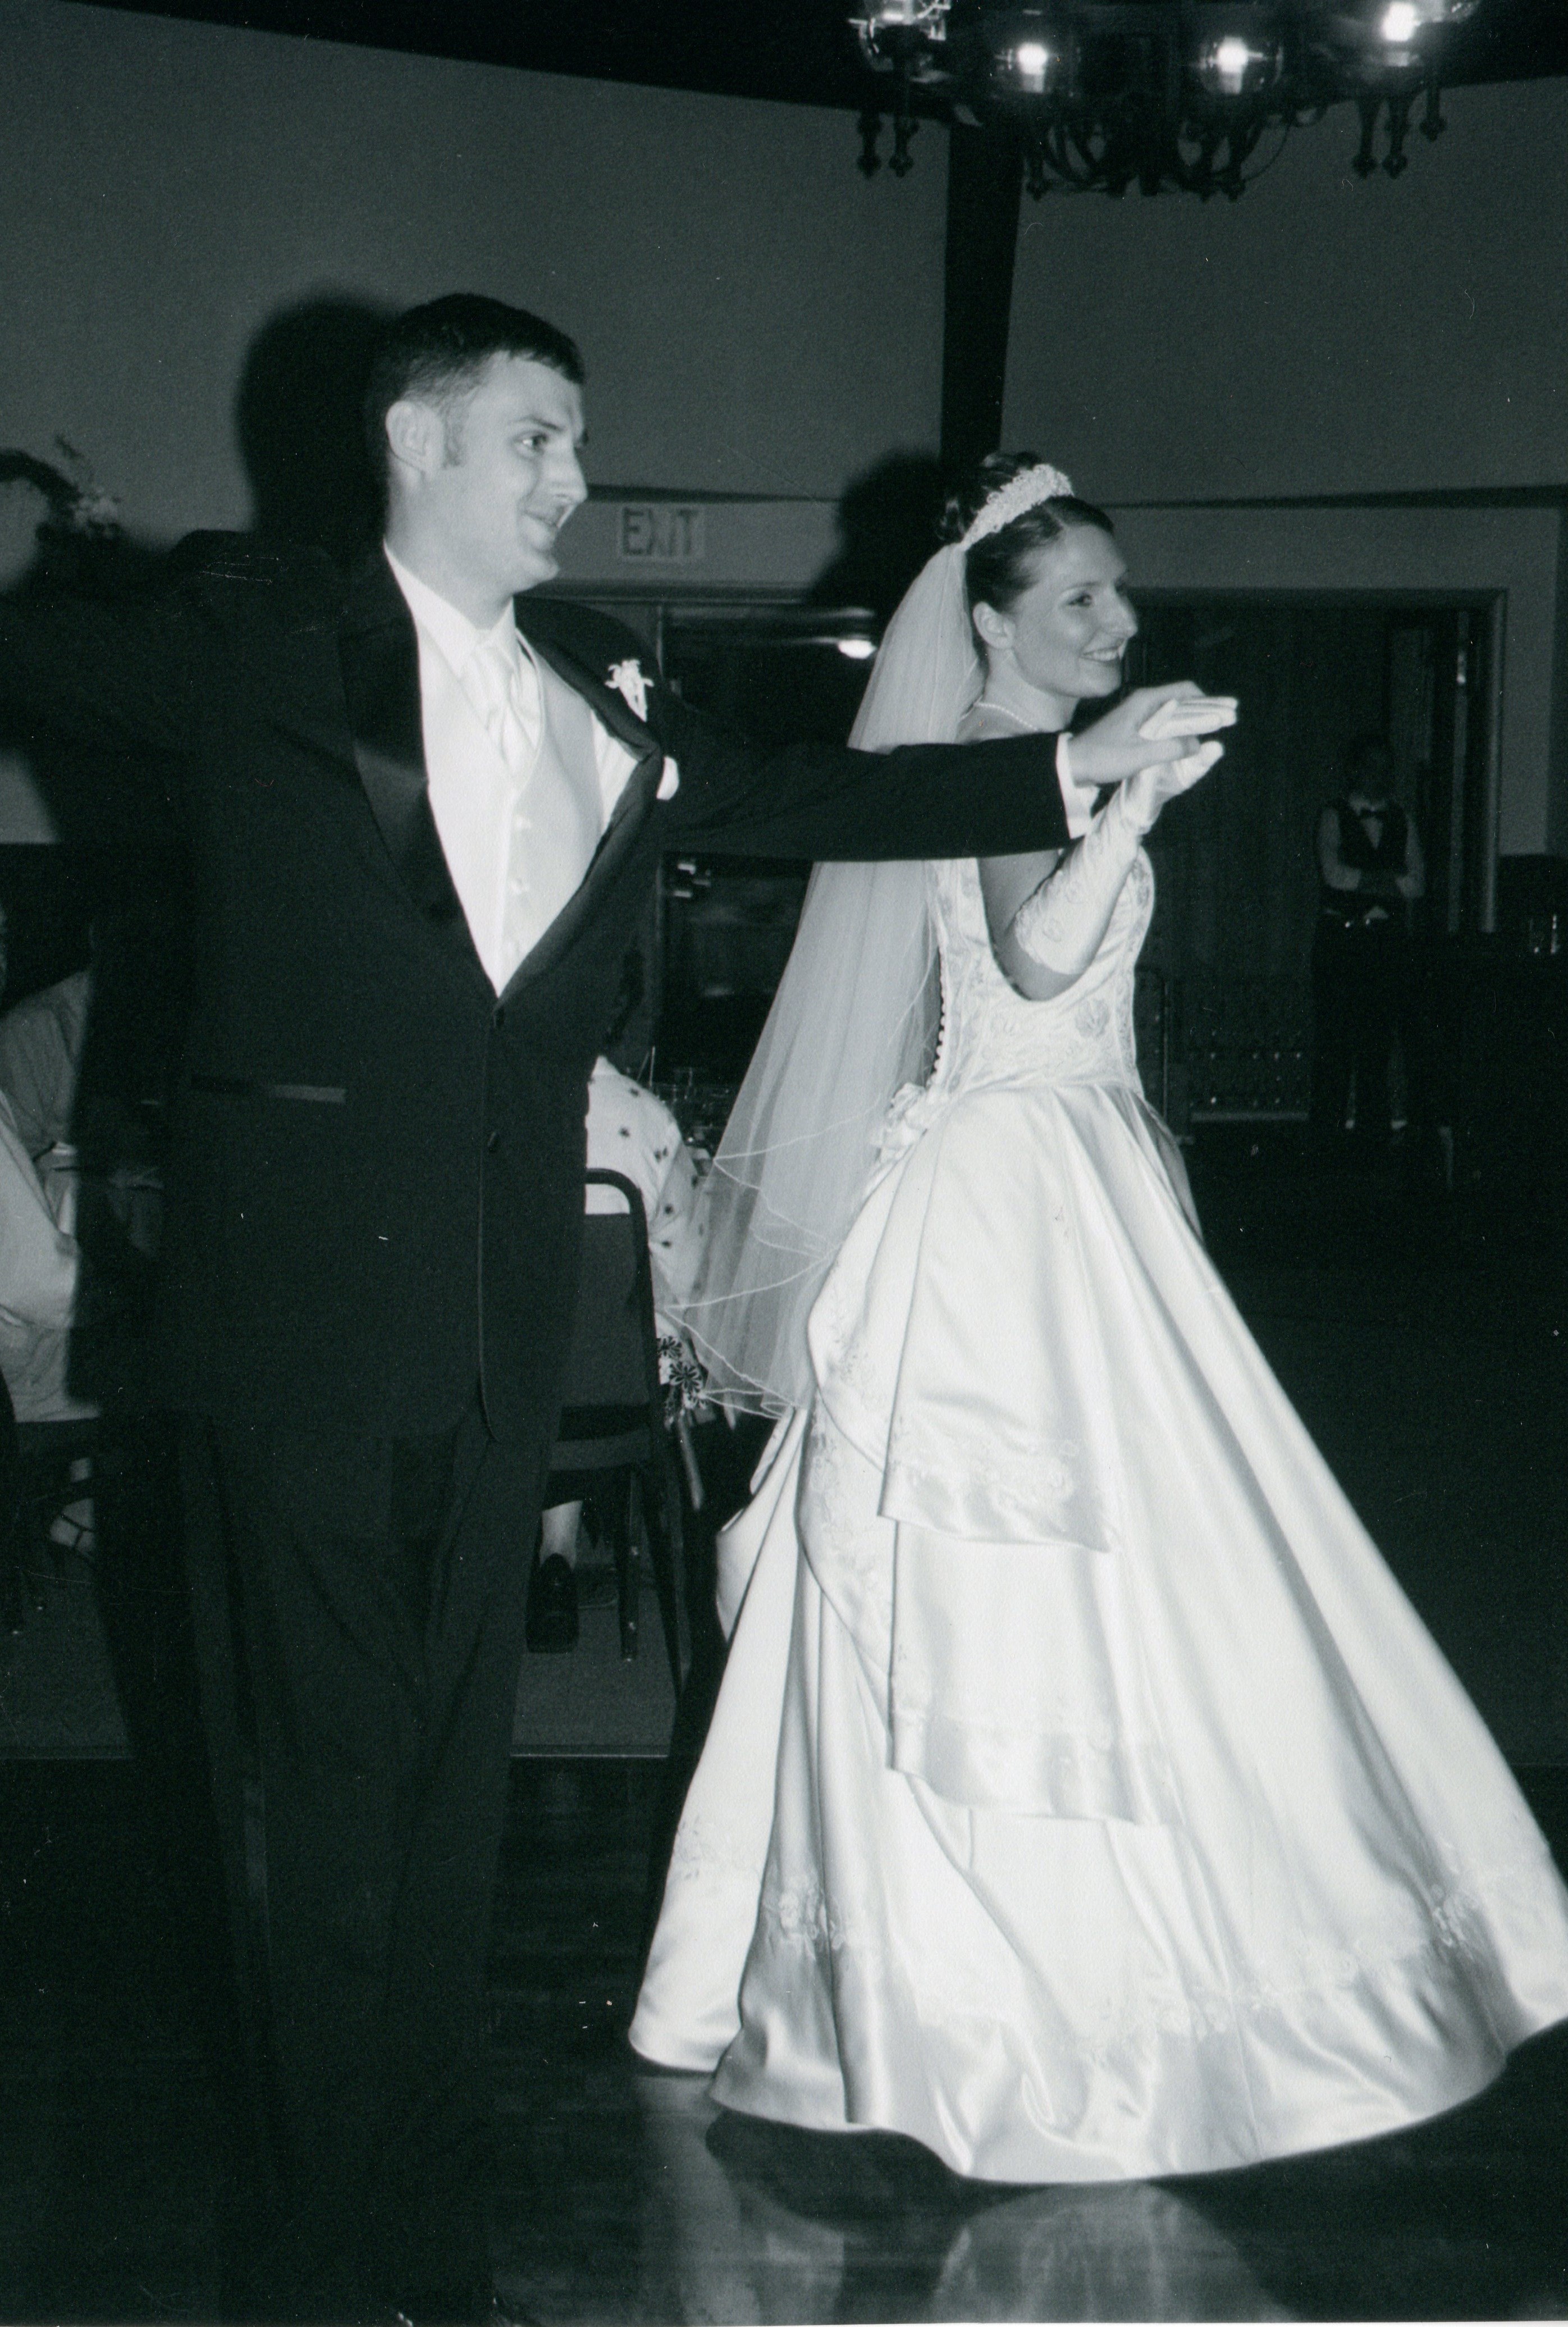
Gary and I took dance lessons before our wedding and learned to Waltz like a proper Disney Prince and Princess.  We practiced for months before our wedding day and it was wonderful having that time set aside for us to learn together.

Disney-Inspired Cake

img018

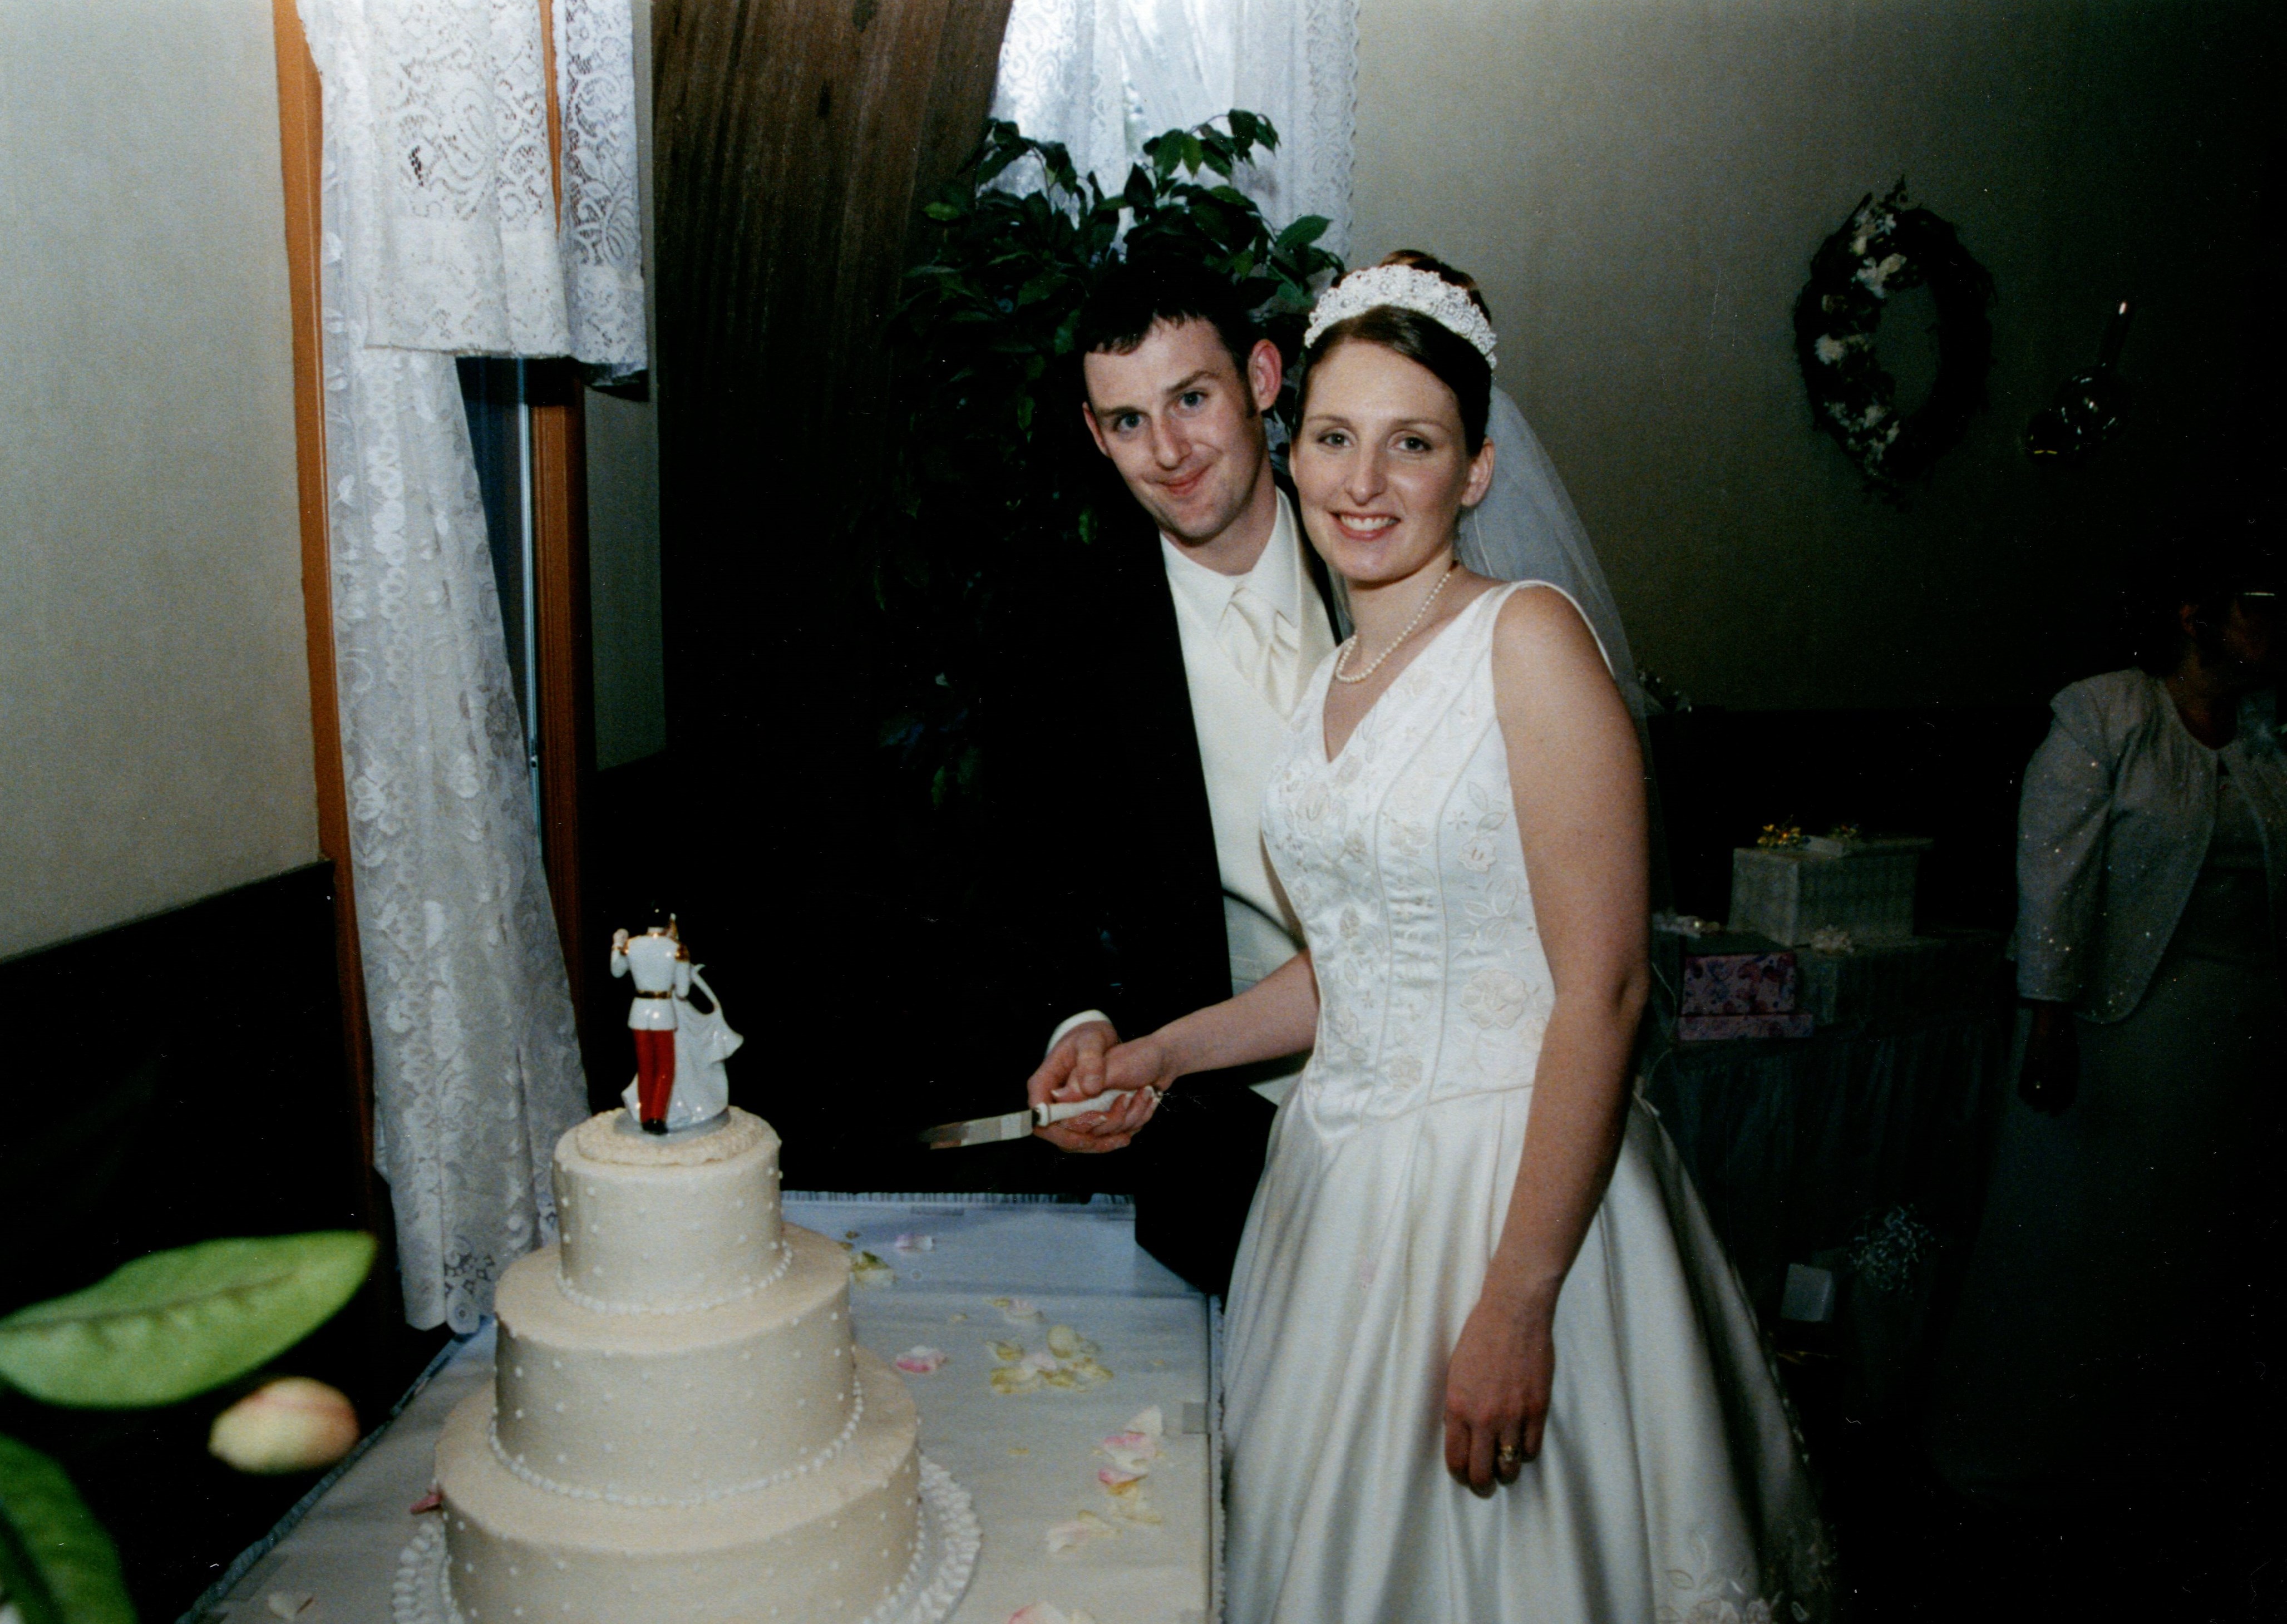
Our Cinderella and Prince Charming cake topper was from Walt Disney World.  We still have in our living room today.  Thank you Keith Renard!

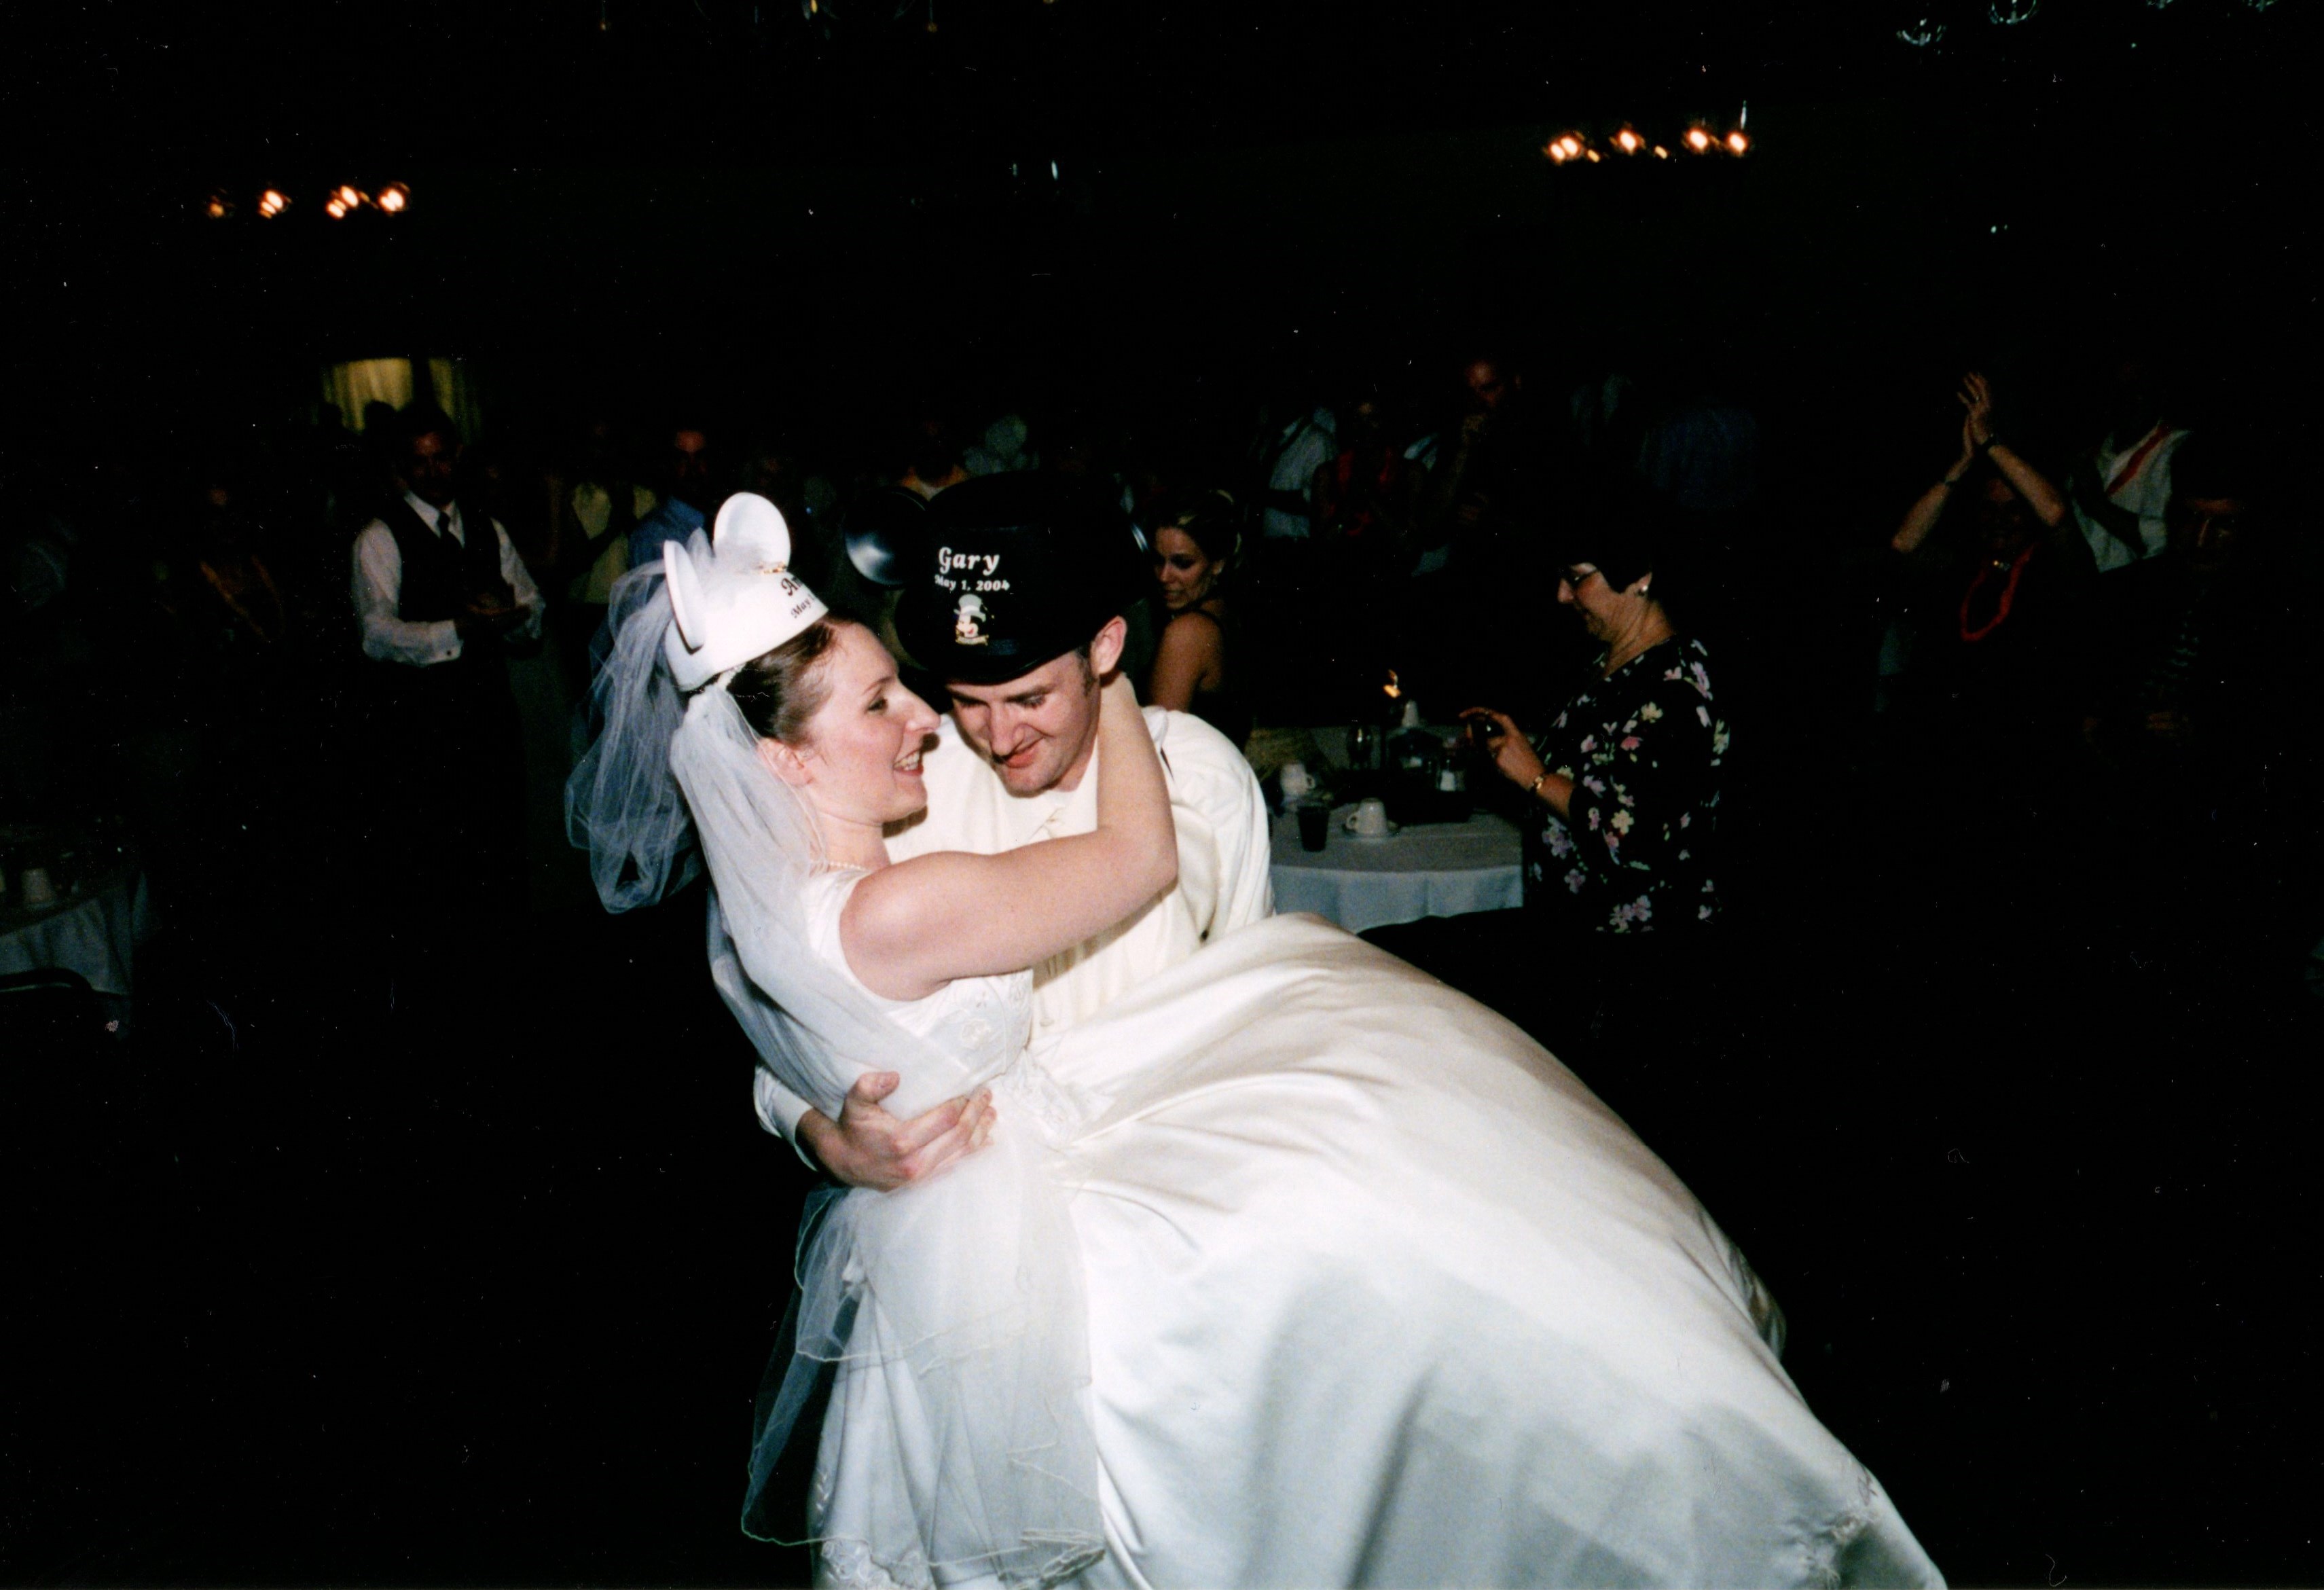
My Mother’s Disney-Inspired Surprise

img025

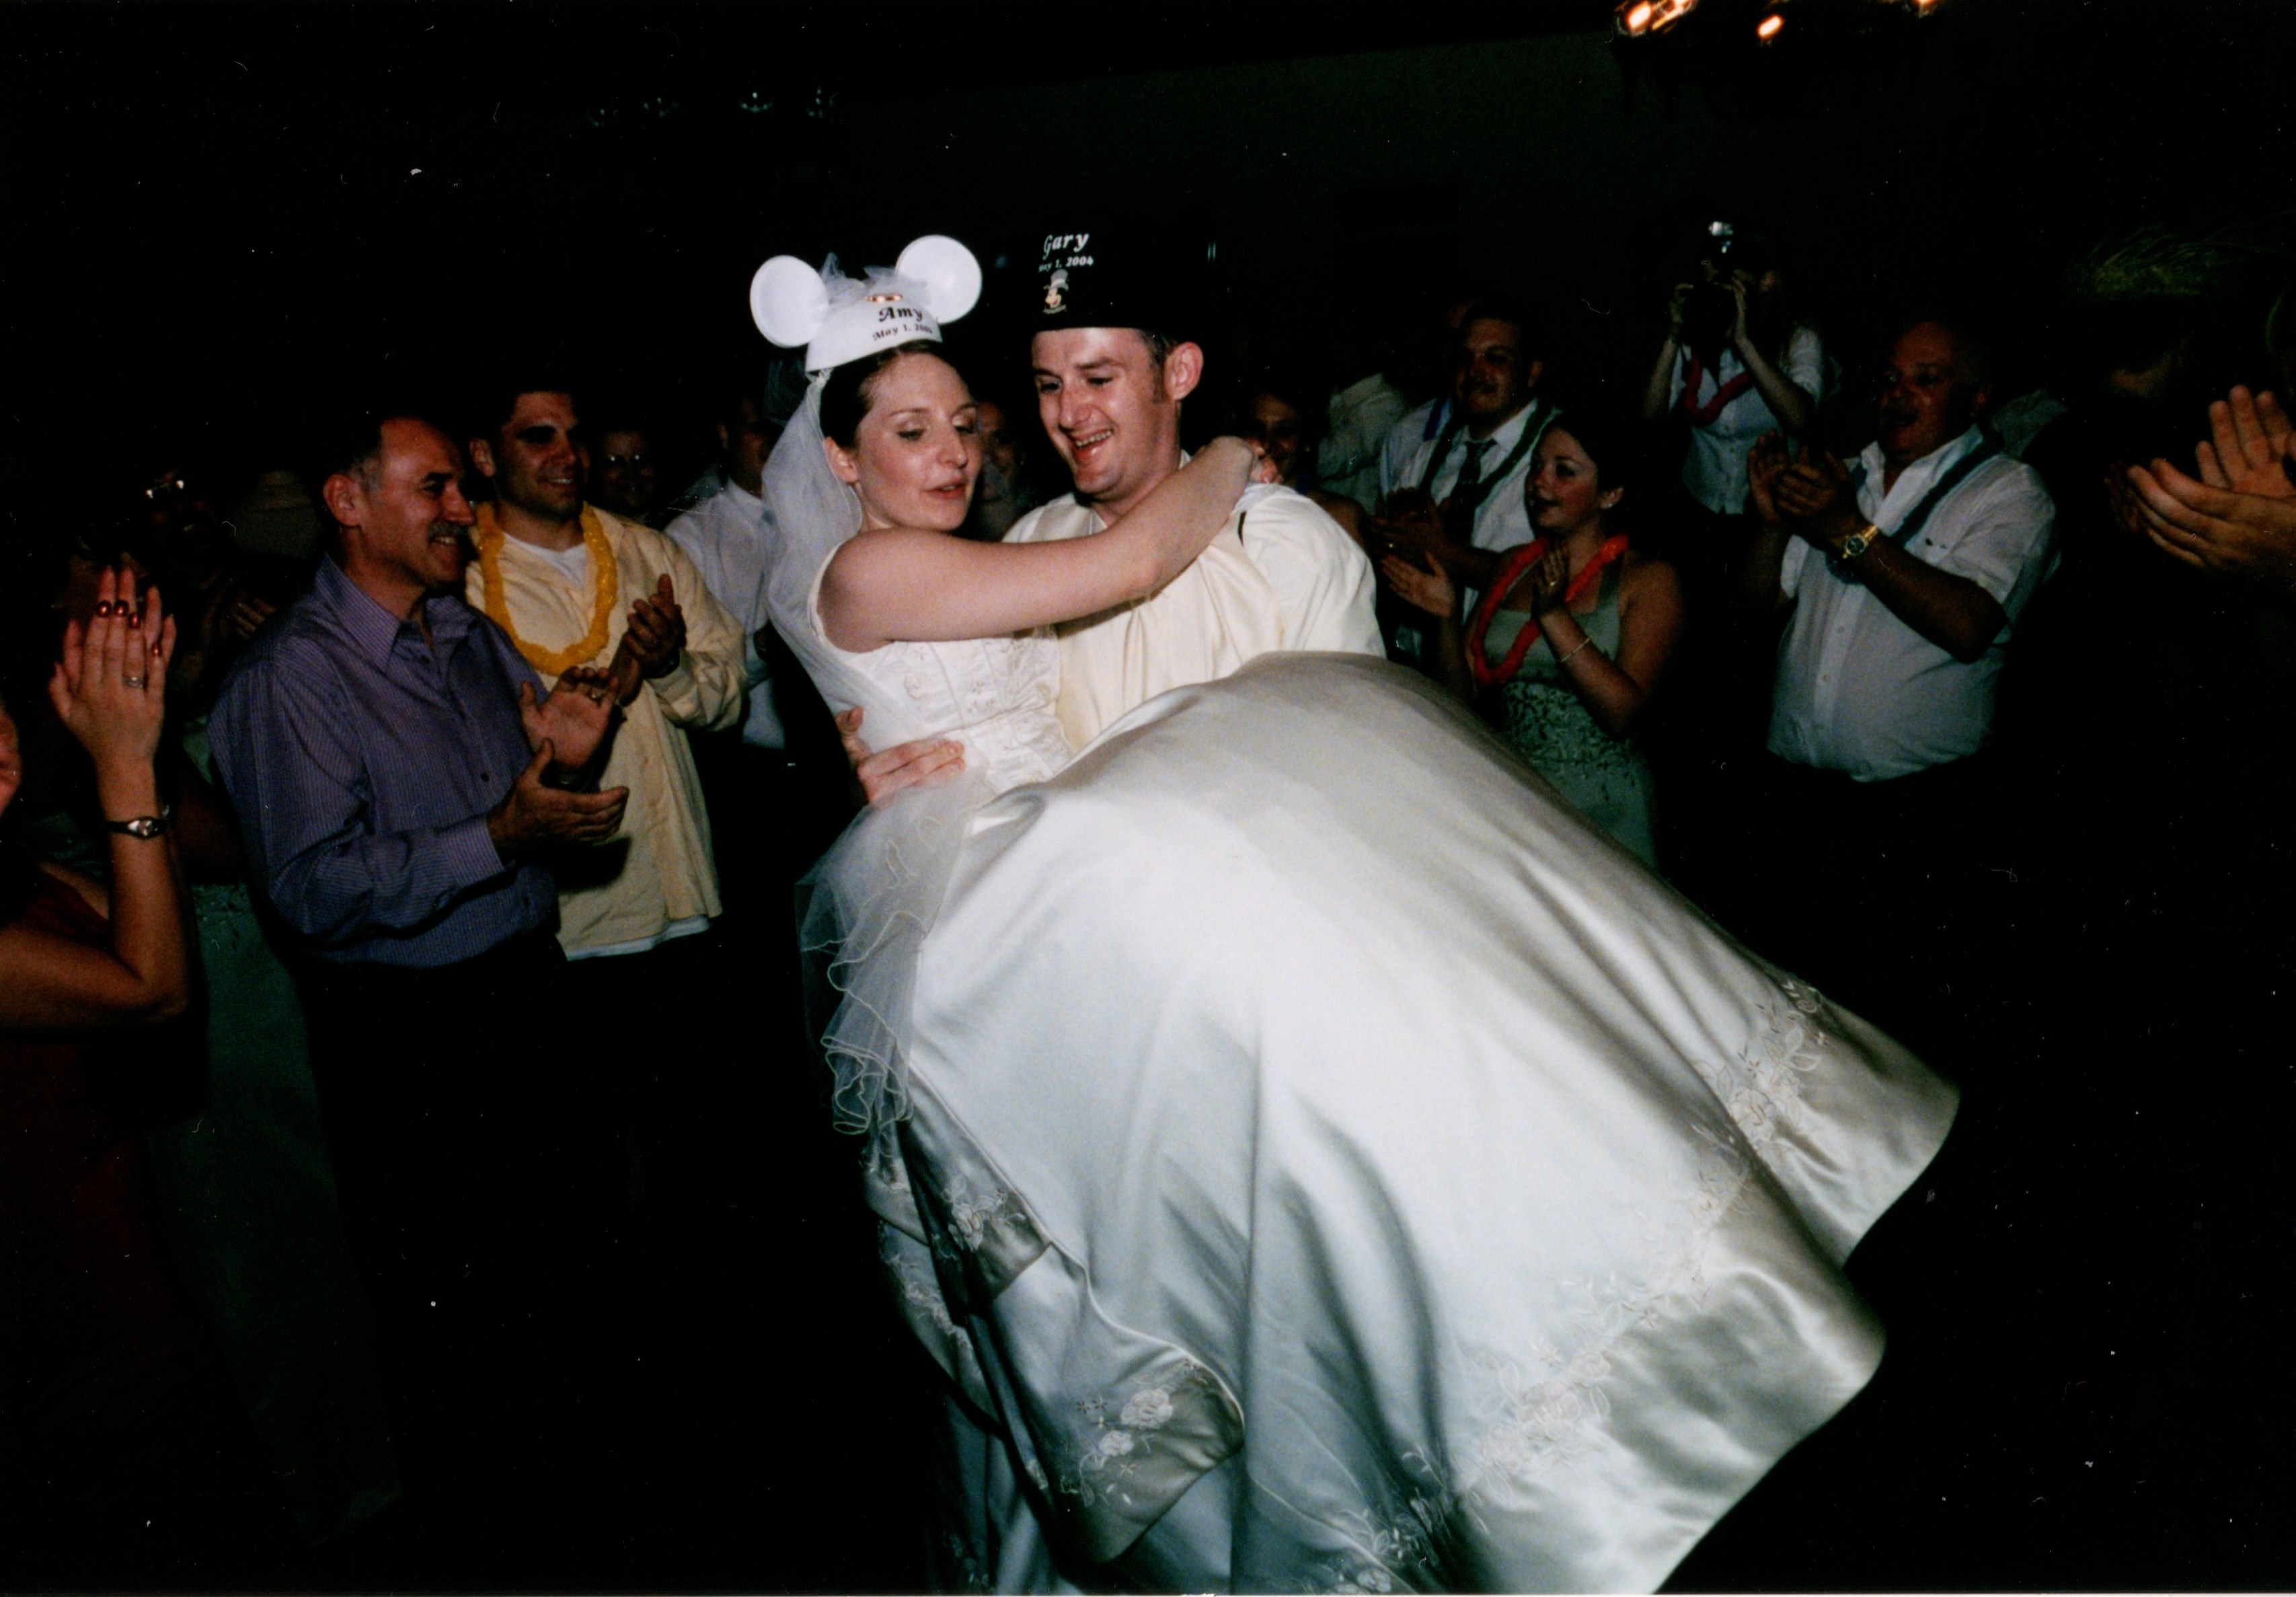
During the last song of the evening, as Gary was trying to “rescue” me from the 100 plus people separating us, my mother put on us personalized Minnie and Mickey Mouse bride and groom ears.  It was fun way to end our day and start our honeymoon to Disneyland!

img024Did you have a Disney themed wedding or do you know anyone planning a Disney themed wedding?  Please share this post with them to pass on the ideas and I’d love for you to share your photos of your Disney wedding on my Facebook page! www.facebook.com/mouseearsmom

A special thank you to Oaktree Photography & Video Inc. for allowing me to post these photos on the blog today.  They did a great job capturing such special moments during our day.  Moments and photos that we will treasure for a lifetime.  Please stop by Oaktree’s Facebook page to see what they’re working on a decade later!

https://www.facebook.com/pages/Oaktree-Photography-Video-Inc/86063976467

Let’s Build an Olaf Snowman Puppet!

olaf play 001Do you love Olaf as much as we do?

My kids are pretty obsessed with Disney’s Frozen’s adorably silly little snowman named Olaf.  This weekend I stumbled across a Disney Frozen Activities page that had a really cool “Build a Snowman” activity sheet.  I printed it out for the kids and we made this simple puppet in a matter of minutes.  Here’s how!

First stop by http://www.catchingupwithkate.com/free-disneys-frozen-olaf-printables/

Print out the “Build a Snowman” activity sheet.  If you’re looking for other Frozen fun visit http://movies.disney.com/frozen/downloads/activities .  There are a bunch of other fun coloring and activity sheets on this page too.  However, for this little project you will only need the Olaf printout.   Since I printed it out on basic copy paper, I chose to laminate the sheet to make it a bit sturdier.

Olaf 0042. Once printed cut out all of Olaf’s parts.

3. Next, put him together by using a hole puncher and brads.

Olaf 018

Olaf 006

4. Once together, flip him over and add the puppet stick.  I used a wooden skewer and taped down the pointed side.  Olaf 011That’s it!  Super simple and my kids had a blast playing with him.  Now it’s time to get our dance party on and pretend it’s “In Summer!”  If you’re surround by two feet of snow, like us, just watching Olaf’s YouTube video is enough to warm your heart.

We’re Sending Warm Hugs to You!

Olaf 014

Disney Makes Potty Training Magical

Pulls Party 017“Good Bye Diapers!  Hello Pull-Ups!”

It’s potty training time for my little two and a half year old.  Honestly, it’s been challenging.  If you’re a mom or dad who’s lived to tell the tale, you know it’s a battle.  Luckily for me I have been given a bit of a secret weapon…Disney didn’t provide me with a sword, shield or the preferable, magic wand; however, Pull-Ups and Disney did provide me with the help of Princess Ariel, Minnie Mouse and an adorable Sulley.

In exchange for this post and hosting a “Good Bye Diapers, Hello Pull-Ups Party”, I received Huggies Pull-Ups to provide to my guests, coupons and a Disney Princess Magical Sounds Potty System for my little Princess.  As with all my posts, my comments and “review” of the items are purely my opinions.

Party Time!

I have an older child, Gavin.  He’s 6 years old and I’m happy to report that his potty training days were overall pretty easy.  He wasn’t ready until almost 3 years old, but once he told me he was ready, that was it.  He was done with diapers.  He didn’t use Pull-Ups and Gavin never had an accident.  Since he never used them, I didn’t purchase any for Victoria either.  Victoria’s 2 and a half now and she’s showed interest in potty training so I’ve felt she was ready to try.  Well we’ve been “trying” for about a month now, without much success.  When I received an email asking if I’d host this party, I thought we’d give Pull-Ups a try.

Pull Ups 003A few days before the party our supplies arrived from House Party and Huggies.  When Victoria and I opened our box,  we were surprised to find a Disney Princess Magical Sounds Potty System.  As soon as Victoria saw it, she wanted to use it.  The next morning we took the potty out of the box and she had five successful potty times!  Success and the party hadn’t even started!  I give this potty two thumbs up.  Cleaning is simple and I love that it doubles as a step stool.

In addition to the potty, we were given a bunch of things to assist us and our guests on our magical potty training journey.  Of course I didn’t wait to until the party to start using them.  I had to test Huggies tips out and see if they worked.

Pull Ups 008Each of our guests received, what I like to call, a celebration package. It included a potty progress chart, Big Kid reward stickers and three party horns.  After Victoria had her first successful potty session I pulled out this package, used the chart, gave her a sticker and she and I went full-on party with those horns.  It worked!  She LOVED it.  Like I said, five successes on the first day!  With this experience under our belt, we were ready to host our party!

Pulls Party 008Pulls Party 011The kids and I, took a trip to Wegmans grocery store and picked out some balloons and of course, the potty-training princess’s favorite treats, sugar cookies.

 Our Guests Arrive!

Pulls Party 001

Derek was the only little prince that attended our party, so he received an entire Pull-Ups package to get him started on his way.  He was happy to open them up and show us how they work.  What a Big Kid now!

Pulls Party 029

The kids loved the Disney characters on the Pull-Ups.  For the boys, the Pull-Ups feature Buzz Lightyear and Lighting McQueen.  For the girls, Minnie Mouse, Ariel and Monster University characters, Mike and Sulley grace the outside of the Pull-Ups.  Of course, Victoria only wanted to wear one because of Minnie Mouse and Princess Ariel.

The party was a success. Moms swapped potty training stories and ideas.  The kids had fun while playing, making party hats and being introduced to Huggies great Pull-Up product.  For my niece, Gwynn, it was her first interaction with a training potty.  A couple more months and she’ll be ready to go!

Pulls Party 006

Thank you Pull-Ups and Host Party!  We’re on our way to being Potty Trained!

The Act of Disney Topiary

Mickey and Minnie Mouse TopiaryWouldn’t it be great to have a Disney topiary in your home’s landscaping?

I’ve always admired Disney’s beautiful topiaries found throughout the Walt Disney World Resort. These living sculptures bring the grounds to life.  They’re part of what makes a vacation at Disney feel magical.

The weather this winter season in Pennsylvania, as with most of The United States, has been horrible.  This week is continuing in the same pattern as the rest of the winter.  On Wednesday school was cancelled, so the kids and I decided to bring a bit of Disney magic into our dining room.  We started our own Mickey Mouse topiary.

Mickey Mouse Chia Pet Kit

Gavin received this Chia Pet kit for Christmas from his grandparents.  If you’re wondering where to buy one, my mom purchased Gavin’s kit at our local CVS store.  We thought this day would be a perfect day to try our hands at a bit of horticulture.  I’ve never tried to grow a Chia Pet and wondered how well they’d work.  If you like to see the process, check out our photos.

Blog February 020

First we submerged the Chia Pet in a tub of water for an hour.  The entire “pet” wouldn’t stay under the water.  I’m assuming that’s how it was supposed to be, but the directions didn’t tell us that.

Blog February 028

While the planter was soaking, you mix 2 teaspoons of the seeds with 1/4 cup of water.  They sit for an hour also.  Eventually the consistency of the mixture will be a watery gel.

Mickey Chia Pet

After the hour ended, we filled up our Chia pet planter with water, placed it in the plastic tray that was included in the kit and then the kids got to work.  They loved it!  What a mess we had making our topiary!

Blog February 051

Here’s a close up look at the finished piece.  Now we have to water him and HOPEFULLY we’ll have our very own Mickey Mouse topiary in our dining room!  The paperwork says that within three days it should begin to grow.  I promise to give you all an update next week.

Chia Pet Mickey with the kids

This was our first attempt to make a living sculpture of our pal.  However, for my daughter and nephew’s Mickey and Minnie themed birthday party, my sister-in-law and I decided to make a Mickey-Inspired and Minnie-Inspired ribbon topiary for the guests’ tables.  If you’d like to stick to crafting and want to leave the seeds to someone with a green thumb, below the photo you’ll find a link to the post where you can see the steps to make this ribbon topiary.

Minnie Mouse Topiary

http://www.mouseearsmom.com/2013/08/01/mickey-mouse-topiary/

I hope you have a magical day!

Easy Mickey Mouse-Inspired Valentine’s Day Craft

Mickey Mouse Placemat from MouseEarsMom.comKeep your table clean with this fun and simple-to-make placemat…well at least part of your table clean.

Yesterday,  in our elementary school’s after-school Disney craft class, I had a great time helping young Disney fans make a Mickey Mouse Valentine’s Day placemat.  The first and second grade students did an excellent job and they enjoyed watching the lamination machine seal their artwork.  If you have a little Mousketeer that loves Mickey Mouse this is a perfect craft to complete with him.  If you don’t have a lamination machine, no problem.  Your local business supply store, like Staples, offers laminating services.  To laminate this project our local store would charge around $3.00US per placemat.

Here’s a break down of what you’ll need for your little artist.

placemat 035For this project you’ll need a Mickey Mouse Craft Punch.  I purchased this punch at A.C. Moore Craft Store.  On a side note, I have to tell you that you’ll love it!  If you don’t have an A.C. Moore store near you, I’ve seen the punch available for purchase on-line.  In addition, you’ll need a 12″ x 12″ piece of scrapbook paper for your base, a glue stick, an 8.5″ x 11″ piece of copy paper, and one pink and one red piece of construction paper or card stock for the Mickey punches.

placemat 001Cut your heart base out of the white copy paper by folding the paper in half and using the entire half of the paper.  Start at the bottom tip and cut to the side corner for the shoulder of the heart.  Have your child use a glue stick to attach the paper heart in the center of the 12 ” x 12″ scrapbook paper.

placemat 003Next, fill in the white heart with the colored paper Mickey heads.  I started with the color red Mickeys and glued each one in place with the use of a glue stick.  There were a total of 41 red Mickey punches and 22 pink Mickey punches used on my placemat.  What was really fantastic about doing this project with the kids is that each child decided to complete the project their own way.  They didn’t care that I had used exactly 27 Mickeys in one row and 21 Mickeys in another row.  All the placements came out really cute and unique to each child.  I had them write their names and grade level on their finished piece, so Mom & Dad will remember how little and adorable their child was when looking at the placemat years down the road.

placemat 022For anyone else out there that want’s to see how I glued the Mickeys onto the heart, here’s a close up of the center.

Now I have one more afterschool simple craft idea I need to come up with.  I’m thinking about teaching the students a little bit about the purpose of molds…and not the kind of mold that cause illnesses.  They’ve already learned how to take something away by using the craft punches and have used tons of glue too.

Any ideas you’d like to share?  Please do!

Thanks for stopping by the blog today!  Have a Magically Mickey Day!