Tag: Disney Craft

Back-to-School with an Olaf Inspired Pencil Holder

Frozen Blog Hop

The sun is shining.  The birds are tweeting and my kids have been running round singing Olaf’s “In Summer” during this beautiful season we’ve been enjoying in Pennsylvania.

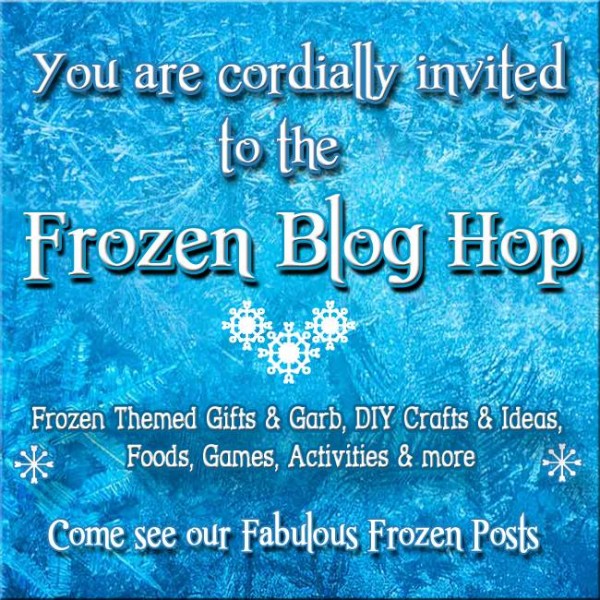
They’re not alone.  While talking with a bunch of fellow Disney-Inspired bloggers, we all realized that Frozen is just as hot as the blazing sun outside.  We decided to group together to bring you our best Frozen Inspired fun for you to read, pin and share as you hop around our blogs.

For my post today, I’d like to share with you how to make an Olaf-Inspired Pencil Holder.

Olaf Pencil Holder

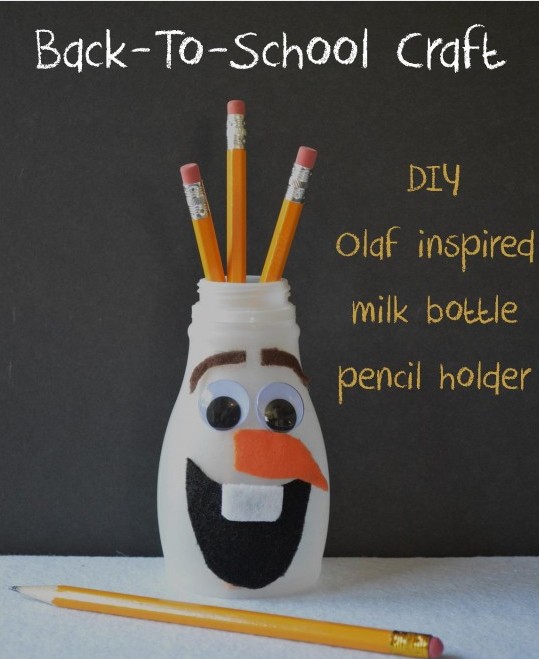
Due to all the extra snow days we had last year, the district is trying to prepare for this winter by starting the school year earlier.  Trying to get my son prepared, I have school on the brain.  While picking up supplies the other day, I bought McDonald’s happy meals for the kids’ lunches.  With the Frozen soundtrack blaring in the background, I handed Gavin and Victoria their milks and couldn’t help but think of little Olaf’s adorably shaped head.  Pairing school with Olaf, I came up with an Olaf Inspired Pencil Holder!  My mind works in strange ways, I know.
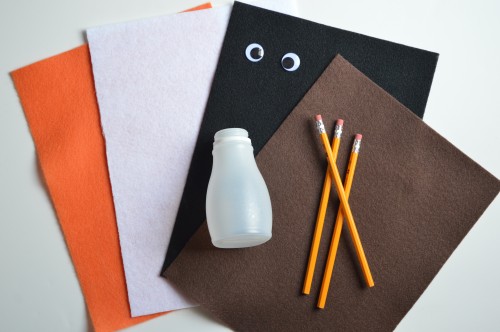
Supplies

Olaf Pencil Holder Supplies

  • One cleaned McDonald’s milk container
  • Orange, white, black and brown felt
  • Two google eyes
  • Glue Gun with glue

Draw Olaf’s nose, eyebrows, mouth and tooth onto the felt and cut them out.

Olaf felt pieces

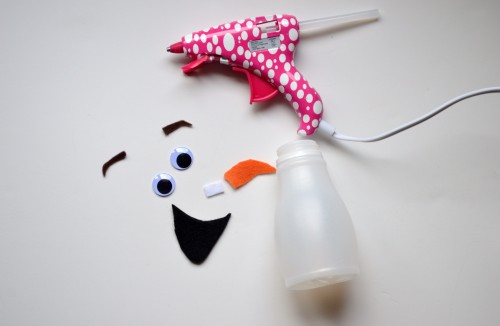
Hot glue the back of each piece and attach them to the milk bottle.

You’re done!  It’s that simple!

Can’t get enough of Olaf?  Hop on over to another fun Frozen post!


Flying High with a Pizza Pie Planes Party! {Free Printable Menu Cards & More}

Planes Pizza Party

Are you going to see Disney Planes Fire & Rescue this weekend?  We’ll be there!

To say my son, Gavin loves airplanes, would be an understatement.  There isn’t a day that goes by when discussing planes or something that flies isn’t part of our conversation and aviation is a staple in almost every play activity.  This seven-year-old boy goes through flying toys as if he’s changing clothing.  It’s not because he doesn’t take care of his toys, he wears them out or the plane gets stuck in a tree.  With the movie release of Disney Planes last year (see my review here), Gavin’s love of airplanes unbelievably grew and he immediately started asking when Planes Fire & Rescue would be in the theater.  Well, the movie release week has finally arrived!

To celebrate this exciting event I put together a couple “Free Printable” Planes-inspired items that I created and party planning tips to help you host a Pre-Show “Flying High with a Pizza Pie” Planes Party for your little aviators and their friends!

 Planes Themed Pizza!

planes pizza menu

There are so many different types of pizza that you can have at a pizza party!  Try offering the kids specialty pizza and place these silly menu cards close by.  It’ll give young readers a chuckle or two before choosing their pizza.

  • Chicken Wing-man Pizza
  • Chicken & Broccoli Alfredo Flying Pizza
  • Ham & Cheesy Flight Attendants Pizza
  • Pepperoni Pie In The Sky Pizza
  • Flying High Cheese Pizza Pie

I’ve created this set of FREE printable pizza party menu cards for you to use. (For Personal Use Only)  Simply print the Planes Pizza Party file (found below) on white card stock, cut the orange and blue colored cards out and fold along the white line.

Click on the Planes “Pizza Party Menu Cards” link for the five piece printable menu cards.

Planes Pizza Party Menu Cards

Dessert!

Planes cupcakesI made these Planes-inspired cupcakes for my son’s birthday party last year.  Check out the super simple cloud icing tutorial for these soaring cupcakes here!

Dusty cookie popsAnother Planes-inspired dessert option are these Dusty Cookie Pops.  You can see my simple tutorial here!

Decor! {Free Printable Template}

Now that you’ve got the food covered, time to decorate the food table! Add a simple planes garland to the front of your food table, to complete your pizza party table.

Airplane Garland template

You can download the airplane template here!

 Trace the template on orange and blue card stock for the airplanes to match the menu cards.  Then add blue and orange table wear and your party will be soaring!

Still looking for more Planes party ideas?

Check out my son’s planes-themed birthday party here!

Check In Desk (Presents!)

Now you’re ready to have the perfect Pre-show Planes-inspired Pizza Party!  Enjoy your party and then off to show!

Use UP! those left over jelly beans with this simple craft idea.

Up Inspired Preschool Art
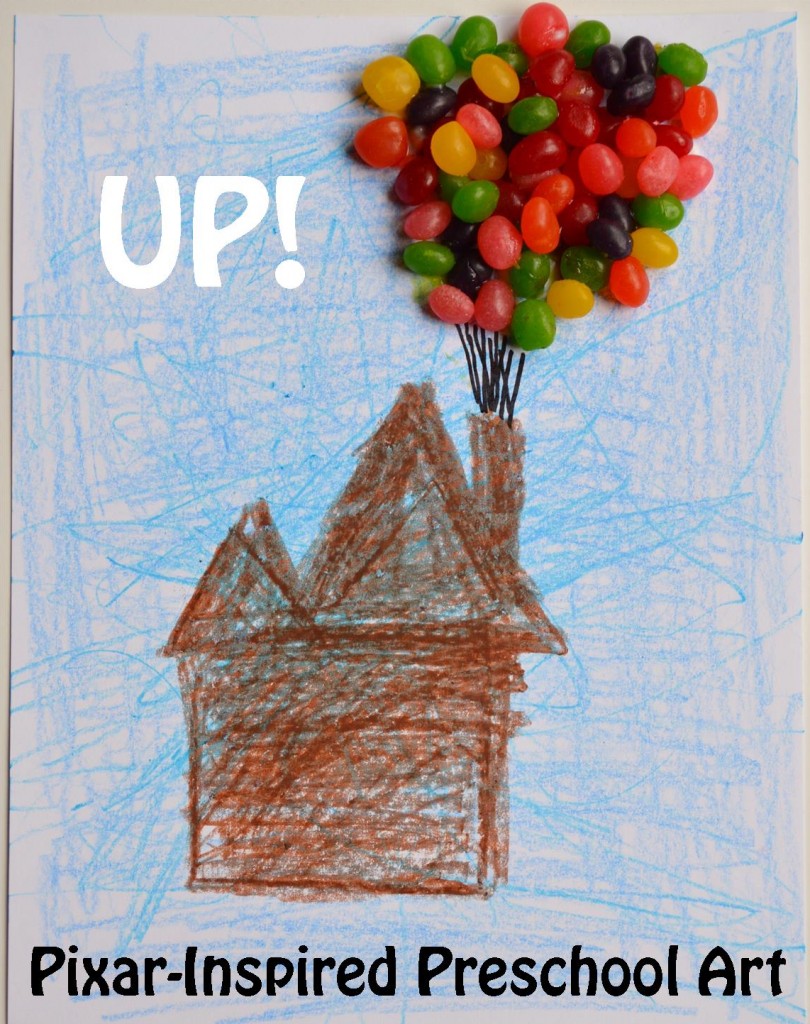
A week and a half after Easter and my family is still consuming candy.

Yesterday was a rainy cold day, so Victoria and I were stuck inside with “the candy”.  Of course I visited the candy shelf in the pantry.  After devouring a few candy Kisses, I decided to stop the cavity-causing madness by choosing to take some of that candy and use it for creating a bit of Disney Pixar-Inspired art.  Looking at our big bag of jelly beans I couldn’t help but think of the beautiful balloons in Disney Pixar’s movie “Up”.  “Up” is a movie that can be seen on The Disney Channel quite often, so it’s one that both of my kids know and enjoy.  When I asked my two and a half-year old daughter, Victoria, if she wanted to work on an “Up” project, she was ready to start that very moment.  The project took us about 15 minutes to complete which included looking for glue, finding the brown and blue crayons and taking a few pictures.  It was the perfect amount of time for Victoria to stay engaged in the task.  It was an added bonus that we had the chance to talk about the different jelly bean colors while she worked on her gluing.  Here’s a brief photo tutorial of our Pixar-Inspired Preschool Art.

Up Project

We started with a heavy weight white piece of card stock.  I wouldn’t recommend using regular copy paper.  It won’t be thick enough to support the glue needed to hold the jelly beans.

Disney's "Up" Jelly Bean Project

Mommy assisted with the outline of the house and helped her fill in some of the coloring.  Otherwise, she could call it her own.  She was so proud giving it to her big brother after school.

"Up" Inspired Preschool Project

We allowed the artwork to dry for three hours before the big unveil.  By that time our tacky glue had dried clear and the jelly beans were secured.

Upon seeing Victoria’s artwork, big brother Gavin announced it was the best artwork she had ever done.  Victoria had a huge smile.  And I smiled when he asked, “Can I eat the jelly beans now?” and I responded, “Sorry, they’re glued on.”  Up, up and away go the jelly beans!


Disney Easter Egg Decorating Ideas For Kids: Q-Tip painting and Monster’s U Egg Dying

Easter Eggs 050

Today, many kitchens are filled with families preparing for Easter by dying hard-boiled eggs.

Yesterday, my children and I followed the tradition of decorating eggs, but this year we decorated eggs two different ways, of course both showcasing our #DisneySide. For our usual way of decorating eggs, I purchased a packaged dying & decorating kit to use at Grandma’s house for some hard-boiled egg fun.  I purchased this Monsters University Easter Egg Dye Kit at Target for $3 US.

Easter Eggs 018Gavin’s favorite part of the kit was the little blue hard hat that he used for his Mike egg.  I’m thrilled to report that he made this adorable egg for his Mommy!

Easter Eggs 043As with previous years, the kids and I had a blast dying eggs with Grandma.  It’s a shame that despite all the hard work that went into decorating the eggs, they will be gone in a few short days.  So this year I scheduled an additional egg decorating activity for the kids to make eggs that we will be able to keep for years.  I purchased these craft eggs at our local Michael’s Craft Store.  I laid out some newspaper, wax paper, paint and Q-Tips and let the kids have some fun.  Having small children work with non-breakable eggs really is a great idea.  The eggs fell on the floor a few times and it saved quite a few tears when my son saw that they had survived the multiple falls!

Easter Eggs 003This Q-Tip project is perfect for young children, like my 6-year-old son and 2-year-old daughter.

Here are the reasons that I love to have my children paint with Q-Tips.  First, LESS MESS.  Painting with kids is messy.  Giving a child a tiny little cotton swab to use for painting alleviates the potential mess that could come with having a regular paint brush in the set of destructive little hands.

Easter Eggs 008Second, painting with Q-Tips allows for QUICK CLEAN UP…if there is such a thing with kids.  Once the kids were finished, I simply picked up the Q-Tips and threw them away.  I  enjoyed not having to clean the brushes after the project was over.  Take a glimpse of just some of the Q-Tips that were used in decorating six eggs!

Disney character inspired eggs Q-Tip painting

Have you figured out what characters we’ve modeled our painted eggs after? Victoria worked on a pretty Sophia the First purple egg.  She tried her best to draw the white on her dress, so the other purple dress is my attempt to make a Sophia dress design.  Gavin’s red and black egg is a Mickey Mouse inspired egg.  Any guesses as to whom the silly one in the middle is themed after?

Happy Egg Decorating!

Mickey Mouse Turkey Paper Craft

Turkey Day Art ProjectIt’s Turkey Time!

My son enjoys using my craft punches and my daughter loves going through my ribbon scrap basket.  Last night, I thought we’d put those scraps and craft punches to use by creating this little turkey craft project.  Of course, we had to add a touch of Disney to our turkey!  If you like our Mickey Mouse feathered turkey and would like to make one with your kids too, here’s what you’ll need to make crafting this project super easy.

mickey punchSupplies:

Construction paper, a glue stick, 3/8 ” ribbon cut into 5″ strips, a Mickey Mouse craft punch, an office style single whole punch, a 1″ circle craft punch, a 2 1/2″ circle craft punch, and a 3″ circle craft punch.

Once you’ve gathered all of  your supplies, use your largest two circle craft punches to create the head and body.  Glue them together onto an oversized sheet of white construction paper.   Next, to create the eyes, use the 1″ circle craft punch for each eye and use the office style hole puncher to make the black centers for each eye.

Hannah birthday 075My little helper loved helping me with the ribbon.  Don’t we all love ribbon?

Hannah birthday 082Next you’ll glue your ribbon strips down and start Mickey Mouse craft punching.

Use two upside down Mickeys for Mr. Tom’s feet.  Then move on to adding the “Mickey Mouse feathers” by gluing each one down to the ribbon.

Lastly, add a little triangle-shaped nose to the middle of your turkey’s face and your done!    Once complete, allow the glue to dry.  If you’d like to use this as a dining mat for Thanksgiving, your local copy store can laminate it for you.  Remember, since this is a multiple layer paper project, use the heavier weighted plastic finish.  It may cost a touch more, but in the end your place mat will last longer.

I hope everyone is enjoying this season of Thanks.  Have you completed any Disney Thanksgiving day projects?  Please share them on my Facebook page.  I’m positive everyone will enjoy them!