Category: Free Printables

Mickey Mouse Inspired New Year’s Eve Party Banner

2014
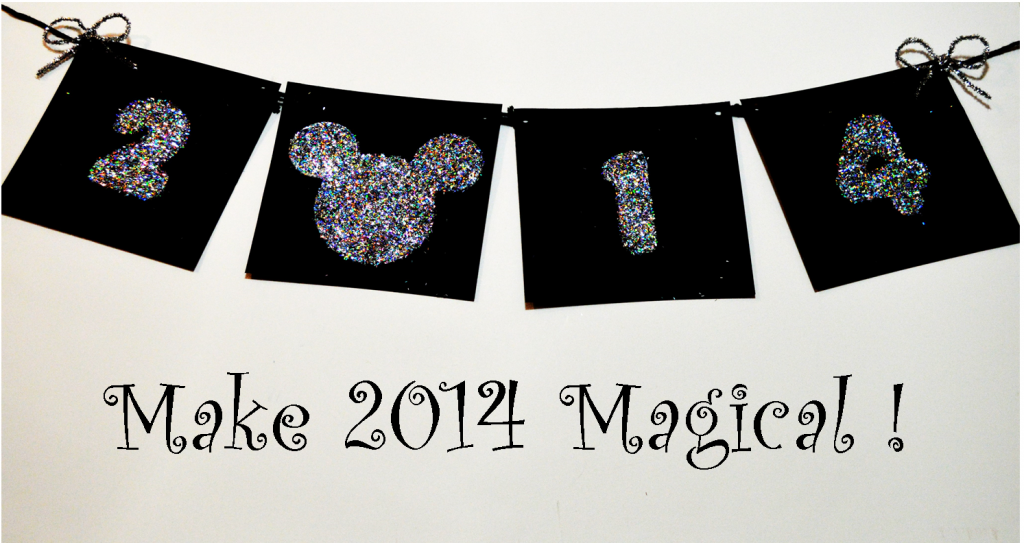
Happy New Year!  Let’s Make 2014 Magical!

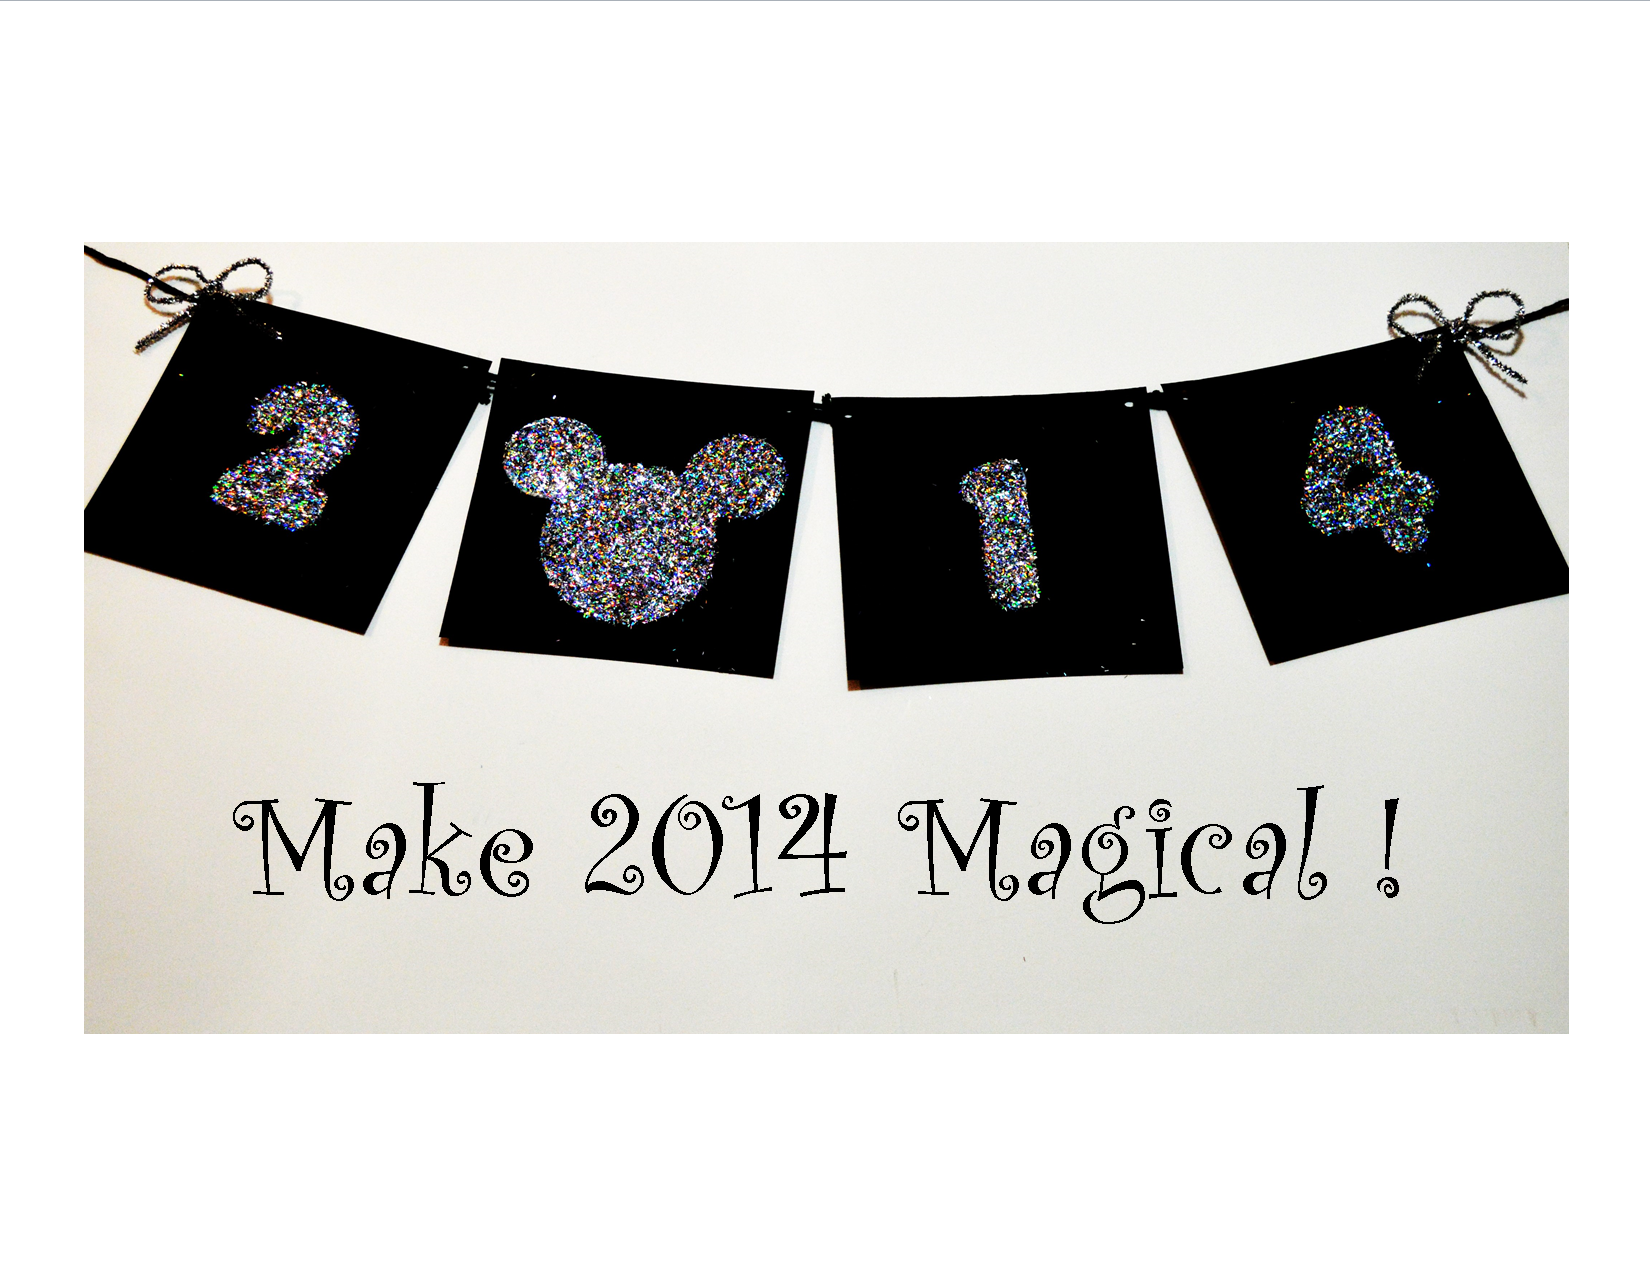
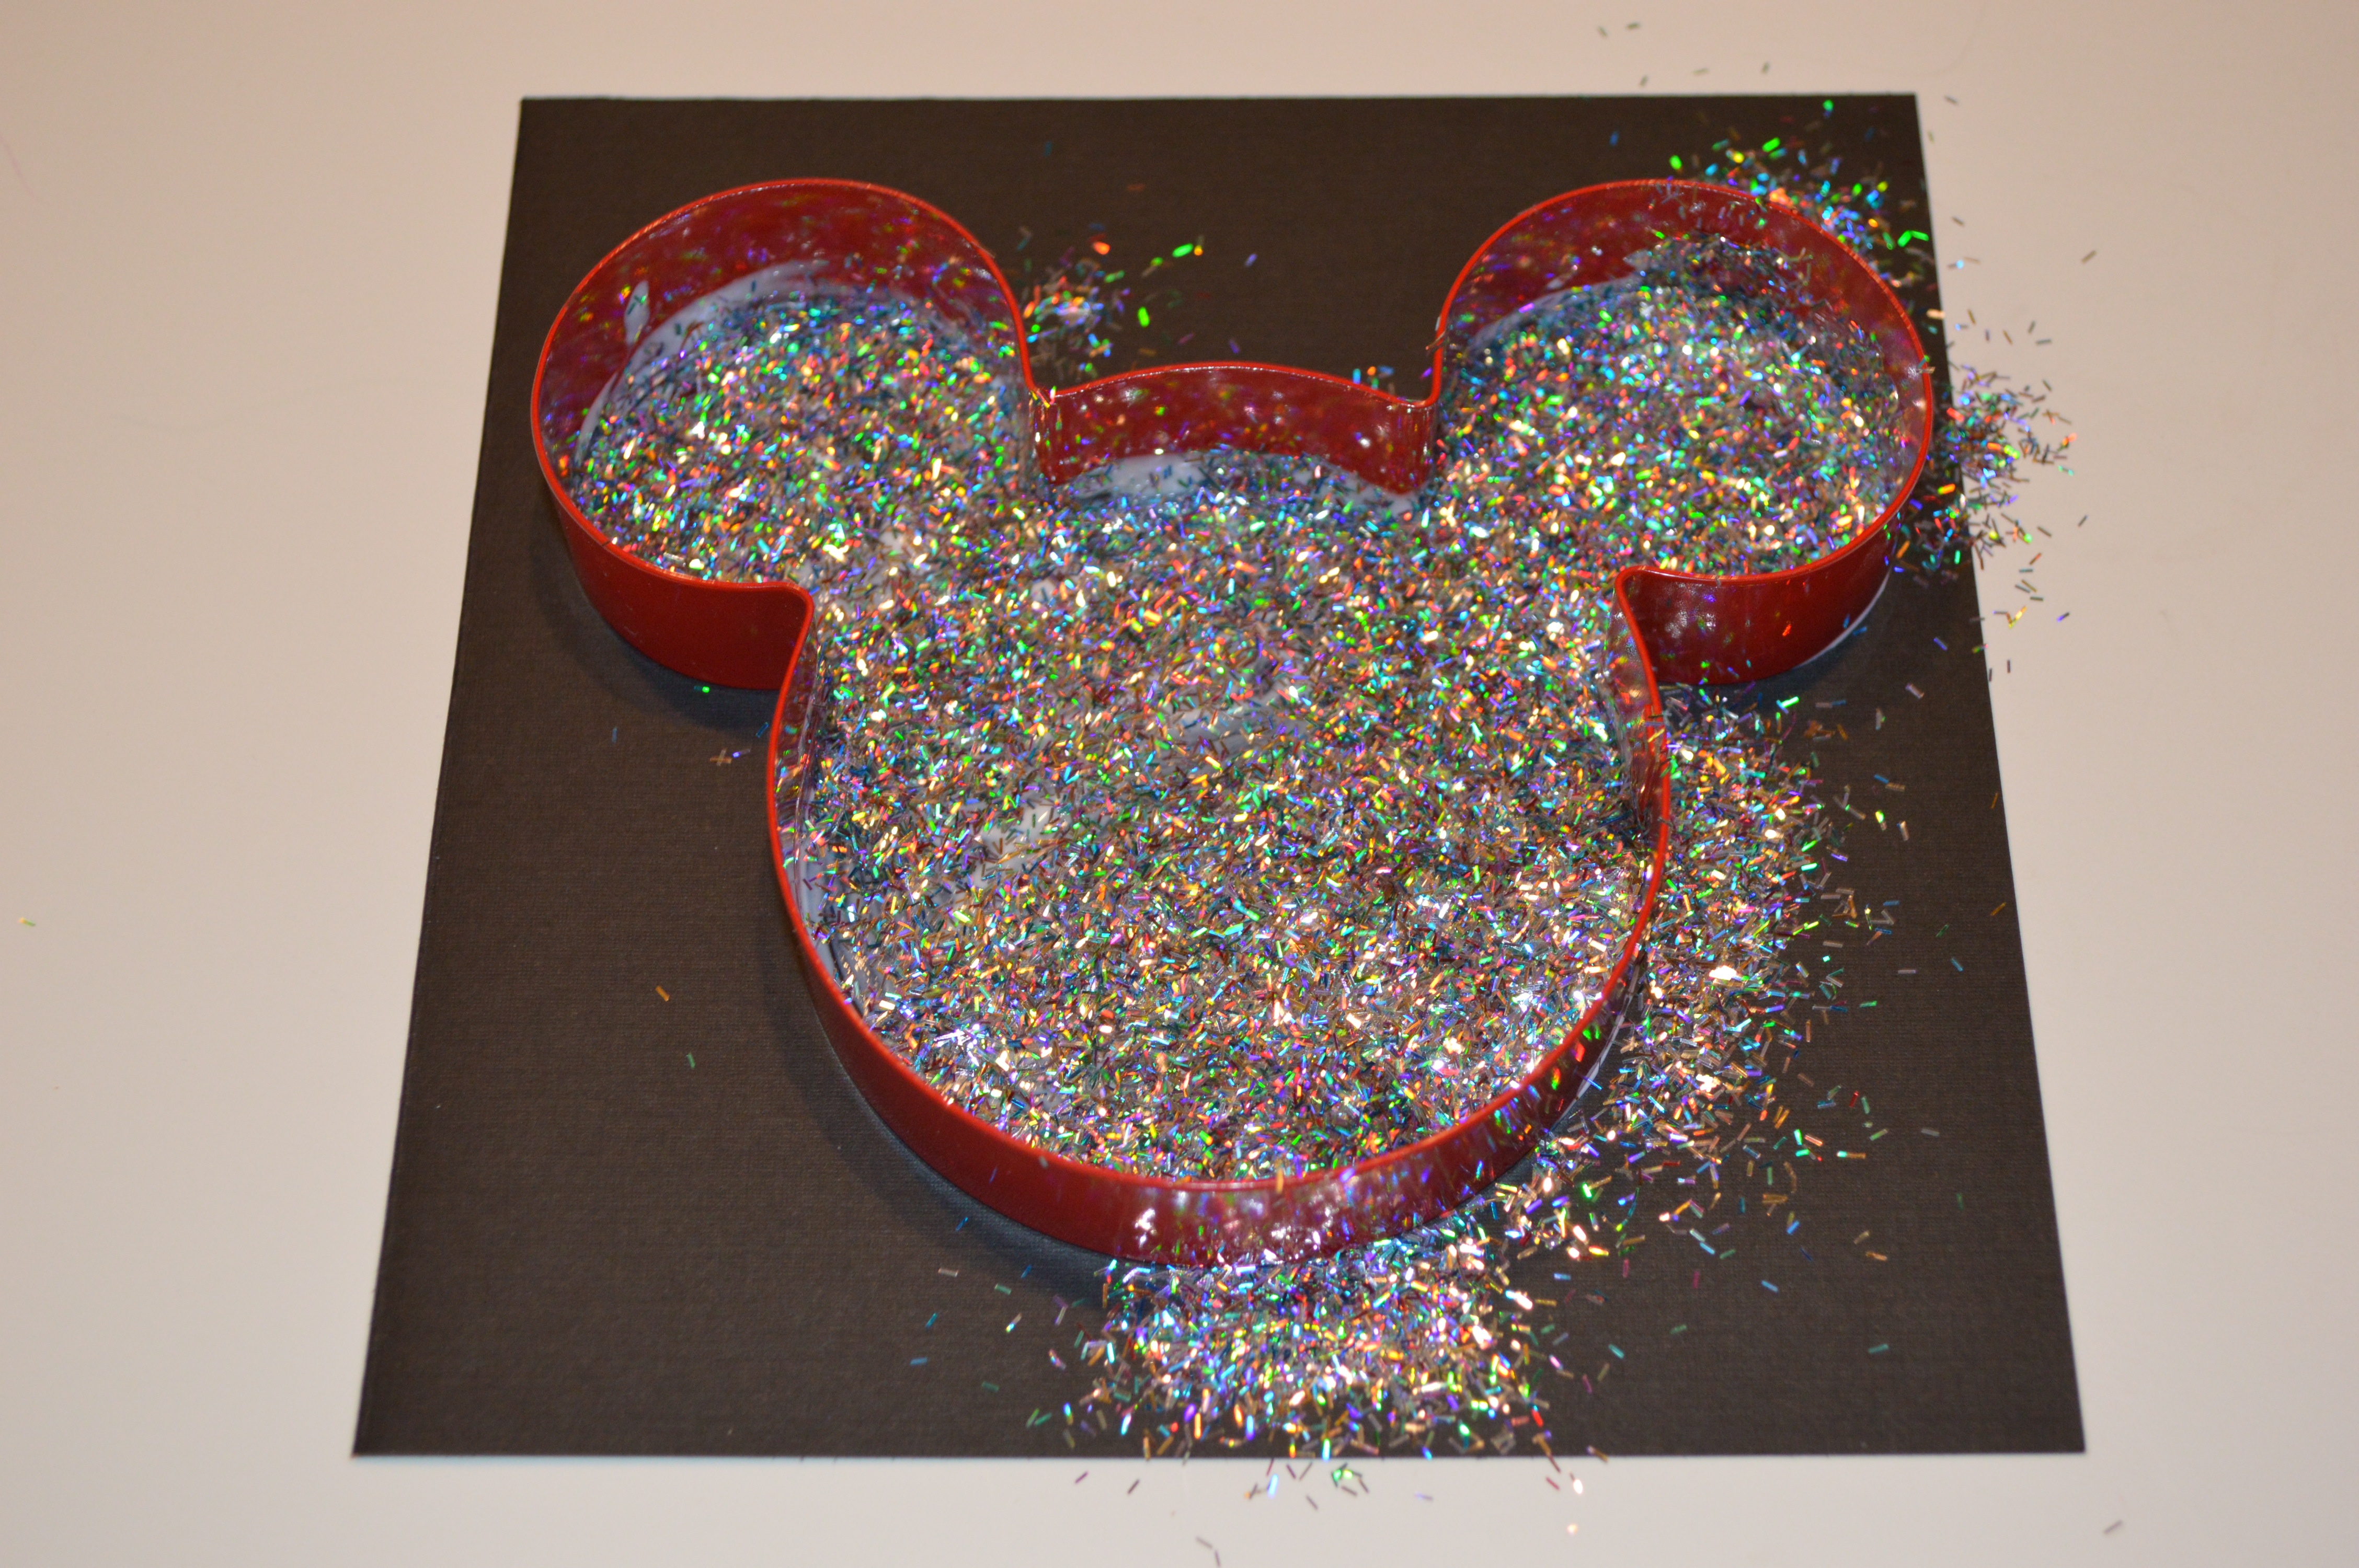
Are you planning to visit Mickey in 2014?  If your family is anything like mine, you’re already counting down the days!  Ring in the New Year and remind yourself that there’s a “magical” adventure awaiting your family in 2014, by creating this simple Mickey Mouse Inspired banner.  With the use of cookie cutters, card stock, glue, and glitter, I made it in about 15 minutes.

Christmas 2013 120

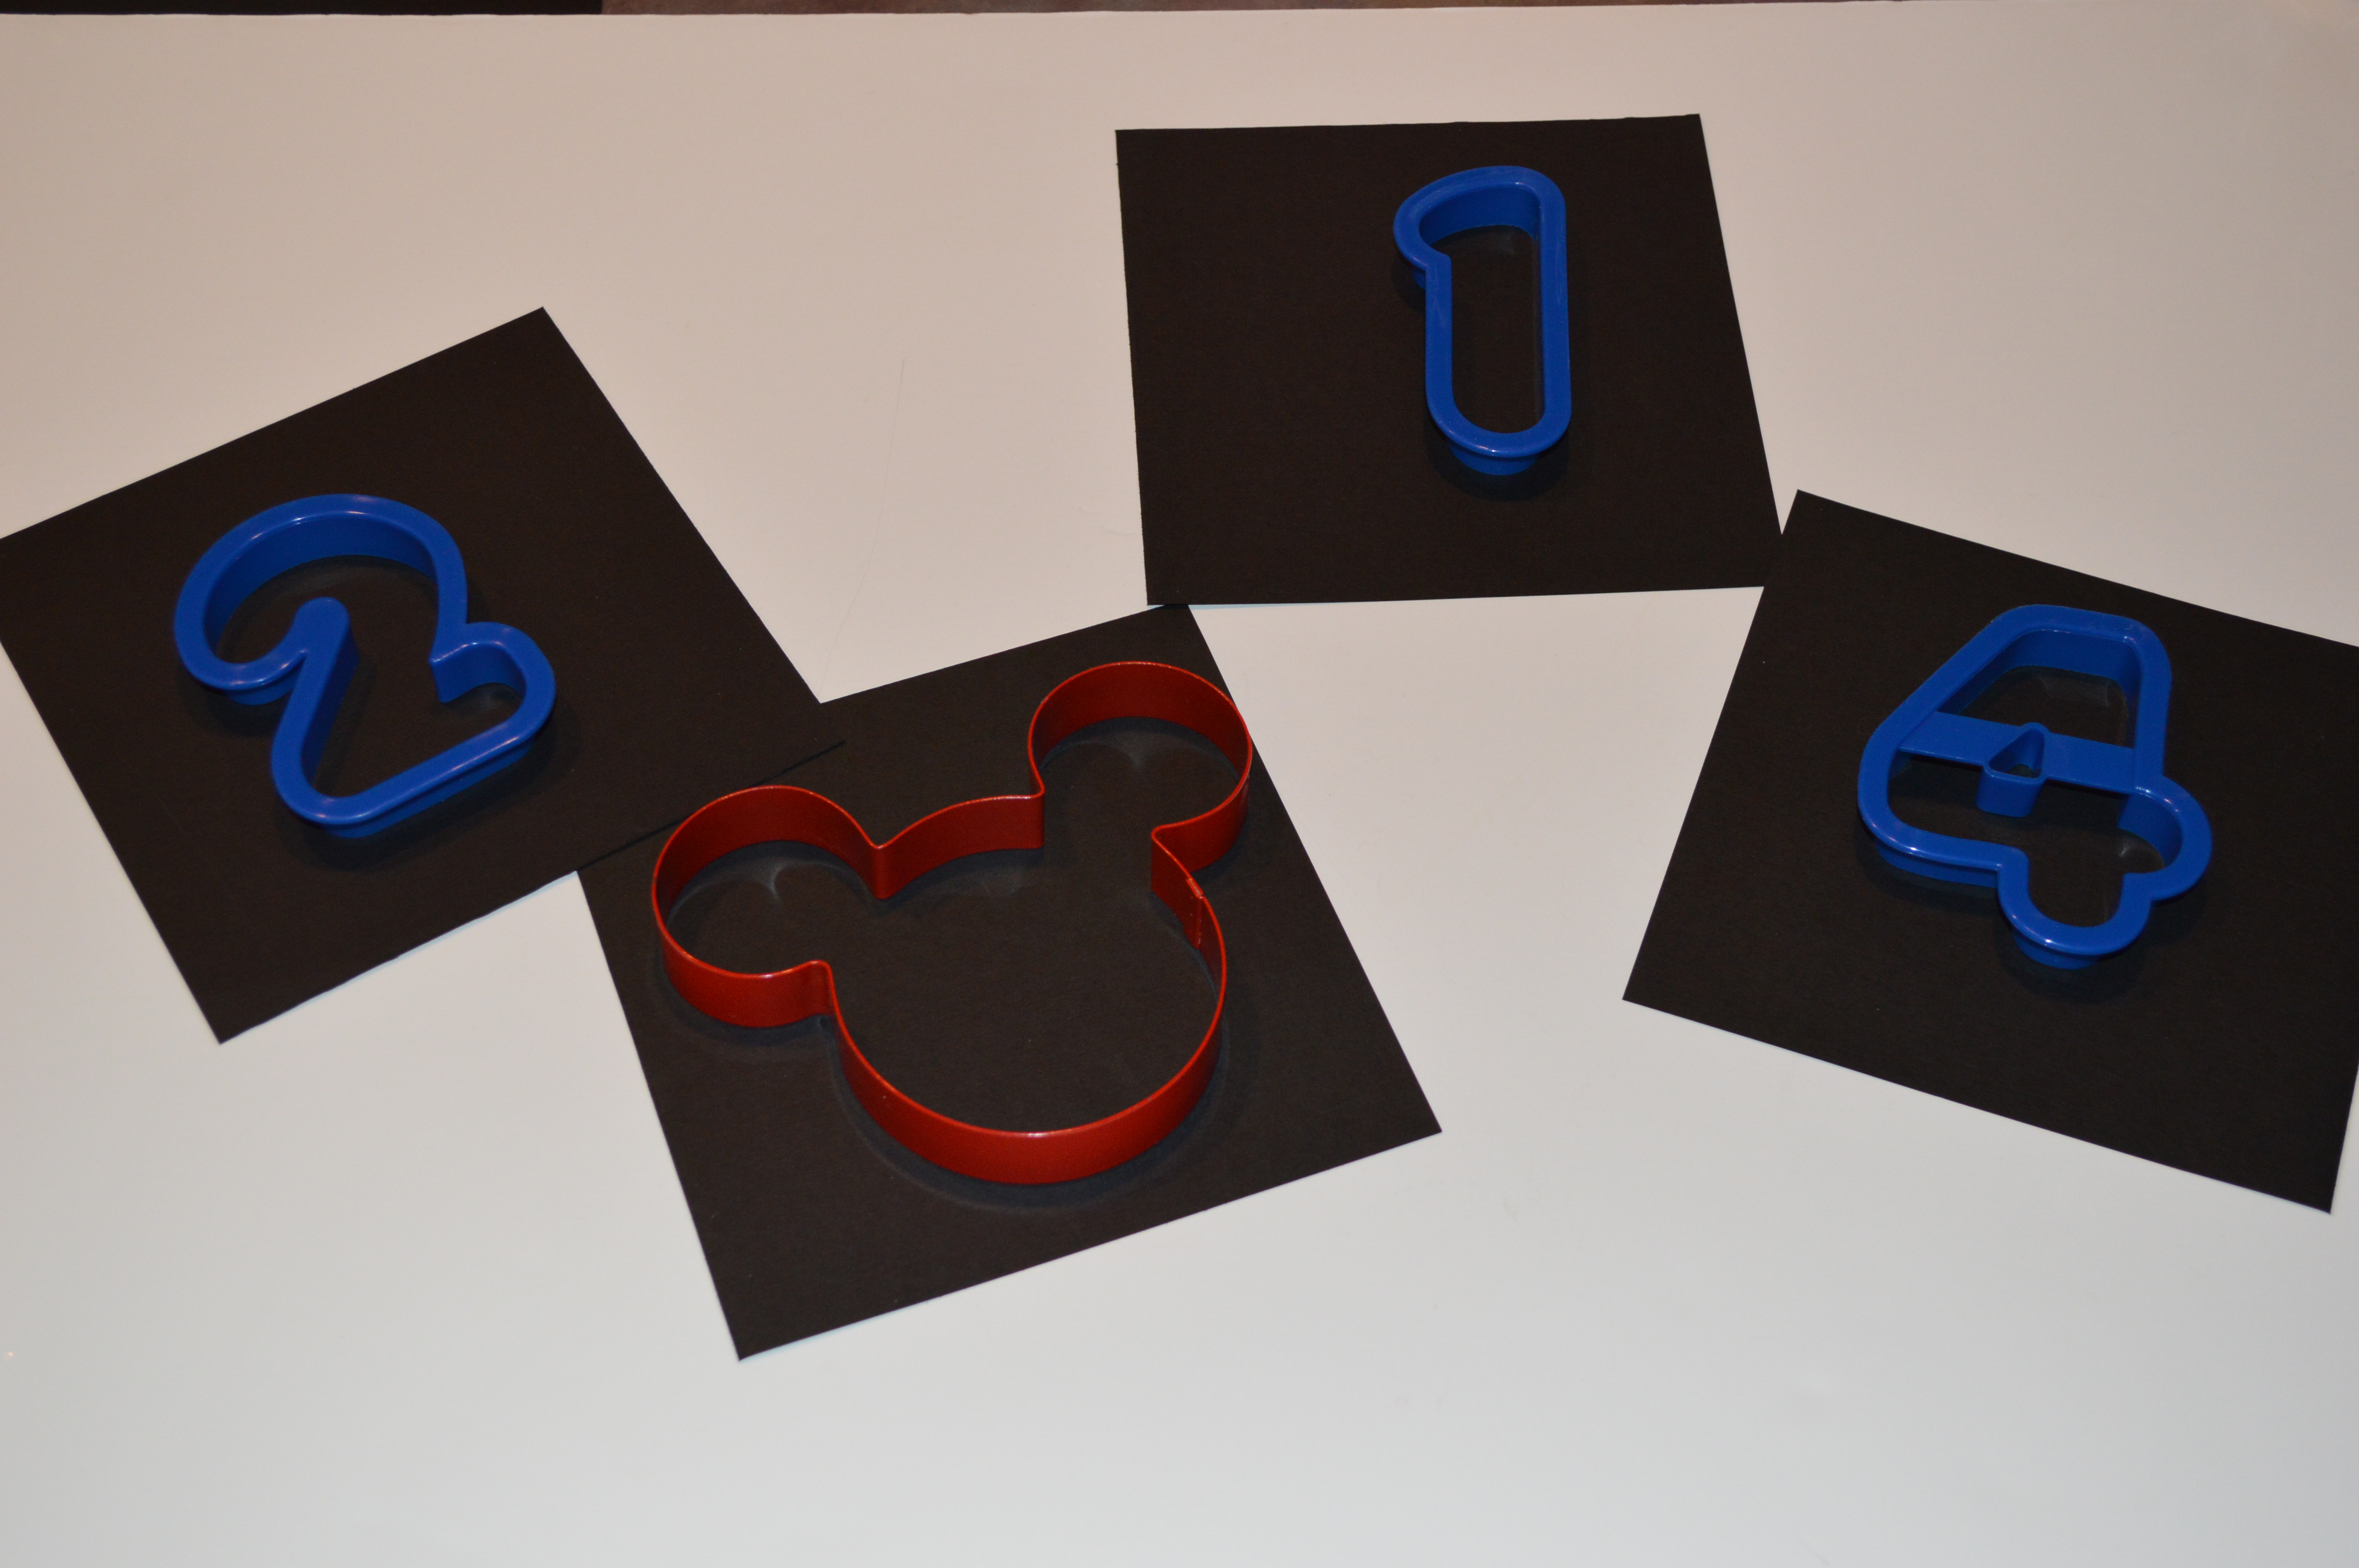
I used Wilton’s large number cookie cutters and an oversized Mickey Mouse cookie cutter that I purchased at Walt Disney World. If you don’t have a Mickey cookie cutter, I scanned it so you can use it for a template.  Click here to print it out the template:  Mickey Mouse template

  • Using black card stock, cut it down into four 6″ x 6″ squares.
  • As pictured above each “number” will get a square.
  • Brush glue on the inside of each of the cookie cutter numbers.
  • Sprinkle with glitter.
  • After a minute remove the cookie cutters, wash them and set aside to dry.
  •  Once the glue has dried, shake off the excess glitter.
  • Hole punch the corners of the squares.
  •  Using ribbon or yarn, tie each square together and you’re done!

Christmas 2013 123

Be safe and enjoy this New Year’s Eve!

I wish you and your family a Happy, Healthy and Magical 2014!

Walt Disney World Party with Free Printables

Disney PartyDuring this first week of November I give THANKS for being able to share my love of Disney with others.

From the age of six I fell in love with The Walt Disney Company.  Everything the company stands for whispers, “Dream.  Create.  Explore”.  Being a dreamer, I made it my goal in first grade to one day “live” at Disney.  Thirty years later, I’m so incredibly thankful for my time that I worked in Disney’s parks and stores. I’m thankful for the time that I was allowed to live out my dream and for the time I was able to create magical memories for others.  I’m thankful for my little Disney-Inspired blog and for meeting others as passionate about Disney as my family and I.  Most importantly, I’m thankful that I am able to share my passion with those that matter most, my family.

About three years ago I applied to be a member of The Disney Moms Panel.  Unfortunately I wasn’t selected, but was sent an awesome Walt Disney World party packet in the mail.  Excited to share all my new goodies, I threw an impromptu WDW party.  I invited my cousins and their young children, in addition to my best friend with her two little Mouseketeers.  What fun we had!  The kids played Walt Disney World Bingo, had a Mickey Vinylmation coloring contest, made a Disney wish maker and played Disney trivia.  If you LOVE Walt Disney World or are planning a soon to be vacation to the Mouse’s house, check out this site.  You can print out the same Disney trivia questions, Disney wish makers, and Walt Disney World Bingo that I used in my party and throw an impromptu party yourself!

Click on the link below to find the “Everyday Celebration” printable items:

  http://www.momselect.com/mickeymomsclub/

Here are some photos from the party.  They were taken with my old camera, so I apologize for the poor quality.Disney Easter Disney Birthday 267Wish Makers- talk about bringing me back to my childhood!

Disney Easter Disney Birthday 263Everyone wore a set of Mouse Ears, even our littlest Mouseketeer!

Disney Easter Disney Birthday 277The Mickey Mouse Vinylmation coloring sheet was given to my son at Downtown Disney’s West Side in the store D StreetWe took it home and made a bunch of copies.  Aren’t they such creative little guys?

The kids had a great time.  Walt Disney World Bingo was everyone’s favorite part of the party and surprisingly some kids even watched a Walt Disney World Vacation Planning video!  Can you imagine them sitting there with their little Mouse ears on?  It was super cute.

Are you thankful for the way The Walt Disney Company has touched your life?  I’d love to hear about it!


Happy HallowSCREAM Favor Tag {Free Printable}

 Happy Halloween favor tag

Happy Halloween Everyone!

Today is a short post that may come in handy this week.   After my little “monsters” and I finished putting together Gavin’s classmates’ Monsters University-Inspired goody bags, I thought I’d create a simple tag for the back side of the bag. If you’re preparing your children’s classmates goody bags today, you may be able to use this tag too!   They are a basic white tag with a little eyeball in the center.  The tag simply states, “Happy HallowSCREAM”.   These tags could be used on any trick-or-treat goody bags!  I used Avery brand 2 1/2″ diameter glossy white round labels to print out the tags.  Using a sticker to apply the note was so easy!  If you’d prefer to use white cardstock, punch the tags out using a 2 1/2″ round craft punch and glue it on the back side of the bag, so easy!  Just make sure your little Monster remembers to sign them!

To use these tags, click on the Adobe pdf file below.

Happy Hallowscream printable

If you newly discovered Mouse Ears Mom, you might have missed my post of what’s inside the Mike inspired gift bag and an easy tutorial on how I made them.  Check out the post here:

http://www.mouseearsmom.com/2013/10/15/classmate-halloween-gift-idea/


Have a Monstrous Halloween!

Using the Monorail to Countdown to Your Walt Disney World Vacation {Free Printable}

Countdown to disney on monorailMy little Mousketeers LOVE the Monorail.  As the Magical Express Bus takes us from the airport to our resort, my children yell “Monorail!” as soon as they see one from the window of our bus.  Upon seeing the monorail, our vacation has officially started.  So, this year when planning our trip to Walt Disney World, I created a Countdown to Disney that included the monorail.  My six-year-old and two-year old helped me set it up and let me say, you would have sworn we were setting up the monorail under our Christmas tree.  Both kids were so excited!

If you’d like to do this project with your children, it’s a lot of fun.  I put it all together for you as a Free Printable!  All you’ll need is white cardstock, a pencil to trace, scissor to cut our your monorail beams, a hole puncher, ribbon, Velcro spots, and maybe a few pieces of tape. Also, you need space to hang it!   I think it would be perfect in a child’s room.  Our home is a Cape Cod style so the kids’ rooms have slanted walls. I ended up turning our dining room wall into a monorail station for a month.  Thank goodness I have an understanding husband that puts up with all of my Disney crafting!

To get started, print out the monorail and monorail beam templates.

Click here for the template:  Monorail Countdown

1. Cut out the Monorail beam templates.

2. Alternating track styles, trace and cut out one beam per day of your countdown.  Then number each accordingly.

3. Hole punch the ends of the beams.

4. Connect the beams by stringing ribbon through the hole punches.

5. Cut out the monorail.  I laminated it too, since we would be using it for a month.

6. Adhere Velcro onto the back of the Monorail and onto each of the beams.

7. Print out the castle to place at the end of your track!

Click here for the castle printout: Cinderella castle

I didn’t create the Cinderella Castle artwork and would love to give the artist credit.  However, I found the image listed as free clip art, with no additional information.

If you and your kids love the monorail like we do, then I hope you and your family take a moment to make a Monorail Countdown for your family’s next Walt Disney World Vacation!


Teacher’s Simple Gift Idea {Free Printable}

teachers desk

Walt Disney has said so many outstanding inspirational statements during his amazing life journey.   As a gift for my son’s new teacher I thought I’d share one of those statements of inspiration.  It’s a simple gift and idea, but I believe it speaks volumes about the important role she plays in her students’ lives.

To make this gift, I purchased a 5″ x 7″ treasure box frame.  Cut a piece of red scrapbook paper down to 5″ x 7″ and printed out the quote on a standard size piece of white card stock.  I formatted the quote to be 4″ x 6″.  I finished the piece by using my Mickey Mouse craft punch for the two Mickey icons.  With the use of a simple glue stick, I was done!

If you’d like to give your child’s teacher a bit of Walt’s Wisdom, click on the link below to print out his quote.  The page size is standard 8.5″ x 11″.  The quote is outlined to fit a 5″ x 7″ frame or by cutting the inside line it will fit in a 4″ x 6″ frame.  Enjoy!

Walt Disney Quote

Do you have a favorite Walt Disney Quote that you think would be perfect for a teacher?  Please share!